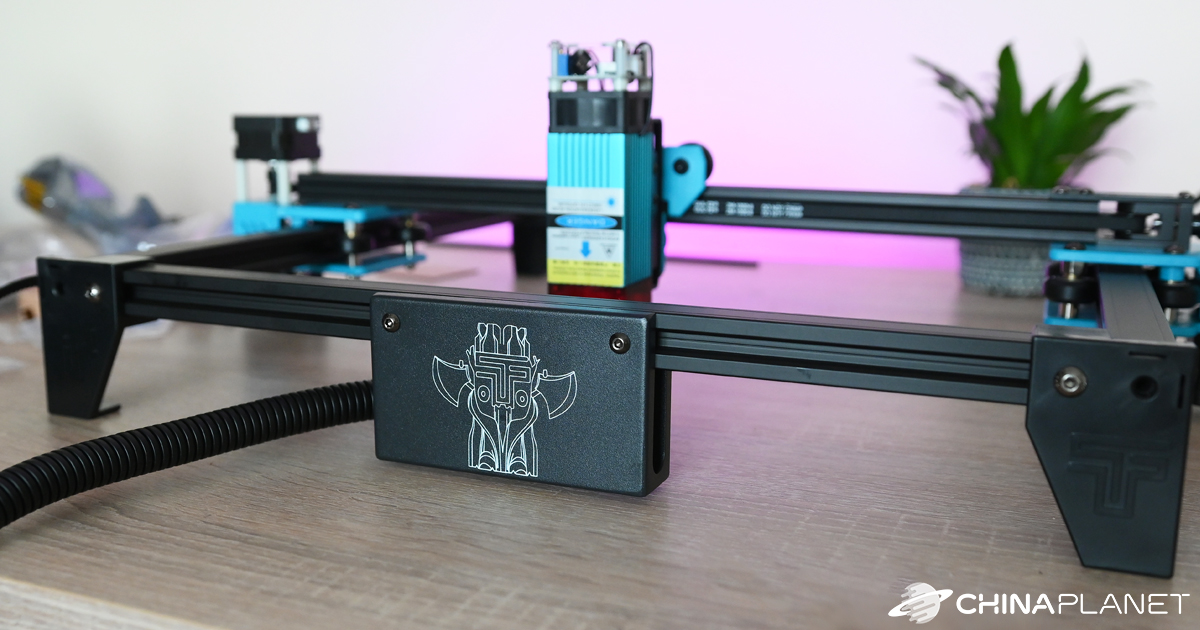
If you are a master and you like to create from wood or other materials, this review will definitely interest you. We tried a new laser engraving machine TwoTrees Totem Swhich is suitable for home hobby engraving, whether in wood, plastic, leather or other materials.
Since we have no experience with engraving, take this review as an introduction to the device, where we will show the assembly, connection, test engraving in various materials and test the possibilities it offers. However, we are not experts in engraving, so let's look at it from an amateur's point of view.
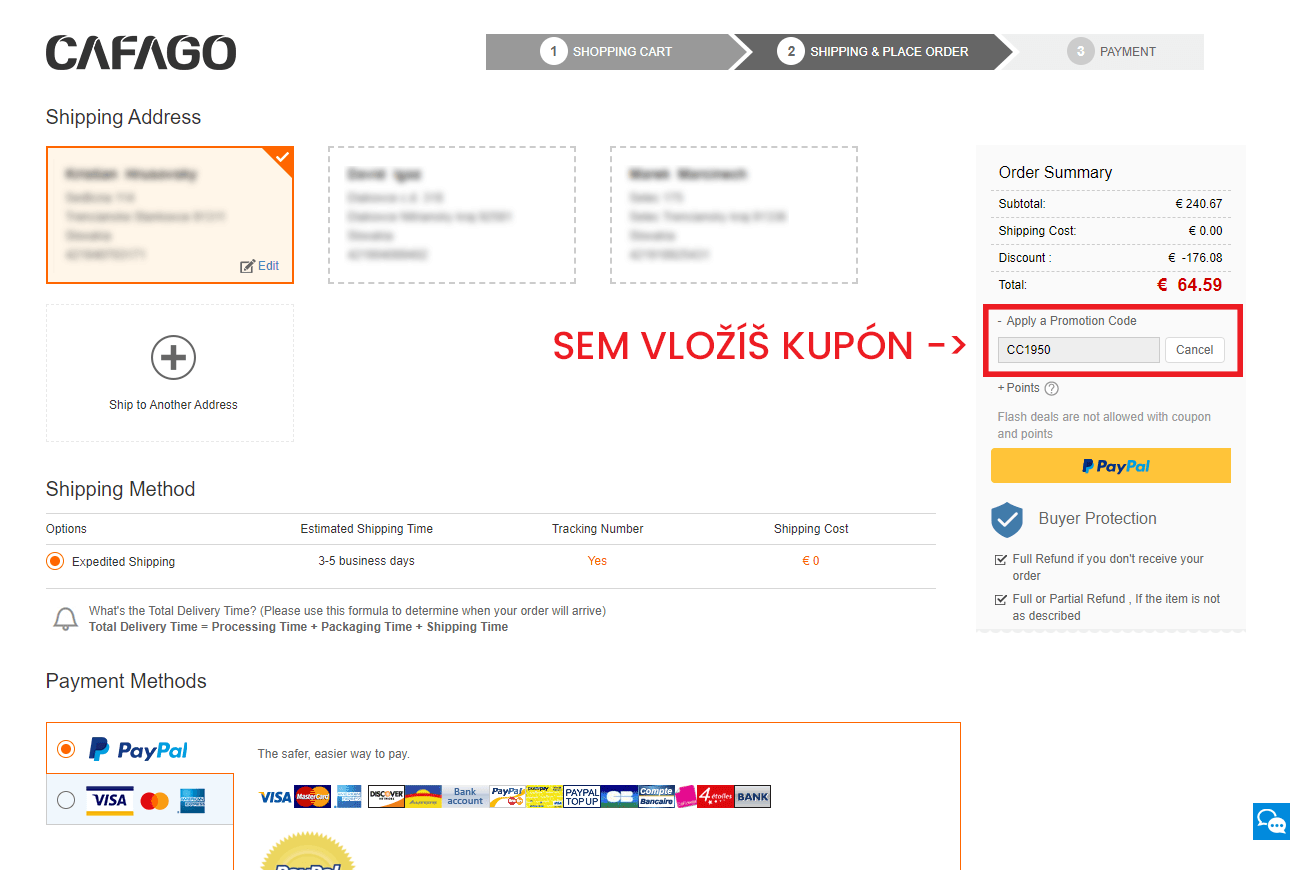
Where to buy TwoTrees Totem S?
We have the TwoTrees Totem S laser engraver from our partner Geekbuying, where you can also buy it for a good price. Will be happy to deliver from European warehouse, thanks to which the engraving machine will be delivered to you within a few working days by courier.
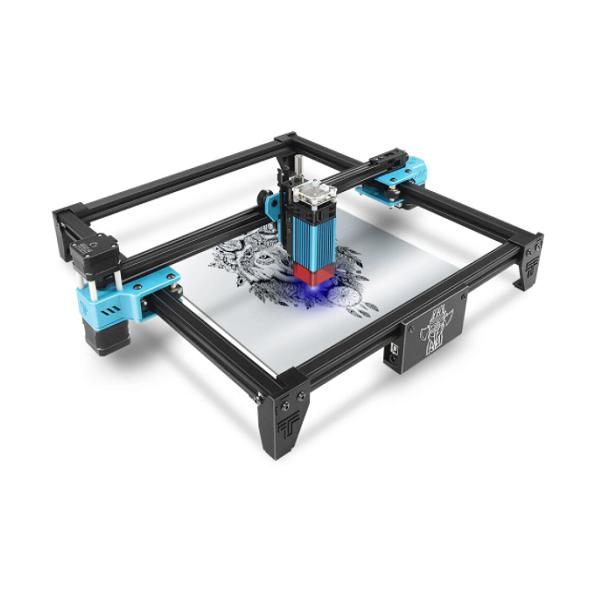
TwoTrees Totem S


Express delivery from a German warehouse free of duty and VAT.
This product will be delivered to you expressly from your local German warehouse. Delivery from Germany usually takes 7-10 days and is delivered by courier. You do not pay any extra fees, no customs duties or VAT on delivery.
Technical specifications
| Model designation | TT-5.5S |
| Motherboarda | LKS |
| Laser power | 5.5 W LD + FAC |
| Laser wavelength | 445 + -5 nm |
| Engraving accuracy | 0.01 mm |
| Fixed focus | Yes |
| Engraving surface | 300 x 300 mm |
| Dimensions of the device | 570 x 485 x 170 mm |
| Engraving modes | image / text / scanning / contour / pixel carving |
| Supported software | Benbox / GrblController / LiteFire / Laser GRBL |
| Supported formats | nc / dxf / bmp / jpg / png |
| Engraving materials | wood / plastic / paper / leather / sponge paper / aluminum / steel |
| Unavailable materials | iron / stone / glass / transparent or reflective material |
Content and quality of packaging
The TwoTrees Totem S laser engraving machine is delivered in a double package, which we always evaluate very positively. This means that the device itself is packed in its product box, which is then placed in another, protective box.
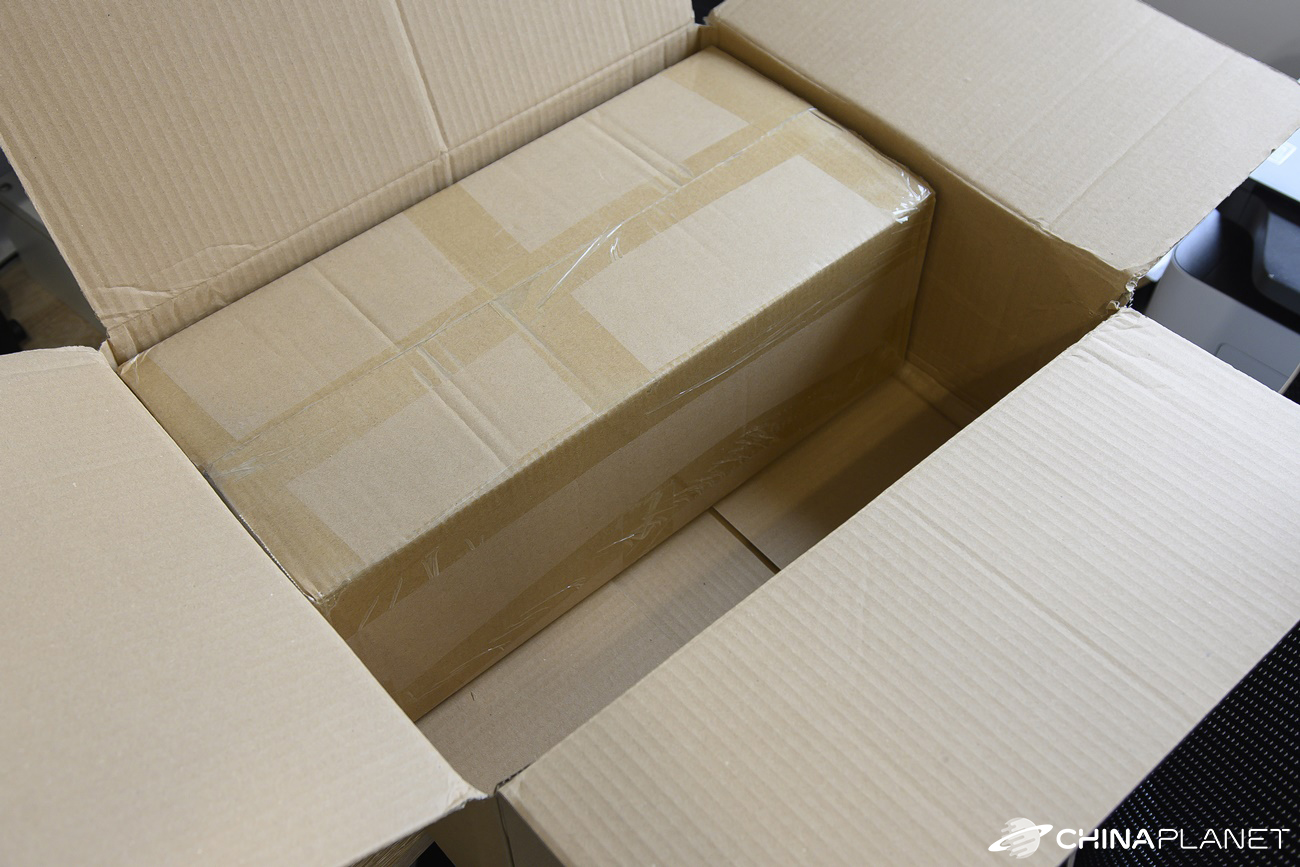
This time, the engraving box has 52 x 24 x 18.5 cm, while the second box is significantly larger and measures up to 53 x 41 x 22 cm. However, there were no reinforcements or air cushions between the individual boxes, which is not usual.

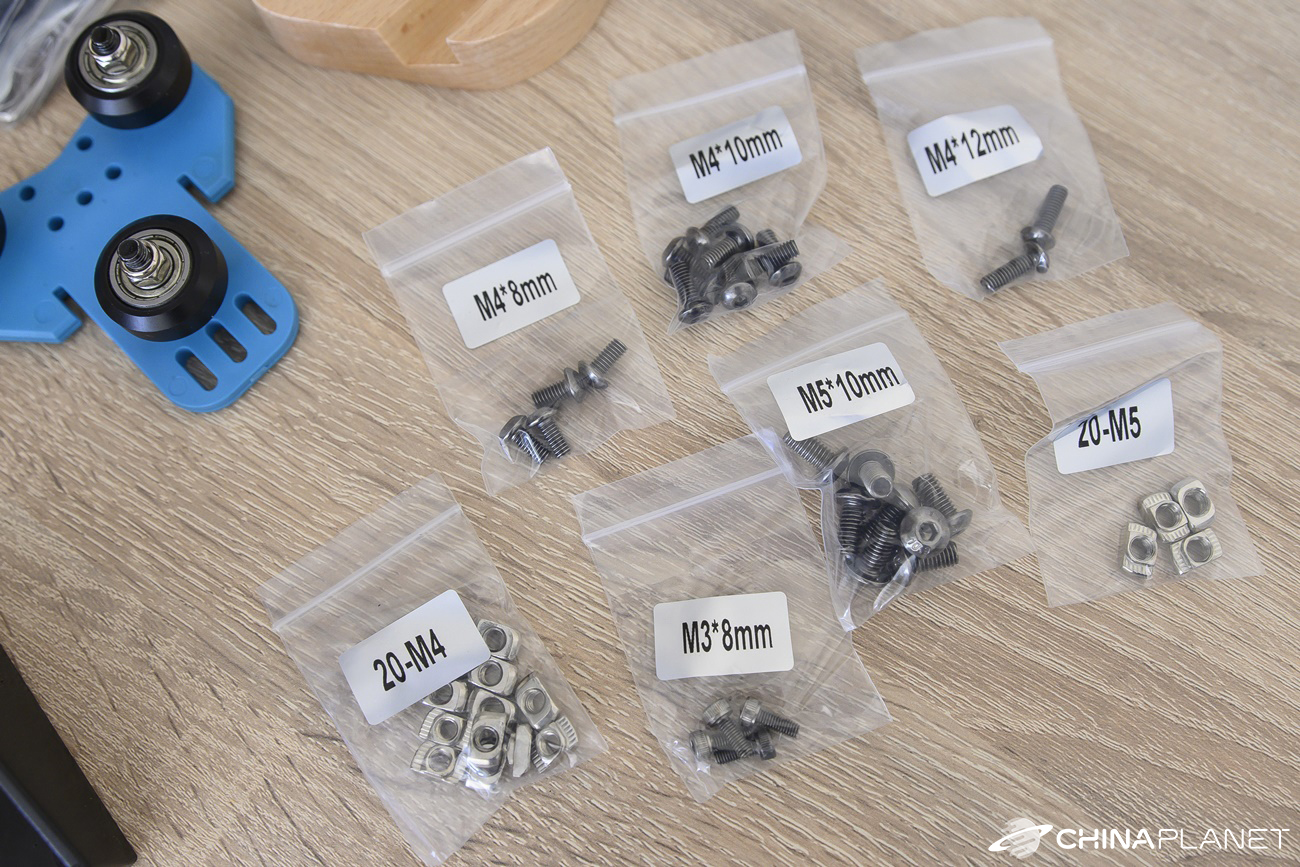
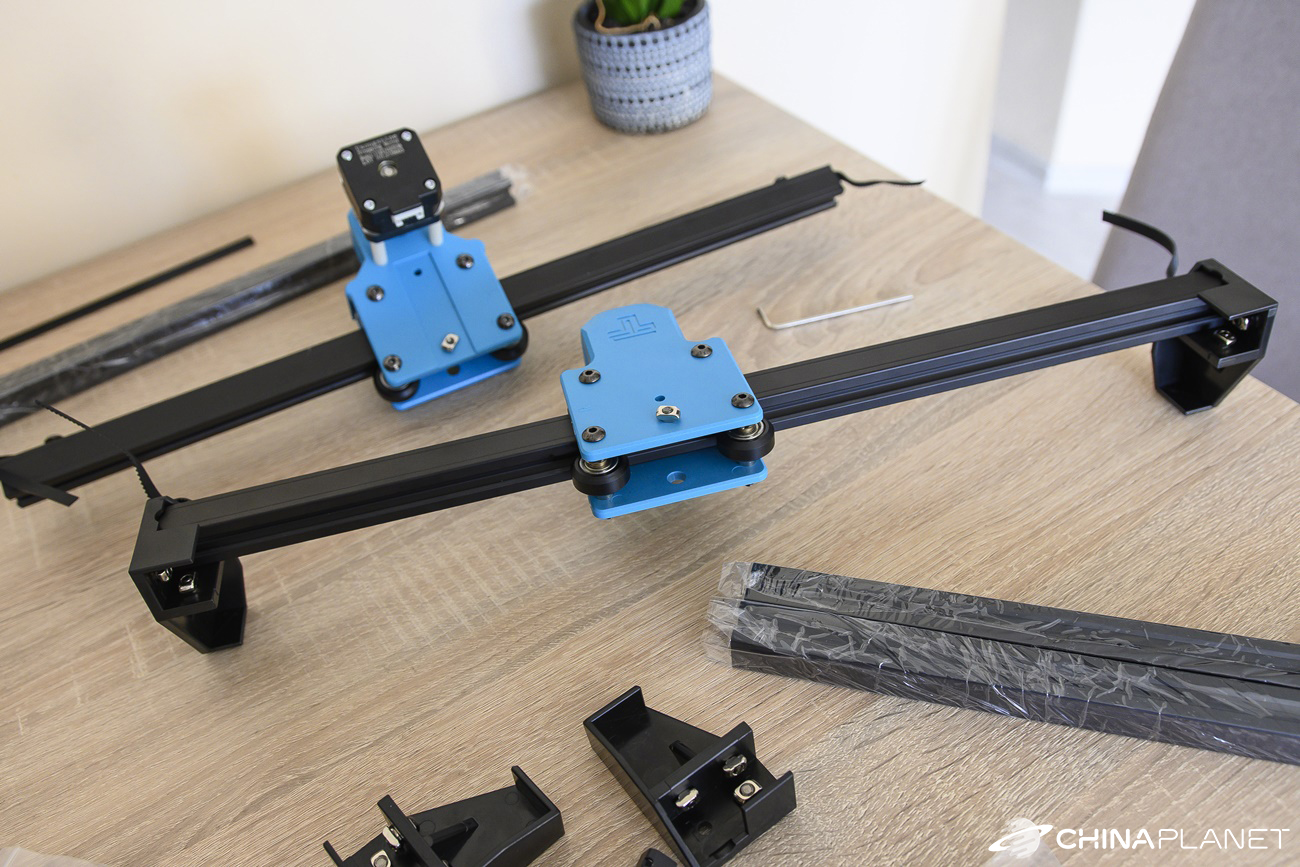
In most reviews, we specifically mention the contents of the package. Here, however, it would be quite complicated and time consuming, as the engraving machine comes in a demo and consists of a number of parts. As you can see in the photo, the package consists of a pair of motors, laser, motherboard, circuit profiles, cables, stands and a number of screws and nuts. There are instructions for use, Allen keys, cable ties or a sample of wood and plastic for engraving testing.
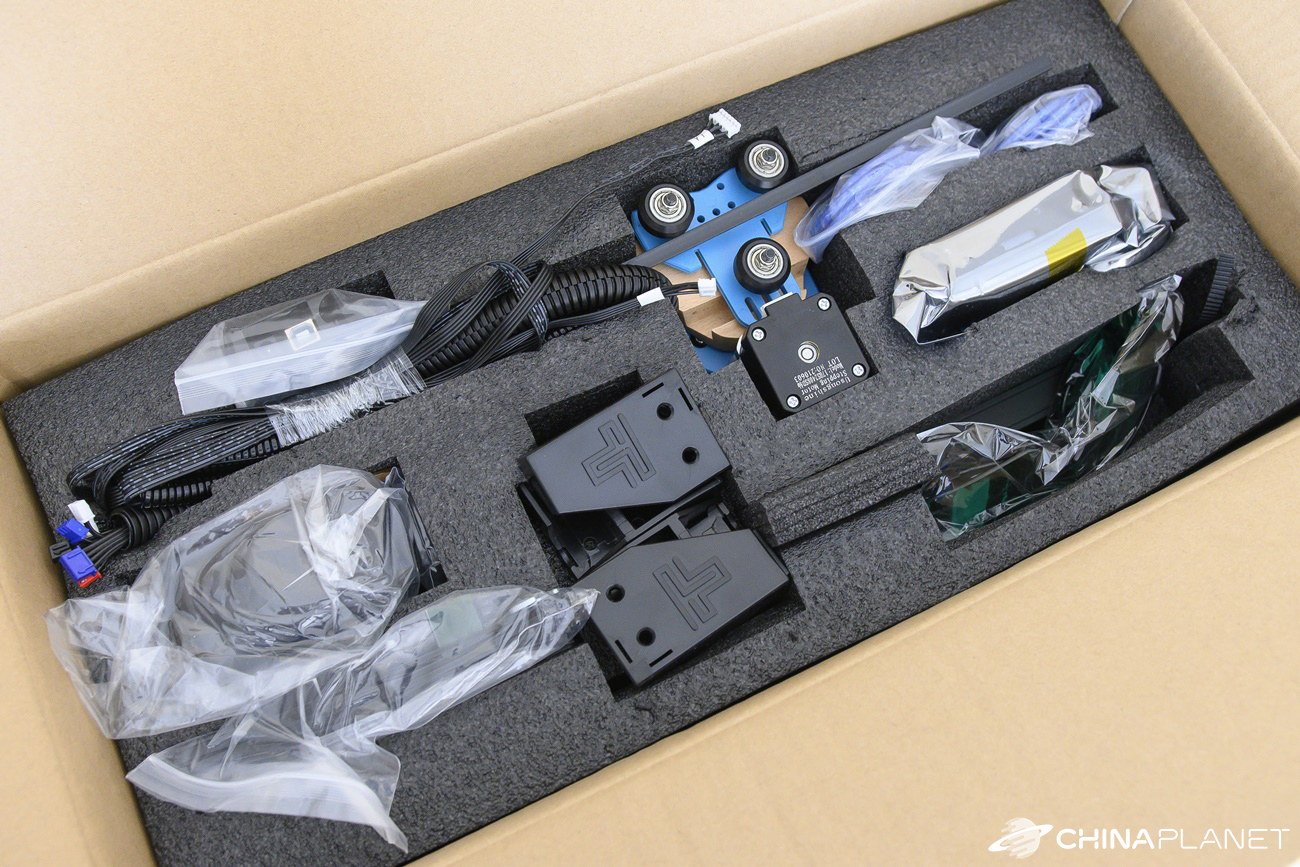
A nice bonus is also the goggles, which fit very well to the face. The manufacturer also comes with a microSD memory card and a USB card reader, where you will find instructions in digital form, the necessary software and several test images.
The parts are stored in a box in a foam reinforcement, where each component has its own folder. The individual parts are thus perfectly protected without the risk of damage. We therefore evaluate the quality of the packaging excellently.
Installation is not easy
Since we already had experience with assembling a 3D printer, we expected it to be very similar and fast with an engraving machine. However, a surprise came after opening the box and we already knew that it would not be that easy.
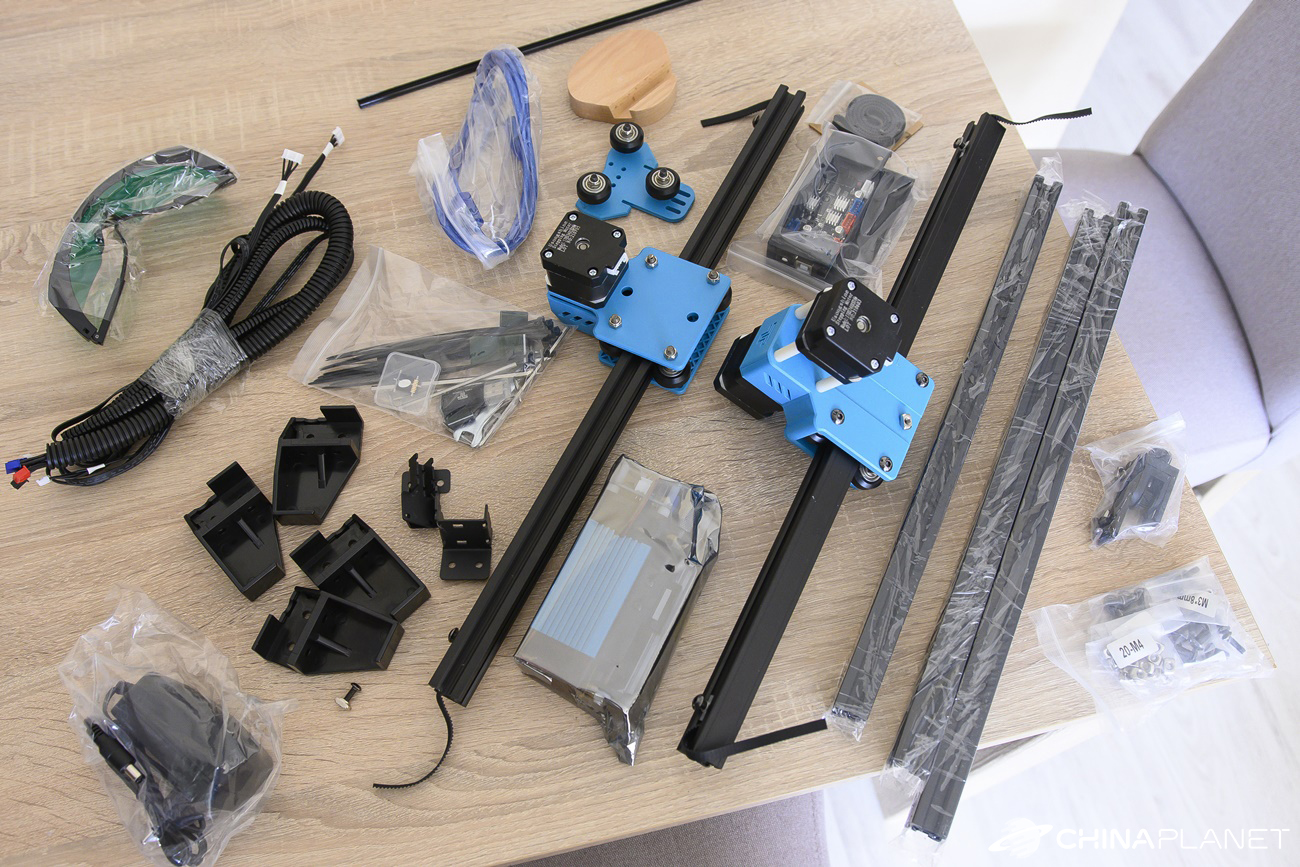
We first removed all the parts from the box to familiarize ourselves with the total contents of the package. We started following the instructions for use, but the steps were not entirely clear to us, so we started looking for a video on YouTube that would help us. After all, it's easier to compose by video. We later found out that the same video we found on YouTube was on the included memory card.
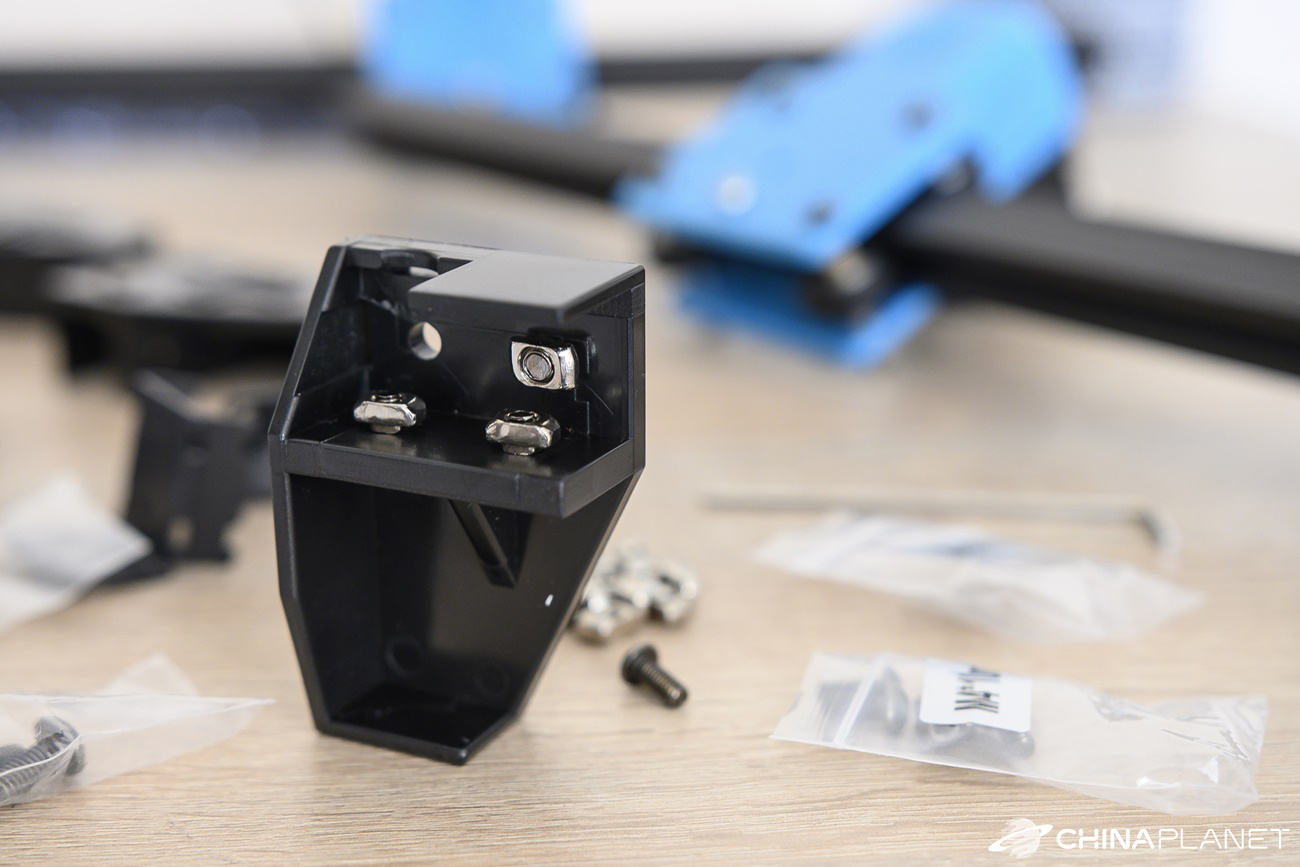
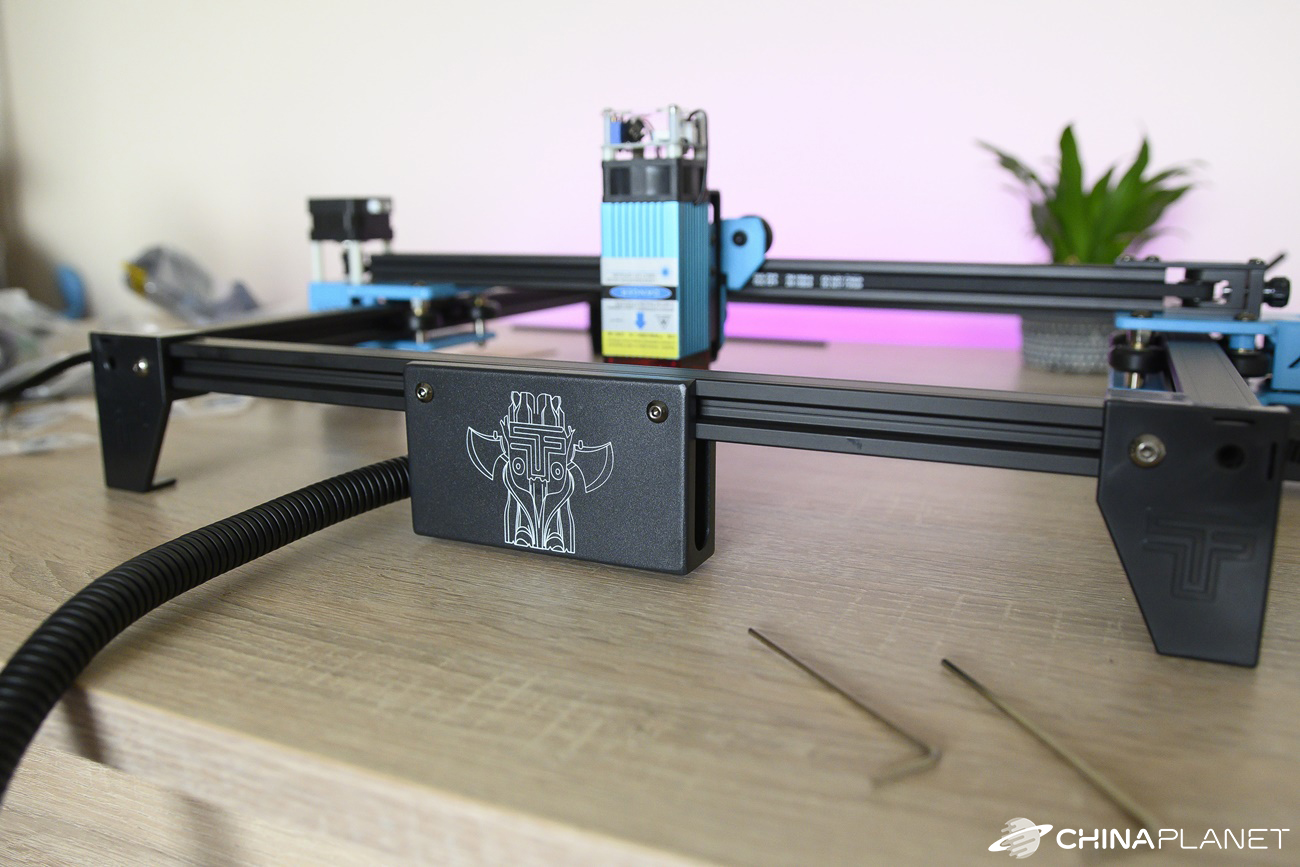
We will not describe the whole process in detail, as it is unnecessary. We will describe only the basic principles. The first step is to assemble the perimeter structure using four metal profiles and plastic stands that serve as raised corner legs.
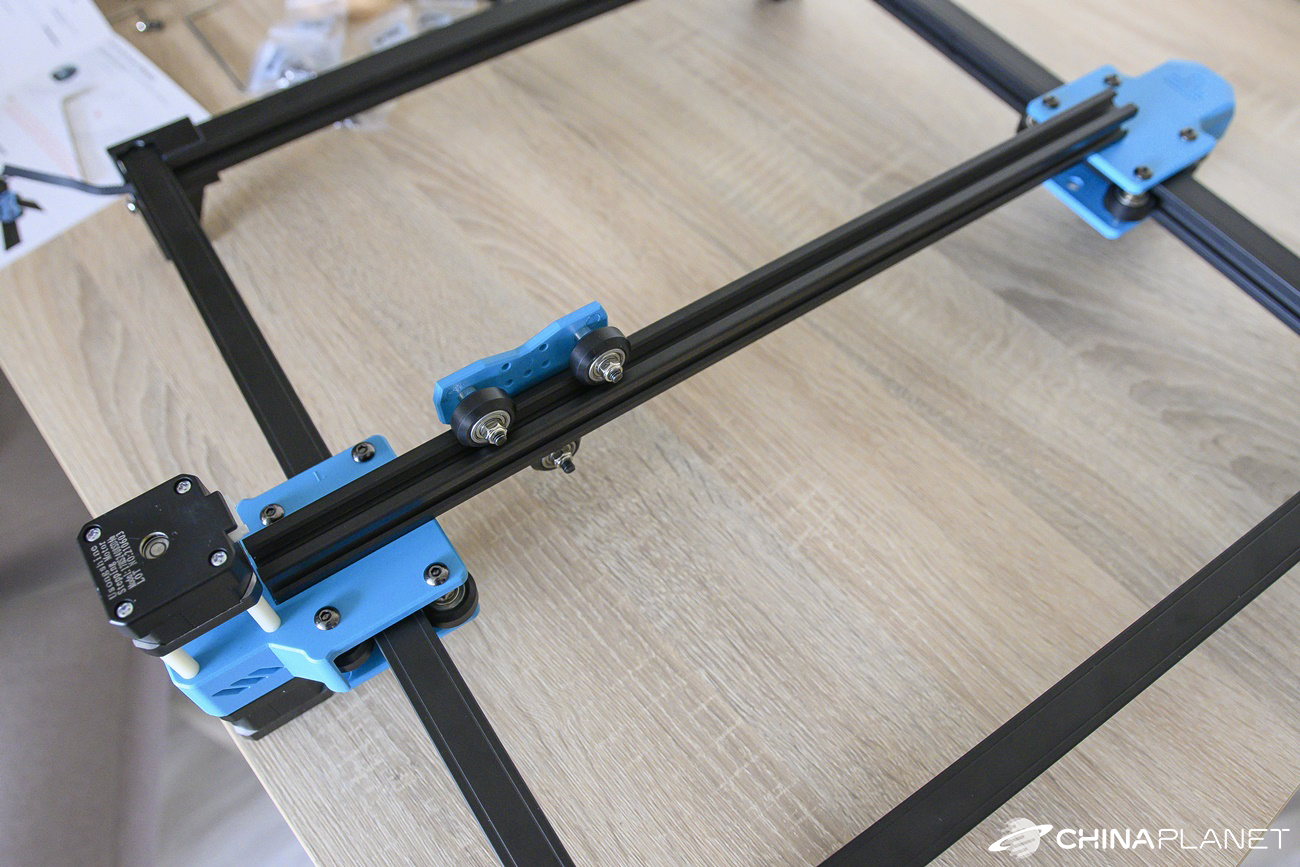
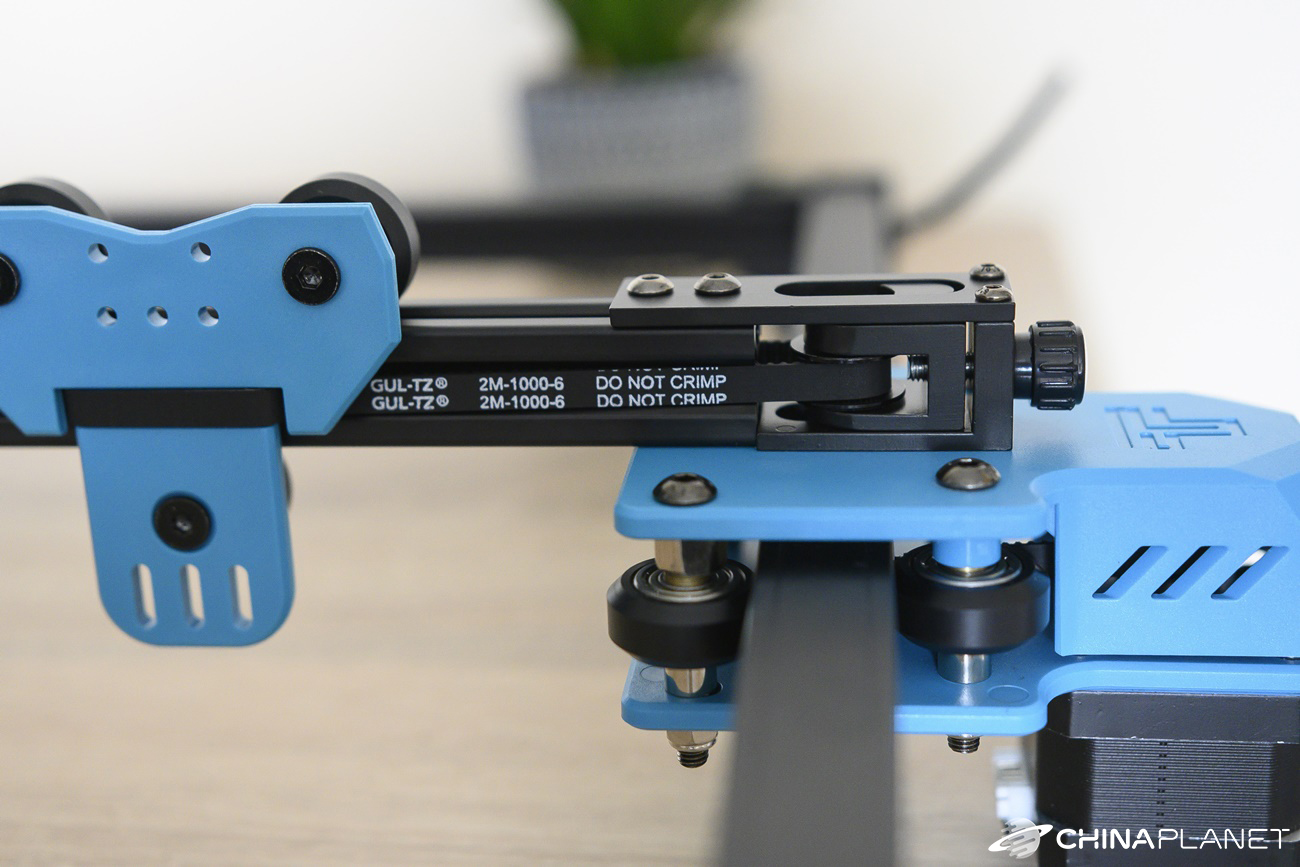
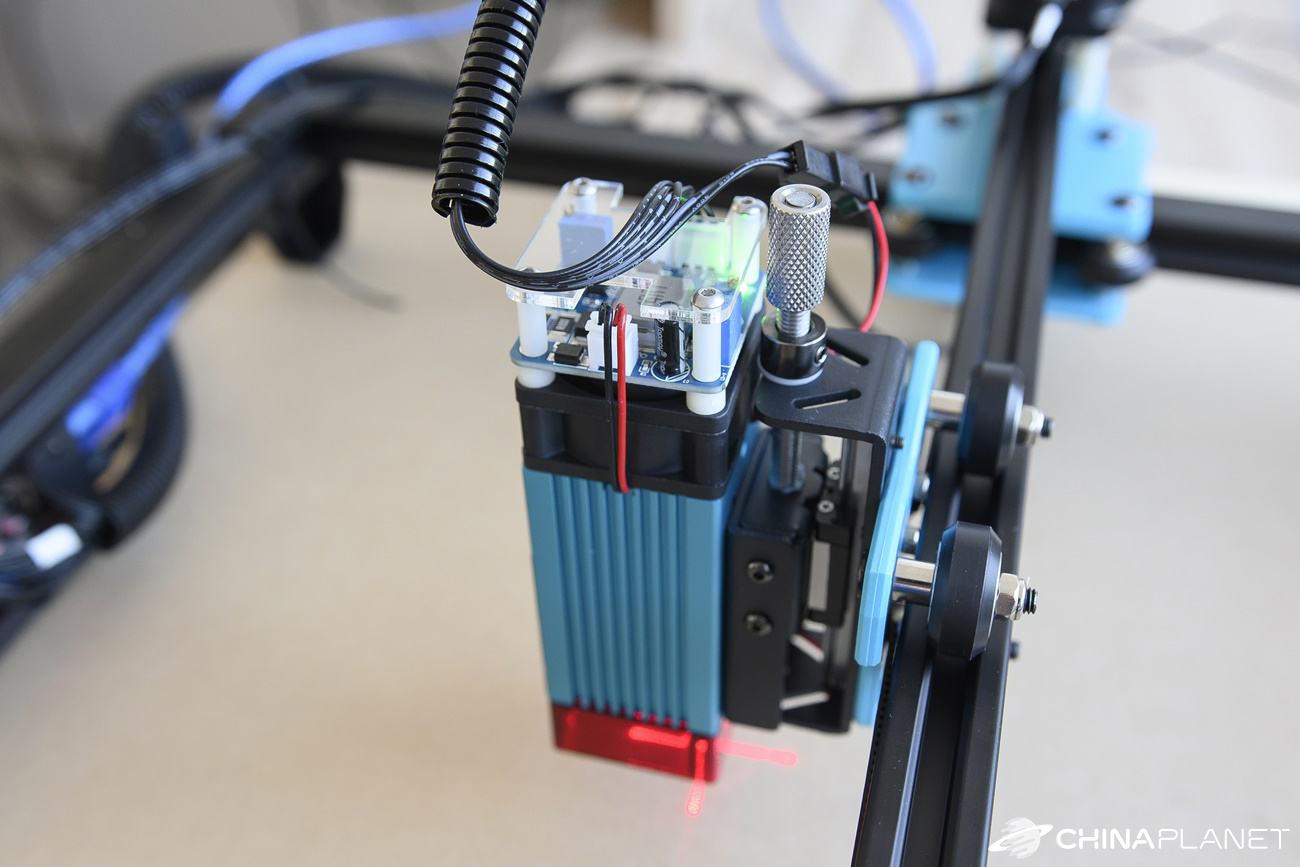
The principle of joining metal profiles consists of preparing screws with special nuts that fit into the groove along the profile. Such joining is mildly laborious and requires a lot of patience. The fifth metal profile serves for the laser guide element and connects transversely to the upper part of the structure. A rubber strip is inserted into this profile, a laser is screwed onto the conductor, and the cables are connected.
Our cables weren't exactly labeled the same as in the video, and they also had different colors, so we paused for a while. We plugged the cable with the red and blue connectors into the red and blue ports on the motherboard. The connection of cables for control of individual axes and laser followed.
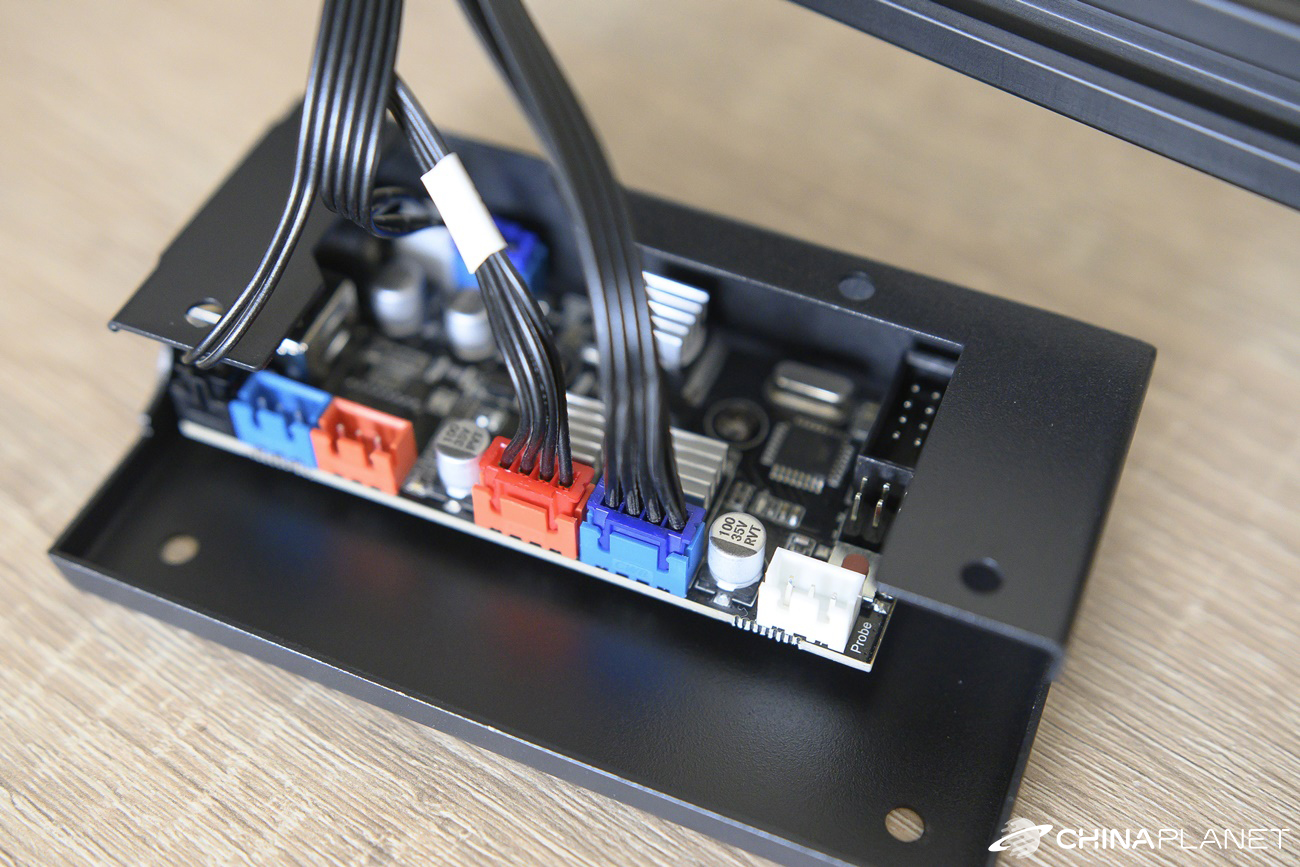
In the video, the cables were labeled X, 1, and 2. In our case, it was X, Y1, and Y2, so in this case, it's better to check the cable connections in the paper manual, where it fits with the real label. In the last step, we just screwed the base plate to one of the metal profiles and fastened the cables to the perimeter structure so that they did not interfere.
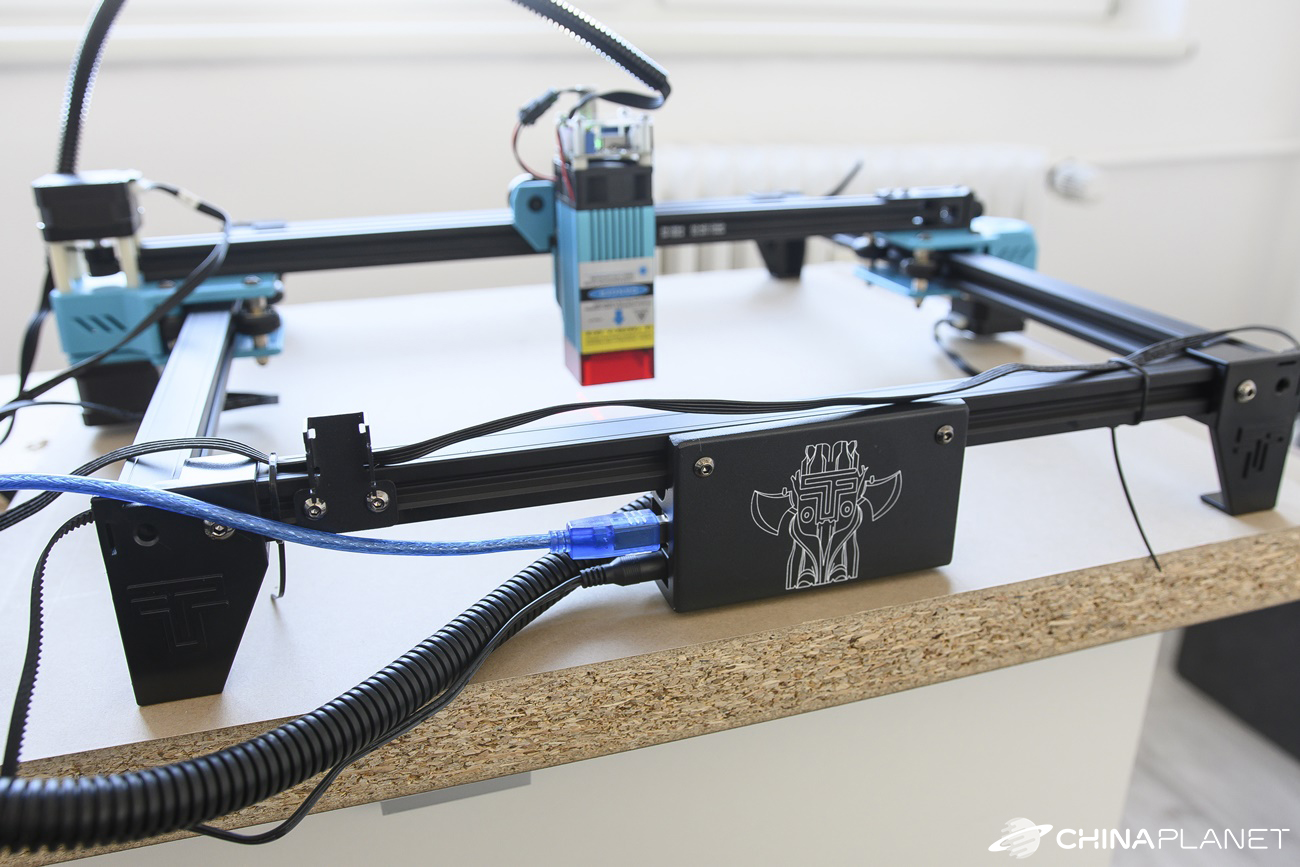
Computer connection and software
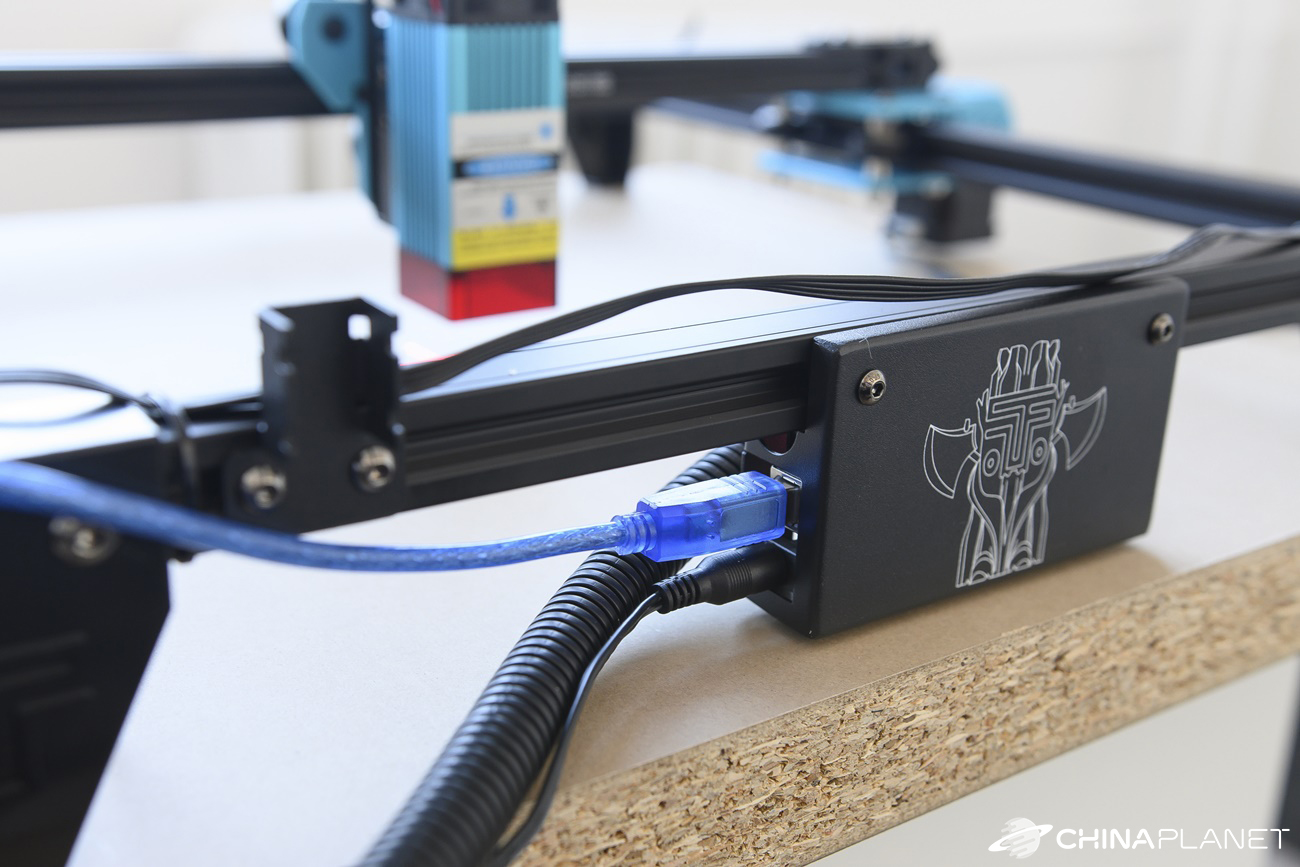
The Totem S engraver is supplied to the mains as standard using the enclosed cable adapter. However, you also need to connect it to a computer with a USB cable to use it. For this reason, we would welcome it if the cables were a little longer, as we connected the engraving machine to the desktop.
To work with the engraving machine, you need software that can translate images into codes, so-called G-code. These codes represent instructions for programming the path of the instrument, in this case a laser, in the area of the Cartesian coordinates X, Y and Z. A 3D printer or CNC machine works on a similar principle.
In addition to the aforementioned instructions, you will also find software on the memory card included in the package laserGRBL. It is a free, freely available program that is primarily intended for hobby users. However, we recommend that you download the latest version available from the official website.
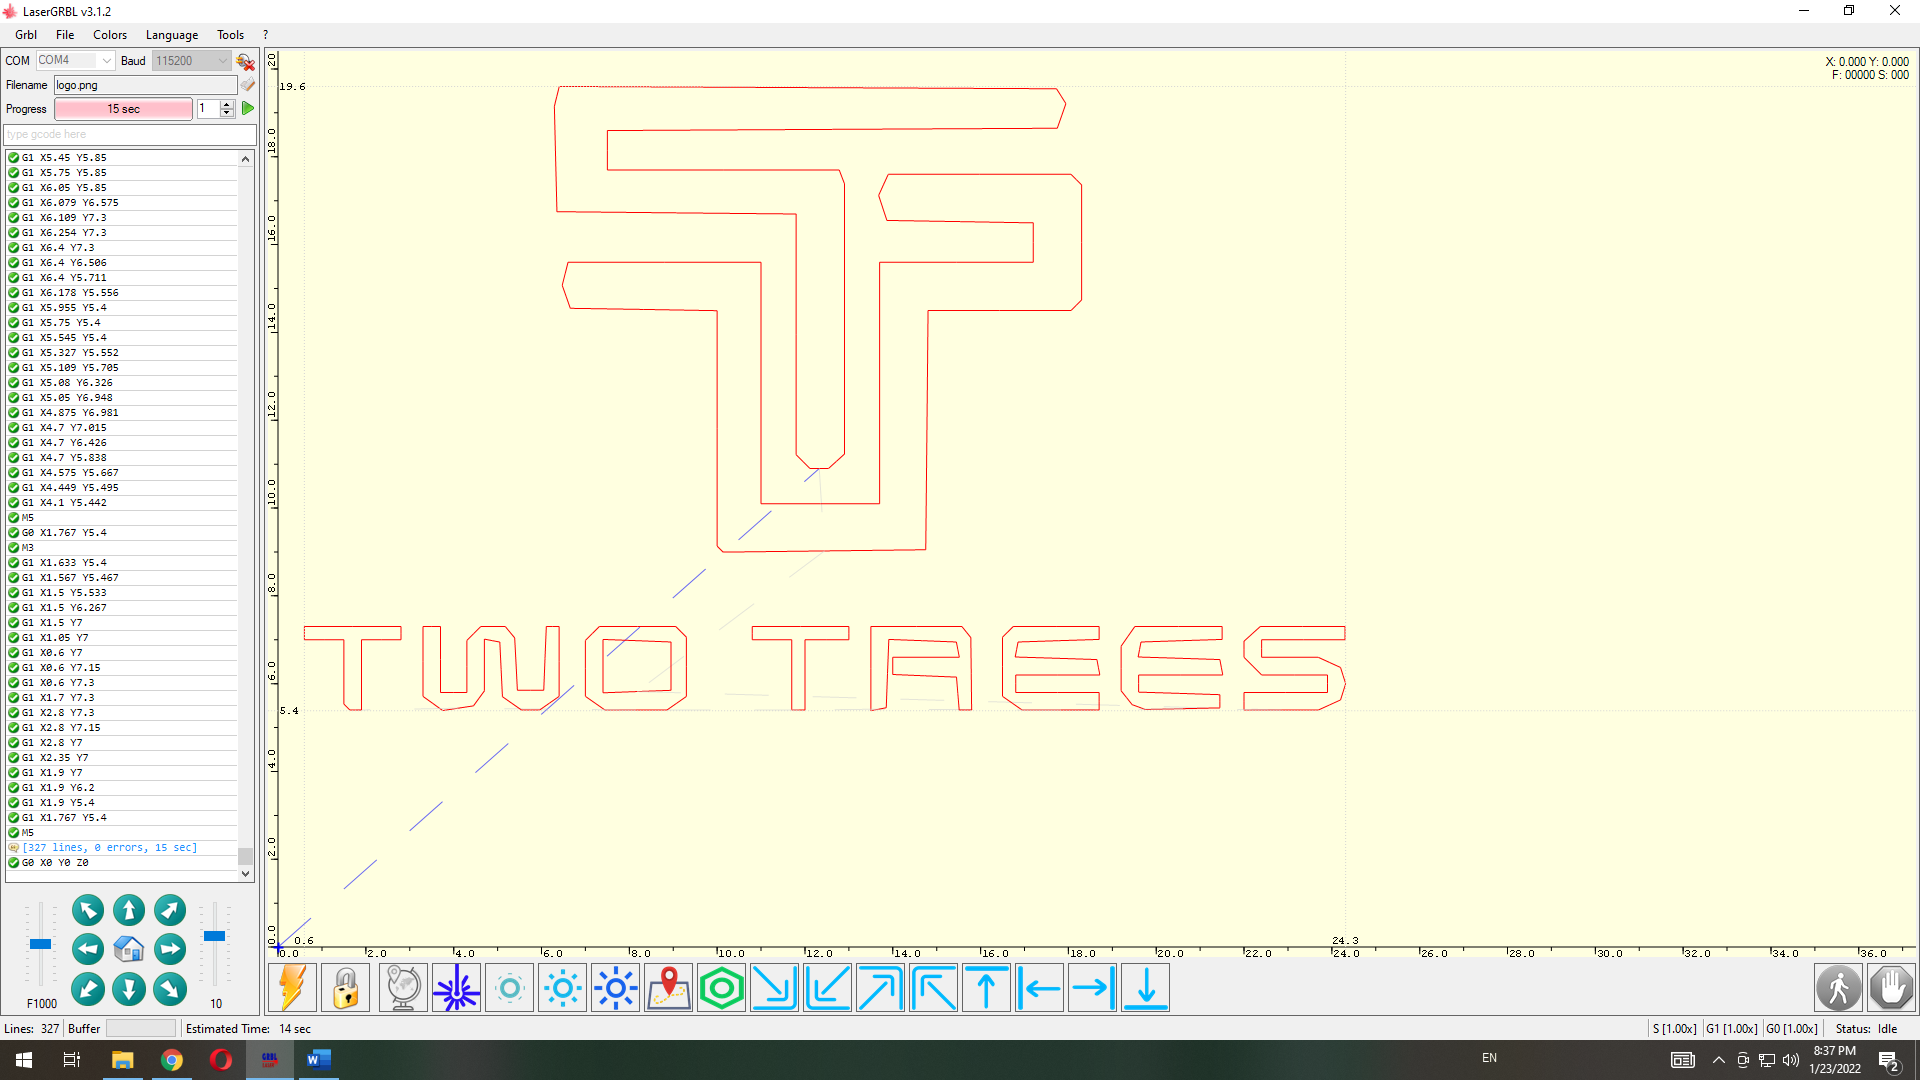
After the LaserGRBL is installed, the engraving machine is connected. If you have it connected with a USB cable and plugged in, just select the COM4 port at the top of the window and click on the button with the flash icon.
Loading configuration files and the first test
Before the first engraving test, we had to import the necessary files into the LaserGRBL program. The first is a configuration file for a specific device - Totem S, the second is a .zip file with buttons that appear in the bottom bar. Both files are on the memory card.

Then we just imported one of the images, which was also on the memory card, we selected the material to be engraved and we clicked on the start button. We placed a piece of spruce board under the laser.
Settings and options in LaserGRBL
To engrave soft wood such as nami used spruce is probably the easiest. There is no need to bother with the settings, we could leave everything at the preset values and we achieved some result. However, in order to get a better result, it is possible to make certain changes to the settings.
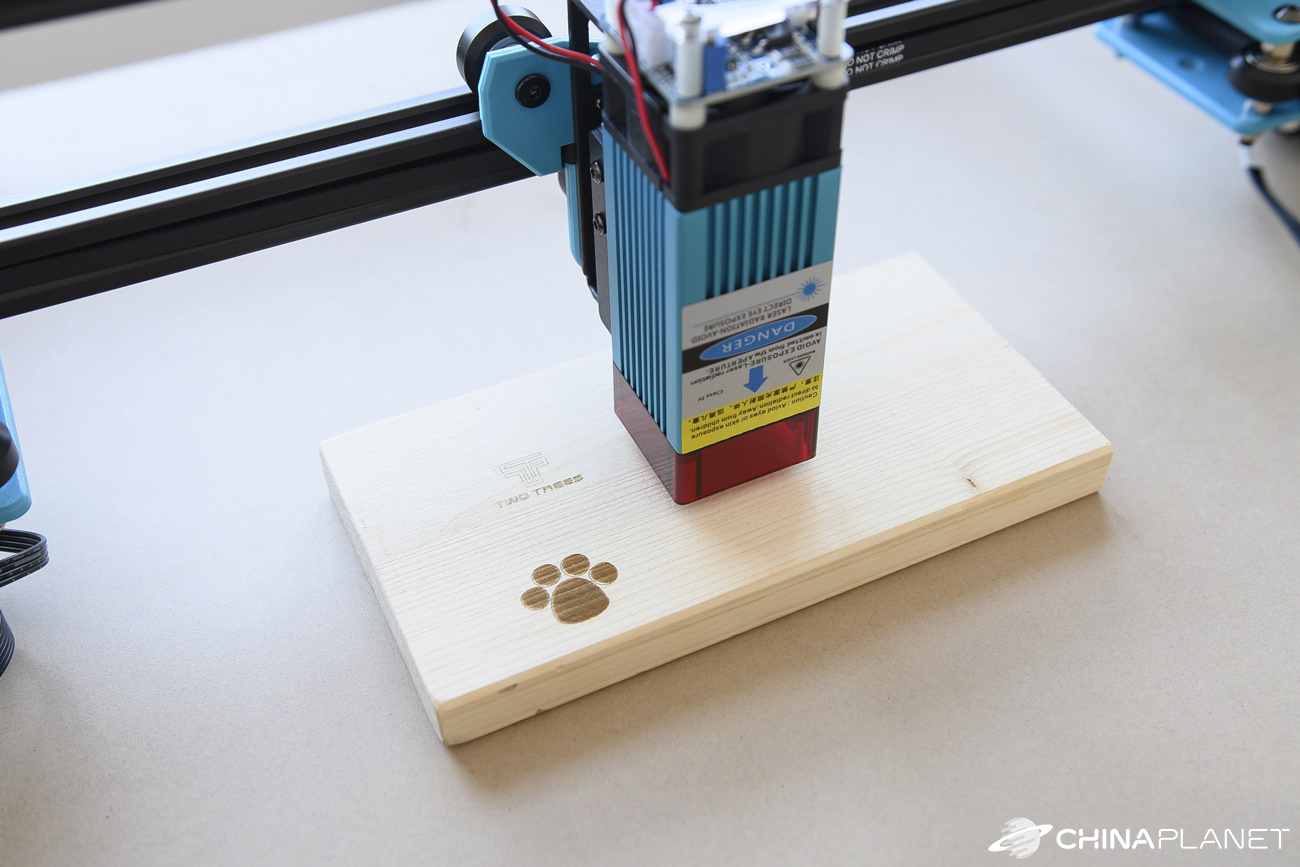
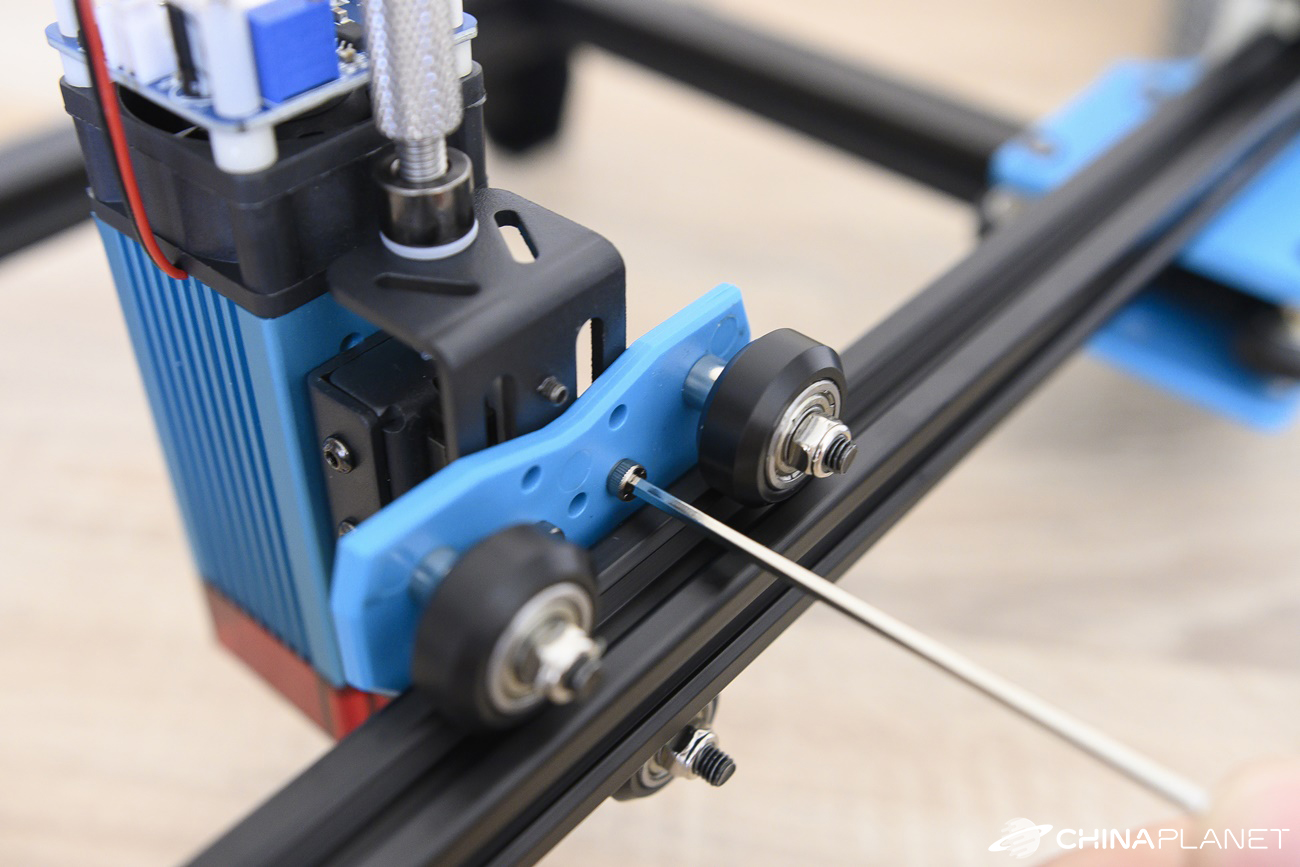
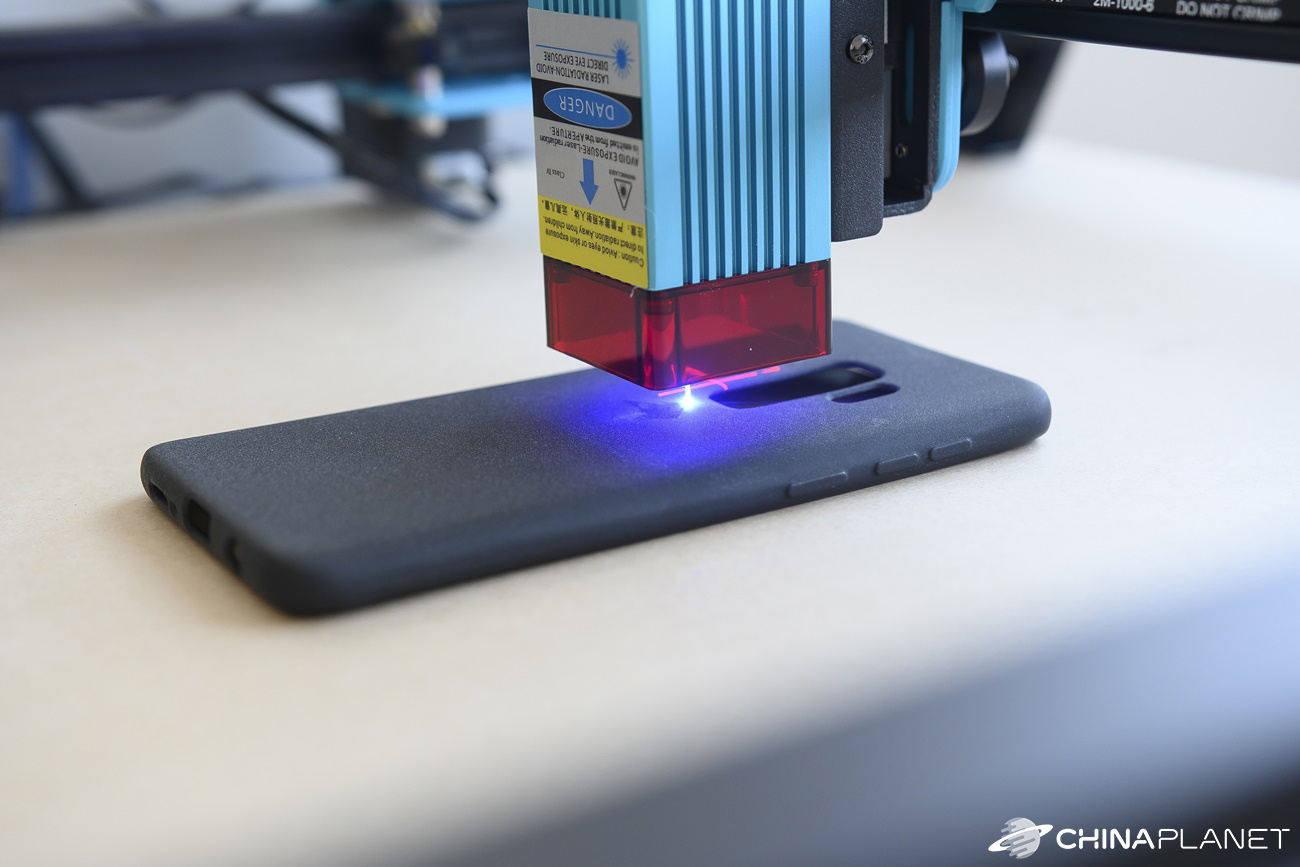
Our first steps led to adjusting the sharpness of the laser. The focus is changed by rotating the metal selector at the top of the laser, which moves the laser element itself up and down. With insufficient focus, the laser engraved too roughly and the result was not very nice, as the edges were quite burned.
After focusing, we reached a completely thin line. We set the laser as close as possible to the object we were engraved into. We left only a minimal gap between the engraved object and the red cover.
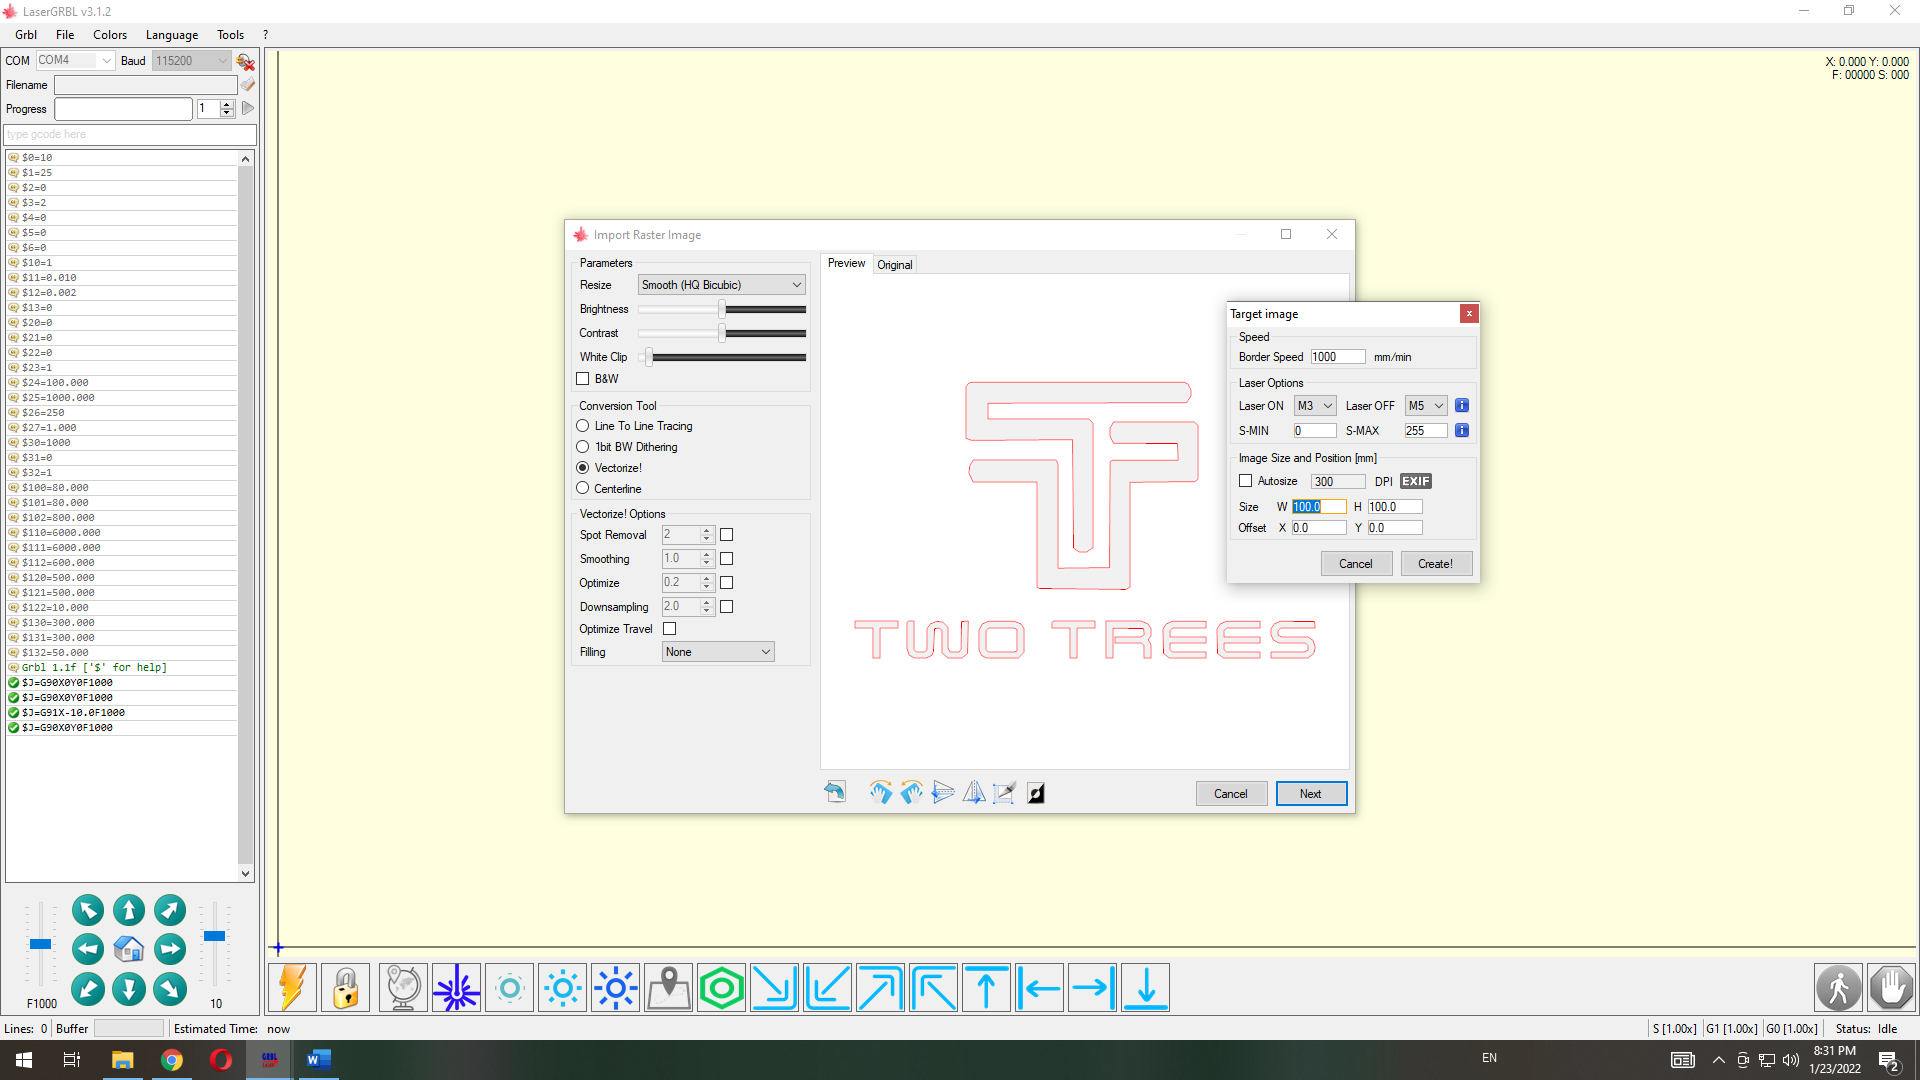
Another setting is how the image is converted. There are options to choose from - Line by line, point engraving, vectorization and centerline. These are different ways of converting an image, and therefore different engraving techniques. We most often used the so-called line to line, where the laser engraves in lines, as if in lines with a set density. You can also adjust the brightness, contrast and white balance.
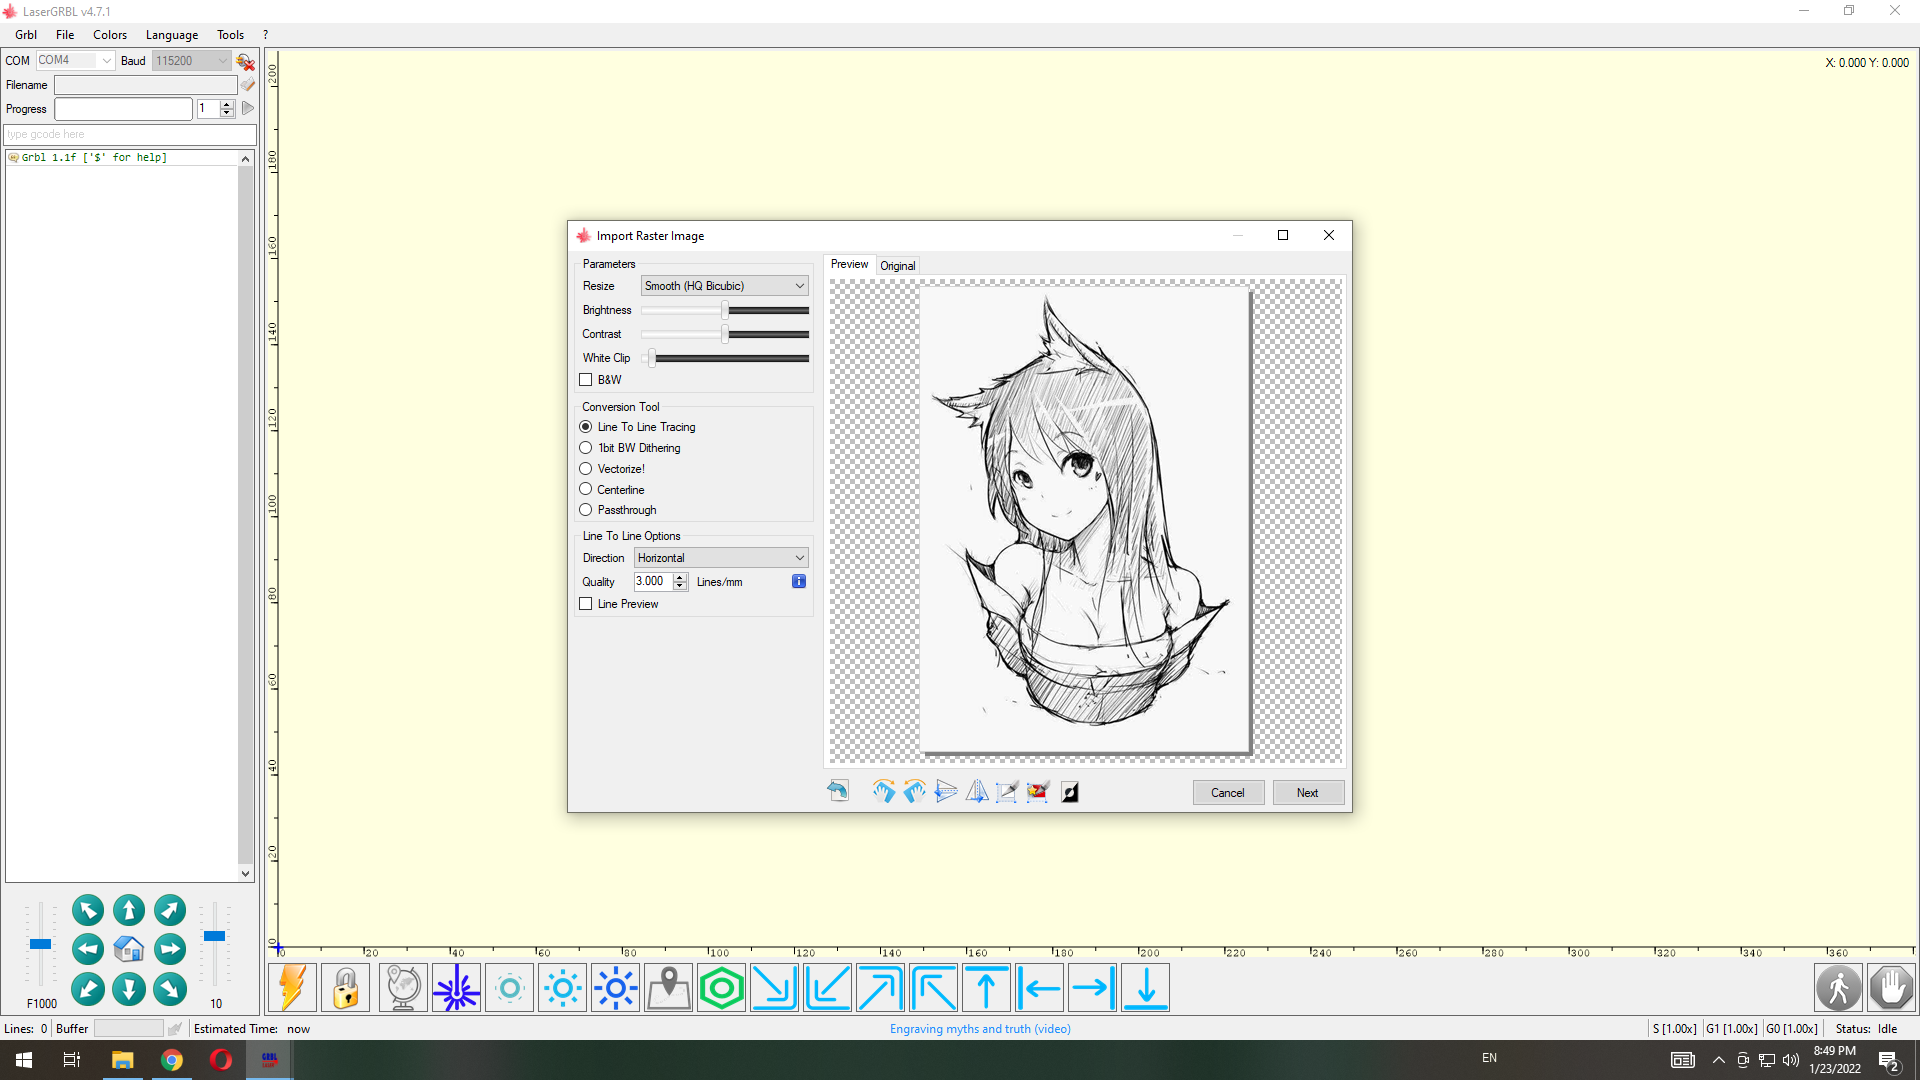
Other settings are, for example, the laser power in percent, the engraving speed in mm / s or the image size in pixels, as well as the resolution in DPI. The settings that can be changed are really a lot, and when you have no experience with laser engraving like we do, all you have to do is try the individual settings and observe the changes in the result.
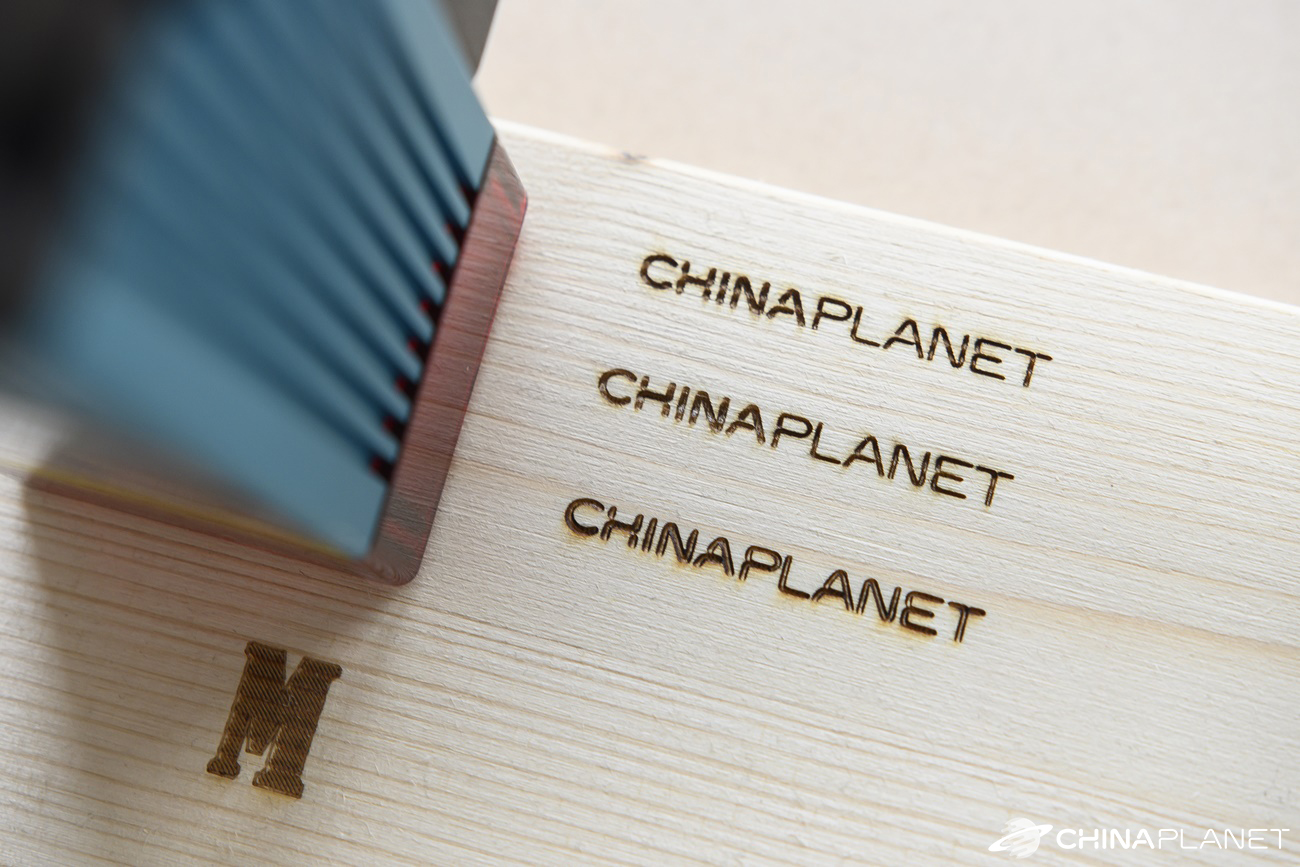
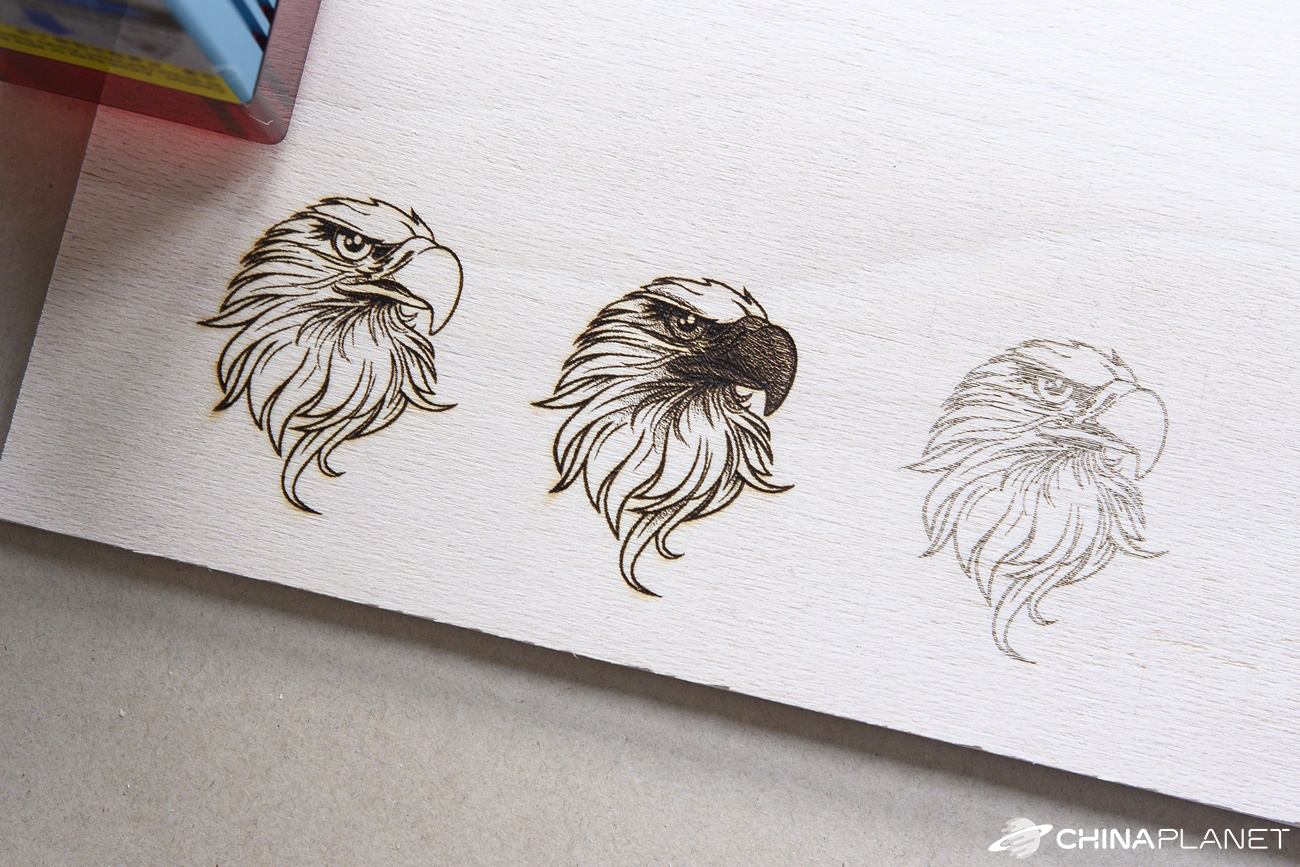
In the following photo you can see the engraved text ChinaPlanet into spruce wood and the eagle's head into beech plywood with three different settings – line by line, point engraving and vectorization.
Materials and cutting
Based on the description, the Totem S engraver should be able to engrave into wood, plastic, paper, leather, aluminum, steel and more. We have tried various wood (beech, spruce, poplar), plastic, metal, but we must say that 5.5 W is probably a weak power for engraving into pure metal. If you want to engrave into metal, you need to color it. In this case, the laser will help itself with the surface color.
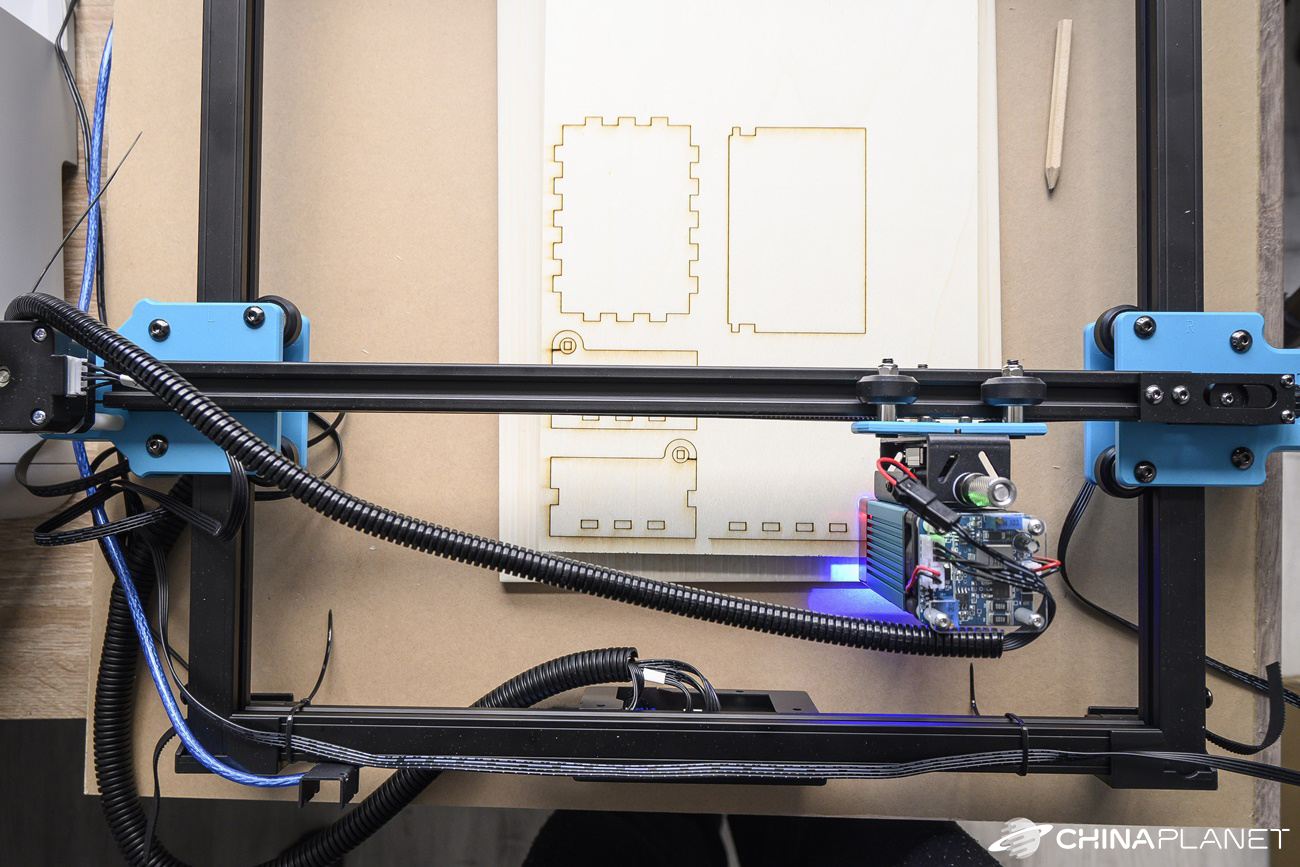
Laser cutting is a very interesting option. Of course, Totem S can only cut thin or soft materials, such as 4 mm poplar plywood. However, there is a small problem here. Although the laser has enough power to cut the plywood, the smoke that is created during cutting contaminates the laser lens, thus reducing its efficiency.
To solve this problem, it is possible to purchase a compressor and connect it to the laser using a hose and a small adapter. This blowing system is known as air assist and you will find many instructions for construction and assembly on the Internet.
Unfortunately, we do not have this system, but we still managed to cut parts from plywood into an opening box. After a while, however, we started to get clogged with laser, so the result is not very nice. Air assist is probably the only way to use the laser for cutting, which opens the door to endless possibilities for making various items from plywood.
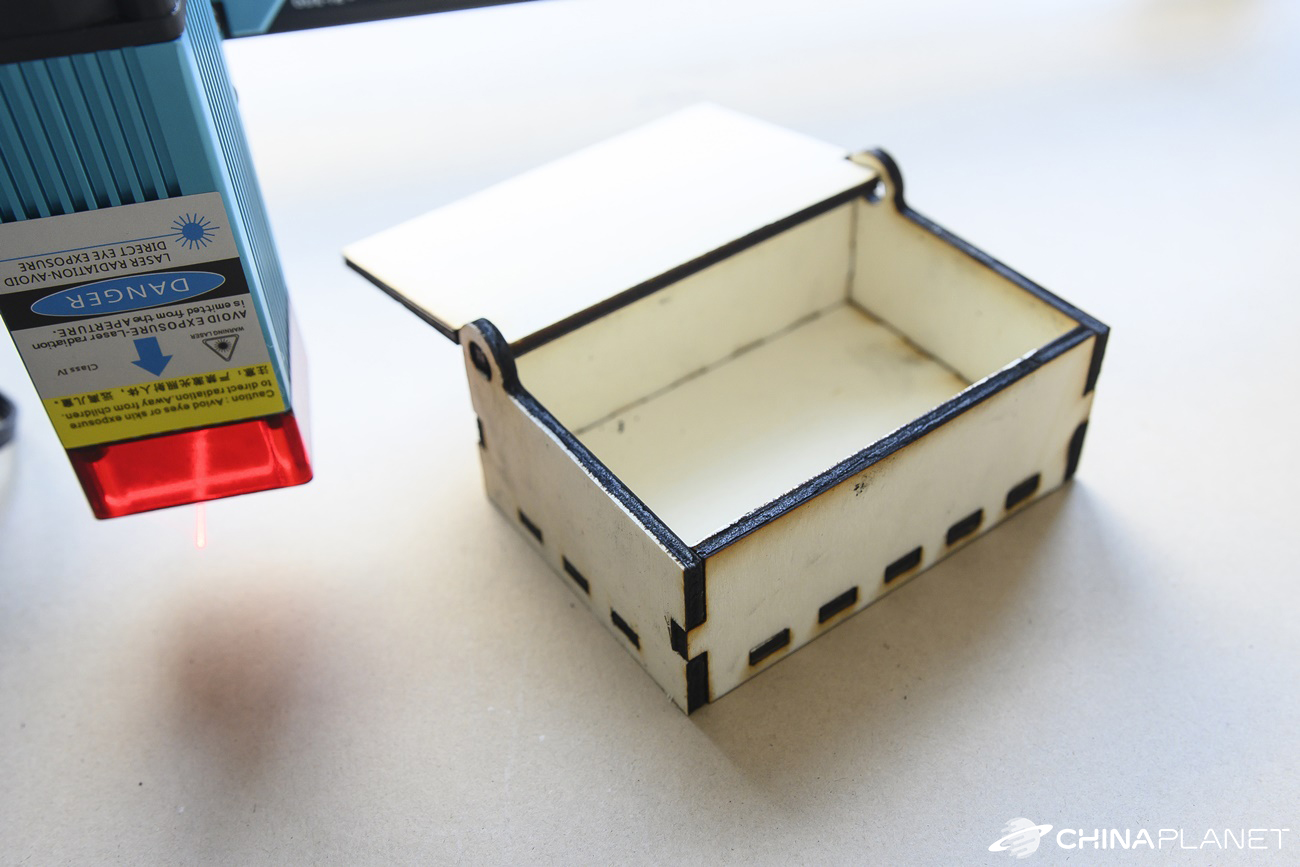
You will find a number of documents and templates on the Internet, whether for various boxes, holders, containers, car or aircraft models and other items.
TwoTrees Totem S: Final evaluation
The TwoTrees Totem S engraving machine has a 5.5 W laser, which makes it especially suitable for amateurs and hobby enthusiasts who would like to try something new. It can work with materials such as wood, leather, foam or plastic with high precision and a thin laser beam.
In addition to engraving, however, it can also handle plywood cutting, for which, however, we recommend purchasing a compressor and installing the so-called air assist. This will prevent laser clogging, which will reduce quality. However, cutting offers you many more uses.
The engraving machine comes in a demo, so assembling it takes a moment of patience. However, you will find the instructions for folding on the enclosed memory card together with everything you need.
TwoTrees Totem S
Express delivery from a German warehouse free of duty and VAT.
This product will be delivered to you expressly from your local German warehouse. Delivery from Germany usually takes 7-10 days and is delivered by courier. You do not pay any extra fees, no customs duties or VAT on delivery.


hello, I am considering this machine to make a watch dial. I want to paint a 26mm brass disc with black paint then use the laser to burn away my design to reveal the brass beneath. Do you think this machine could get fine enough details to make a design like this image? https://imgur.com/a/6sdGXzS the manufacturer claims it has a focal point of .08mm.