We already have the thermostatic head for the radiator from the Chinese brand MoesHouse tested. It is a smart device that will help you save on heating, but the first version had some shortcomings. New MoesHouse thermostatic head it brings several changes that we will look at together.
In our detailed review, we will introduce you to the novelties that this thermostatic head brings, we will guide you through pairing with the application and all functions. Our personal experiences after intensive use in the home will also be a matter of course.
Where to buy a MoesHouse thermostatic head?
These thermostatic heads from MoesHouse are currently available on the AliExpress online marketplace directly from the Chinese warehouse. The great news is the free and fast delivery, thanks to which you can expect them at home within 15 working days of dispatch.
Thermostatic heads MoesHouse Wifi/ZigBee


15-day delivery via Aliexpress Standard Shipping
Aliexpress Standard Shipping is available for this product with guaranteed delivery within 15 days. It is the most convenient way of delivery, which takes place without customs fees and in most cases is delivered by a courier company. 15-day delivery we actually tested it.
Technical specifications
| manufacturer | fashionable House |
|---|---|
| dimensions | 97.4 x 52.4 x 52.4 mm |
| power supply | 3 x 1.5 V AA batteries |
| Protocol | WiFi |
| IP protection | IP20 |
| Laundry room temperature | 0 - 50 ° C |
| Application | SmartLife / TUYA |
| Display | Yes |
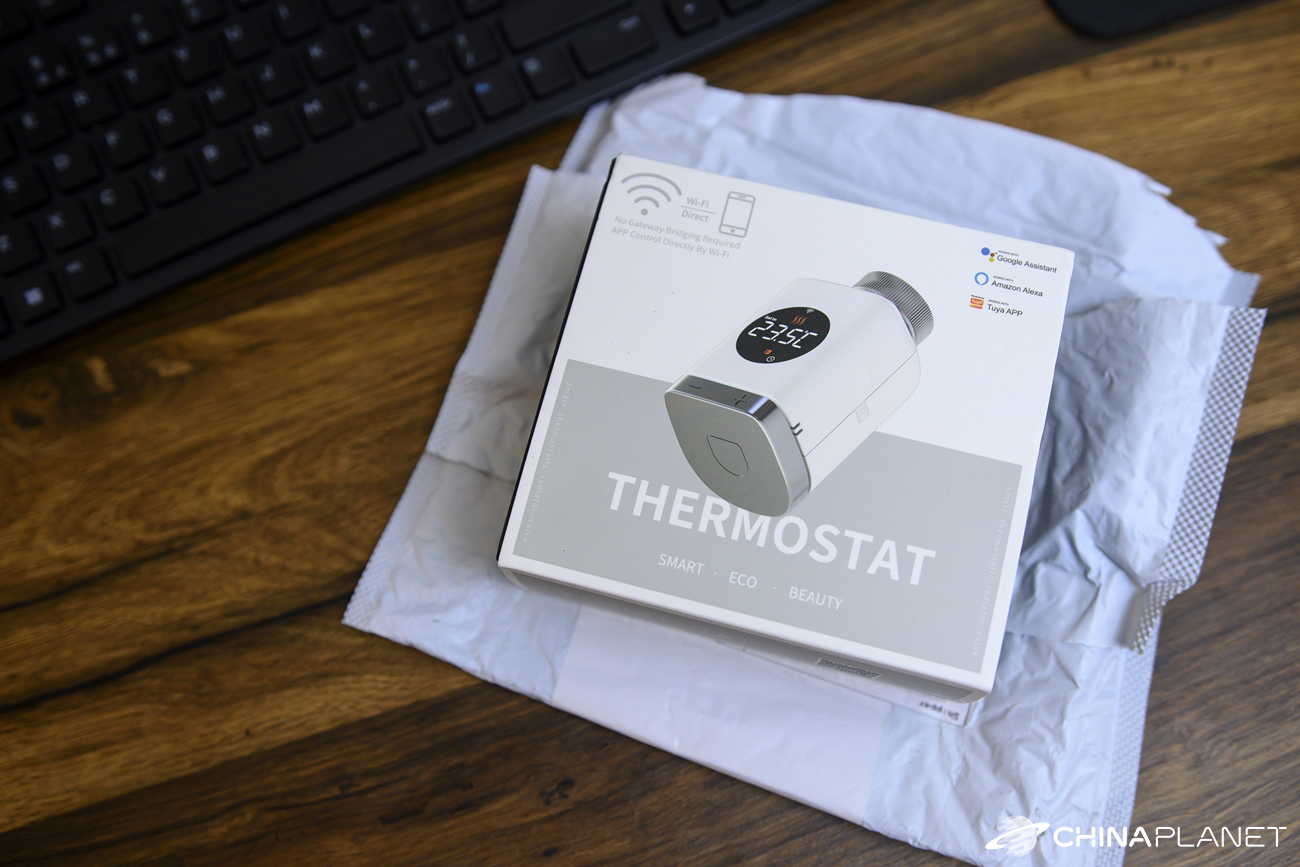
We were not happy with the packaging
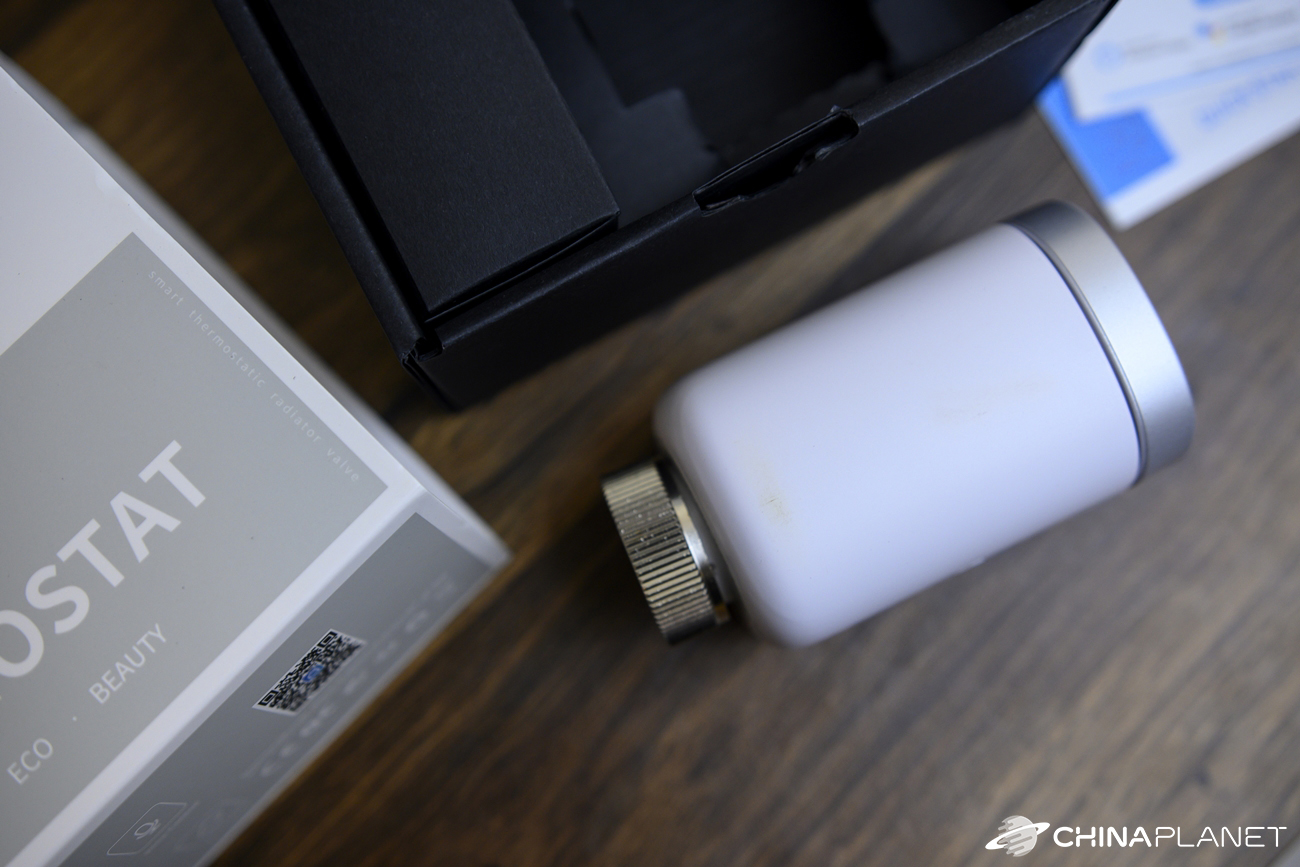
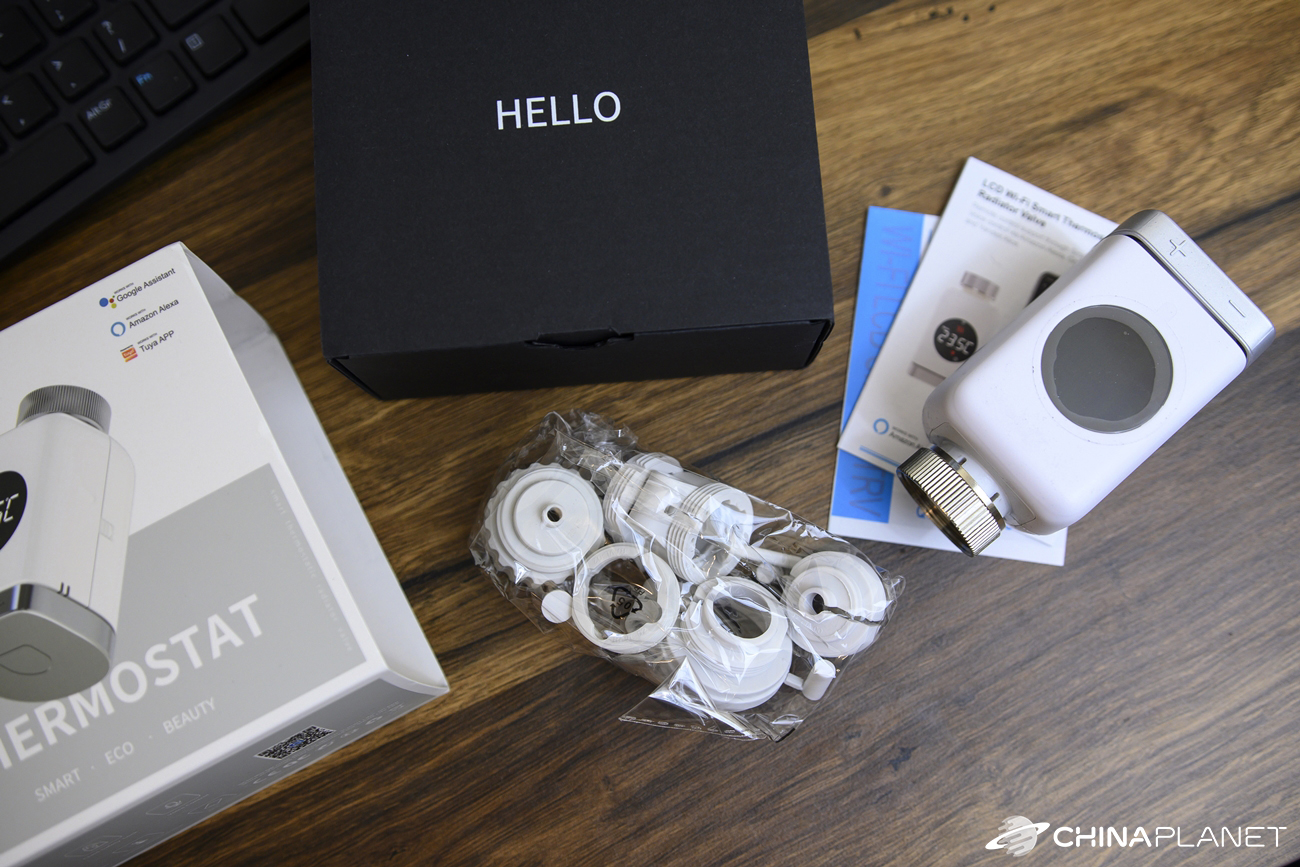
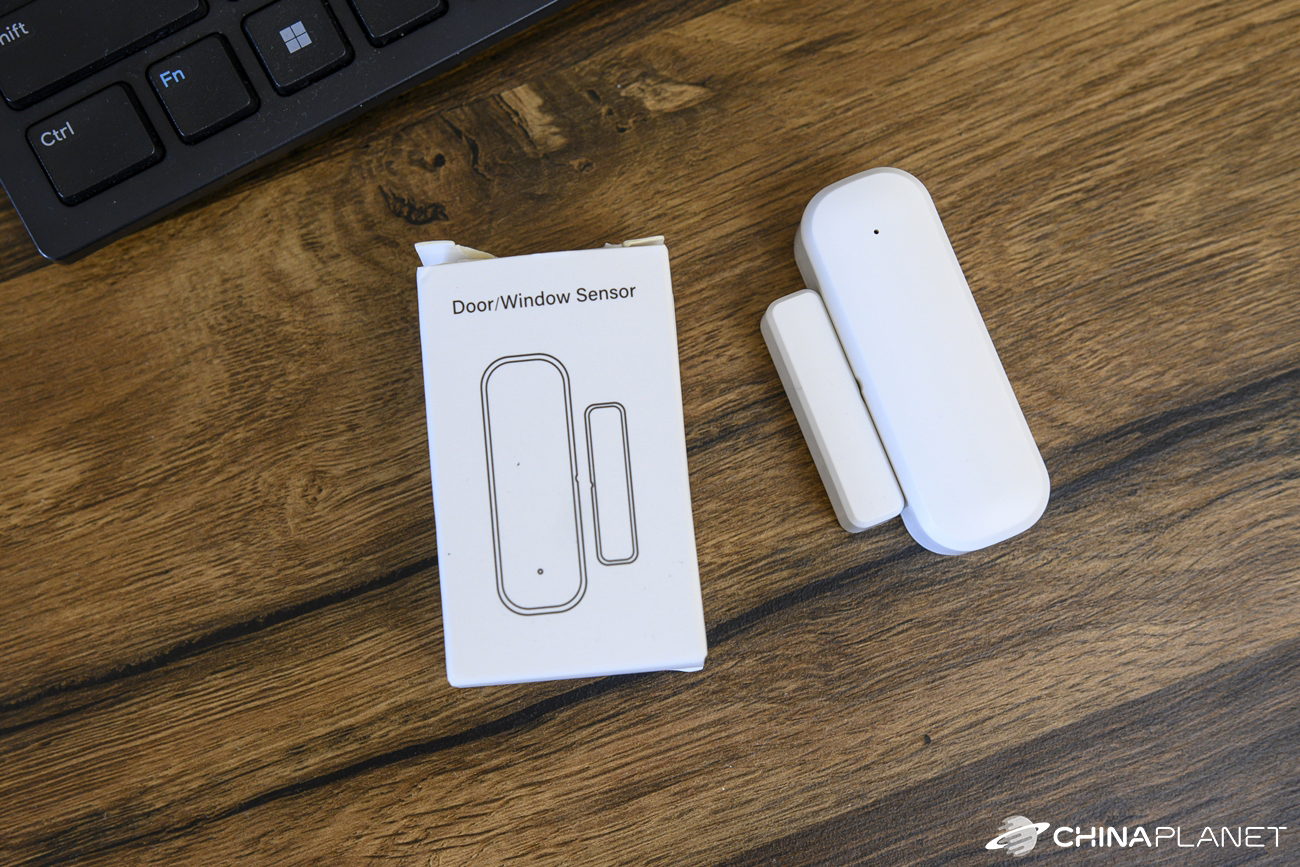
The MoesHouse thermostatic head came to us from Aliexpress in a small box wrapped in a standard silicone envelope. After unpacking, however, unpleasant surprises awaited us. In the box, the head was stored without any additional protection, directly in the cardboard and was even slightly scratched. At first glance, it looked as if someone had already used it, and overall the packaging seemed very cheap and low-quality to us.
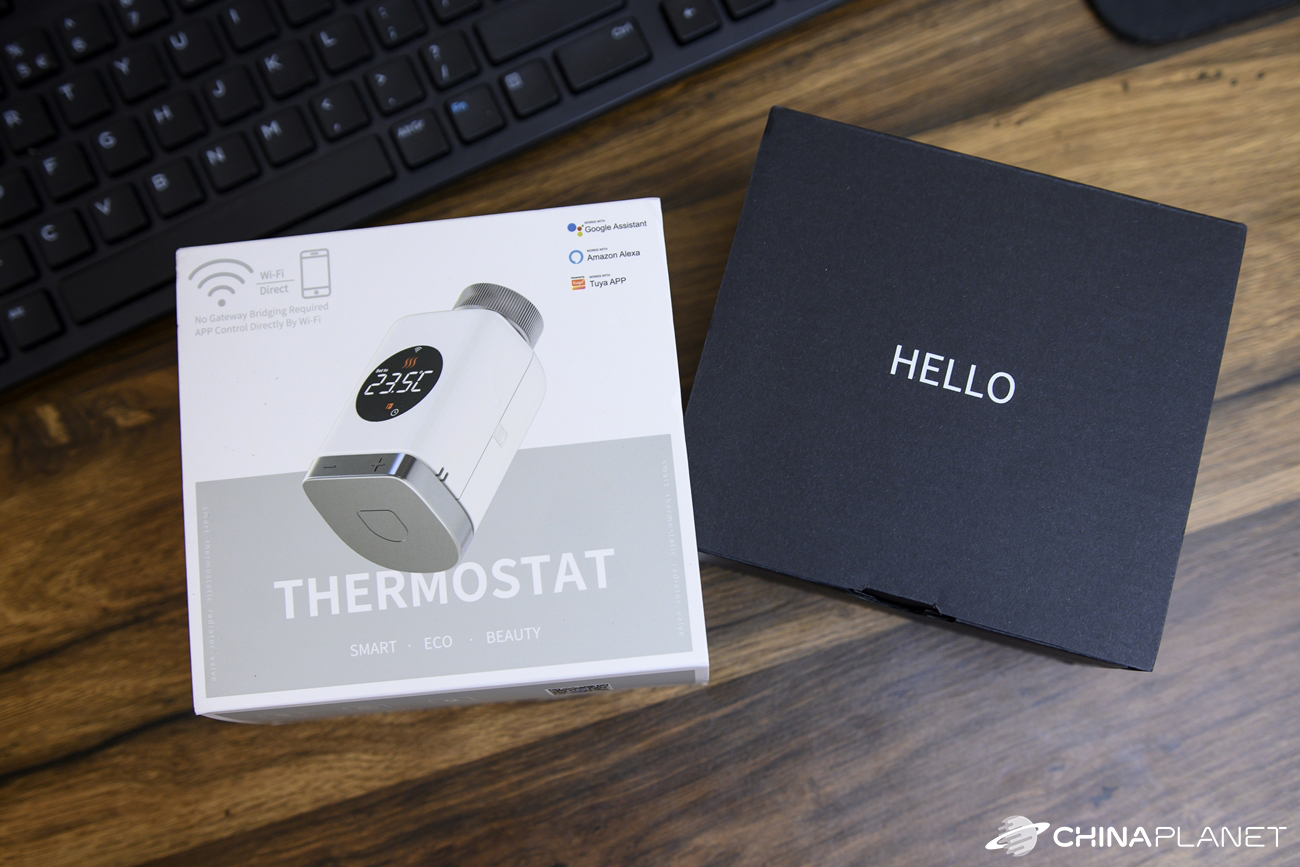
In addition to the head, the package also includes adapters for connecting to a radiator with various valves and instructions for use. The first impression was not very good, but the packaging of the product corresponds to its price.
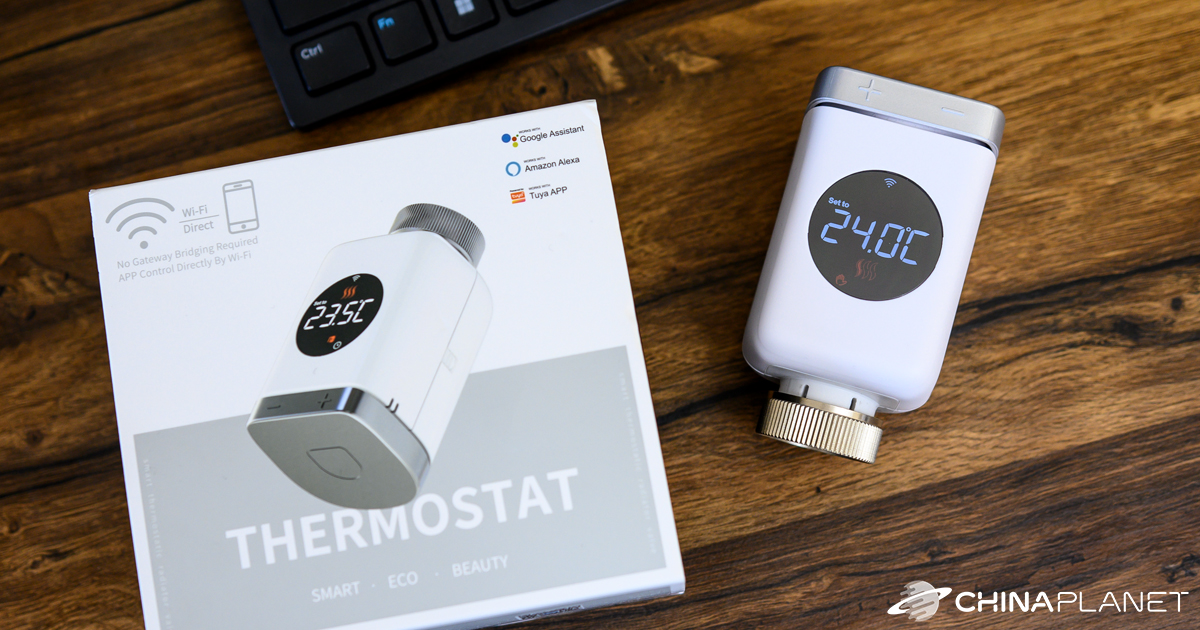
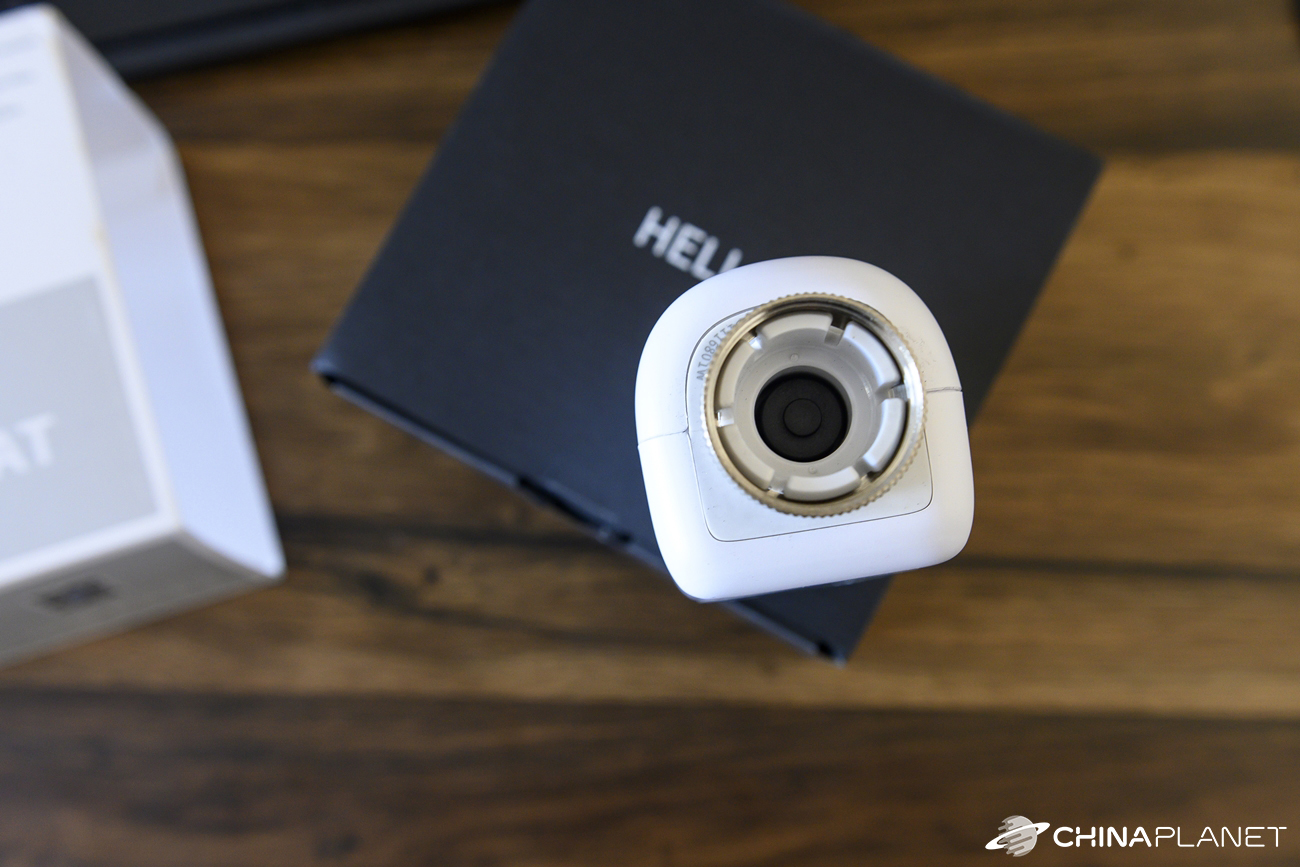
Design and quality of workmanship
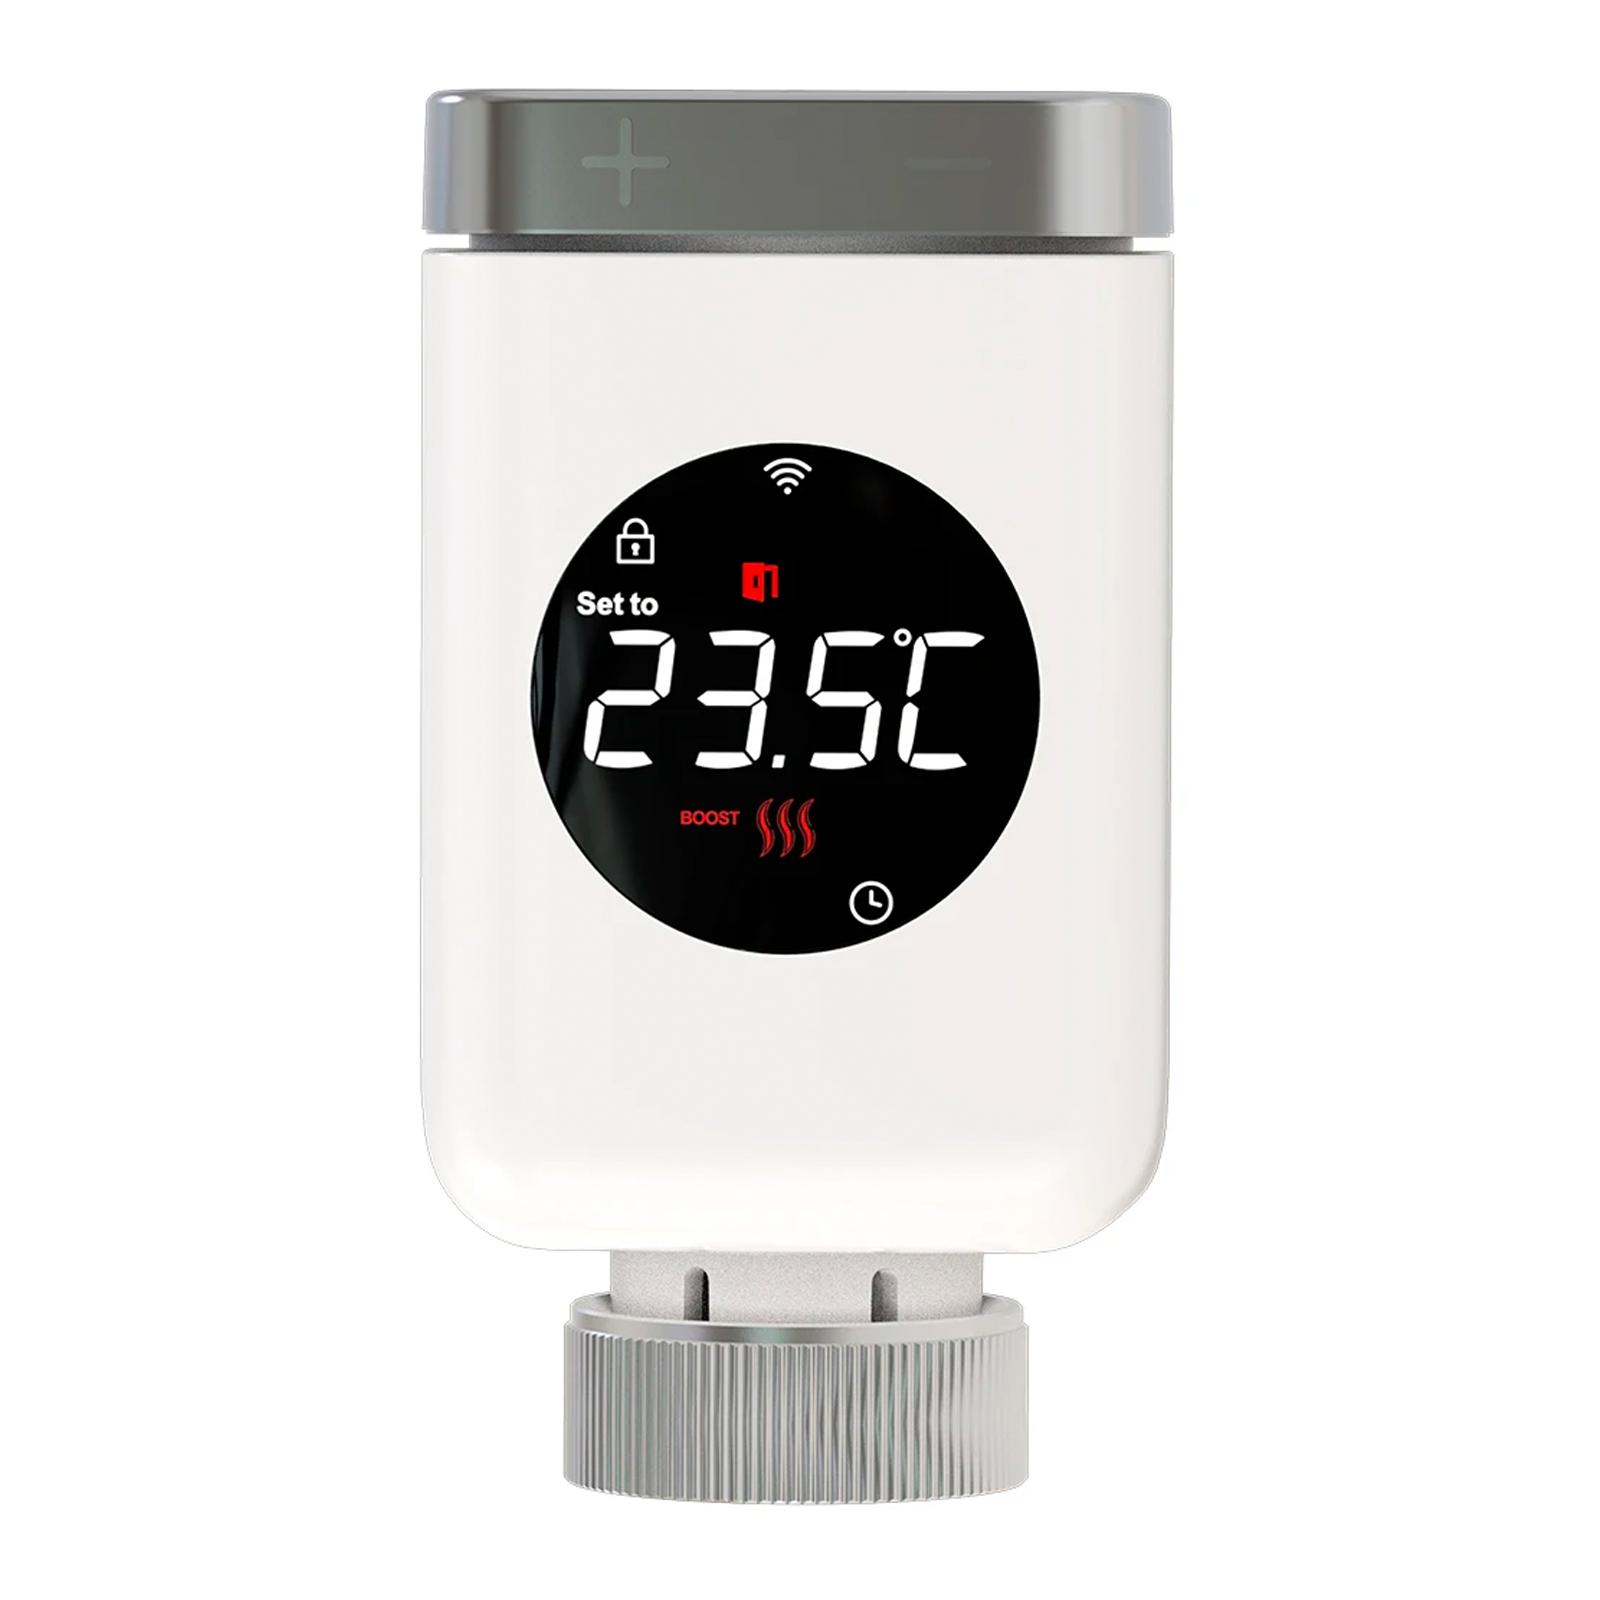
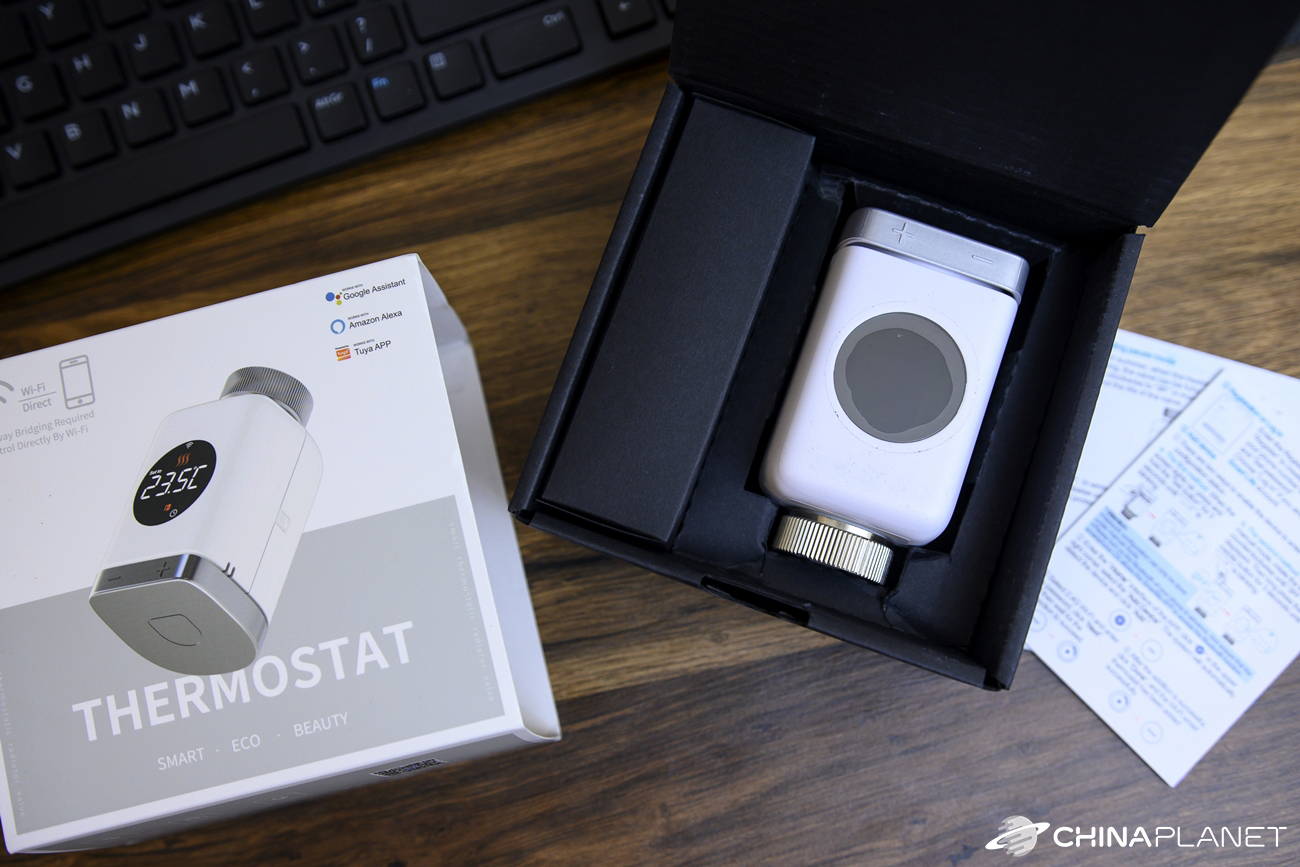
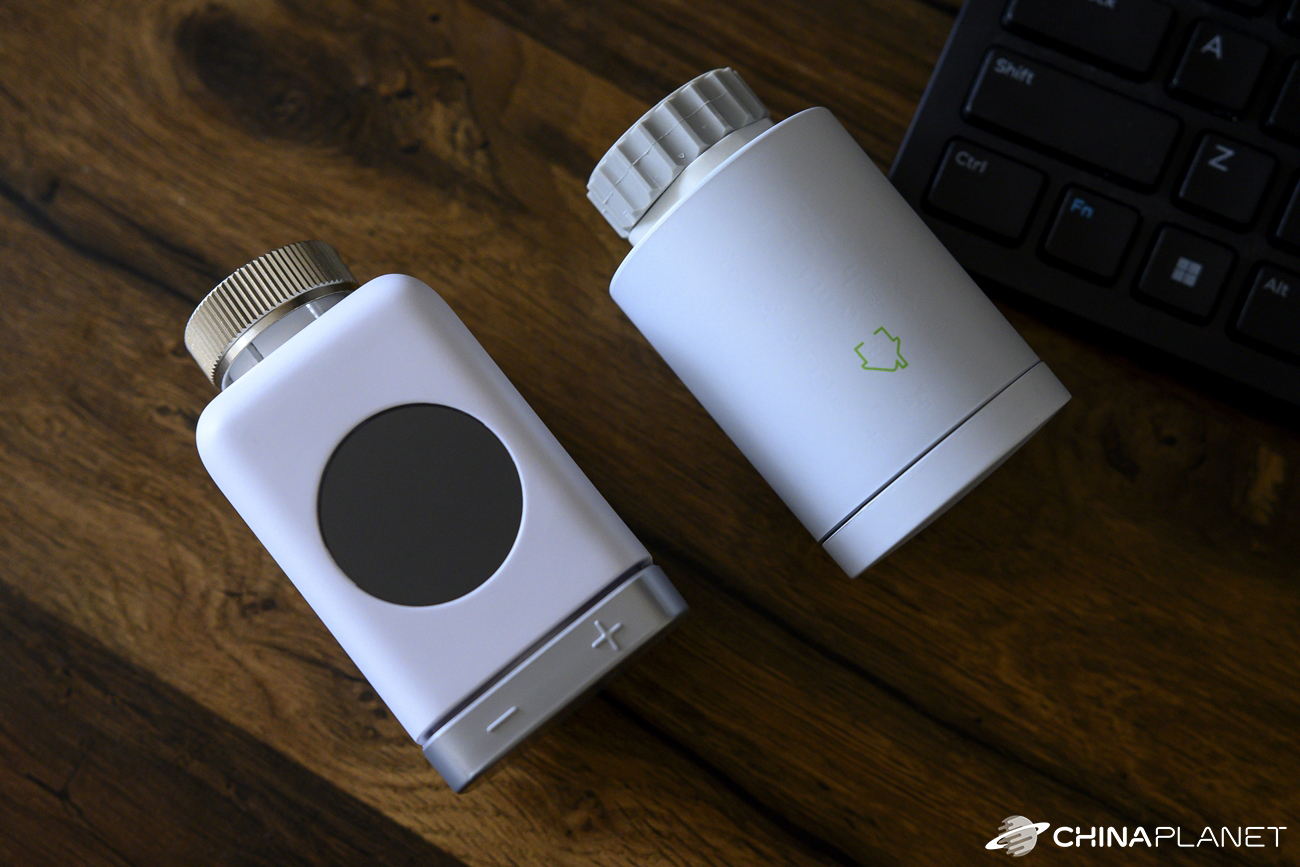
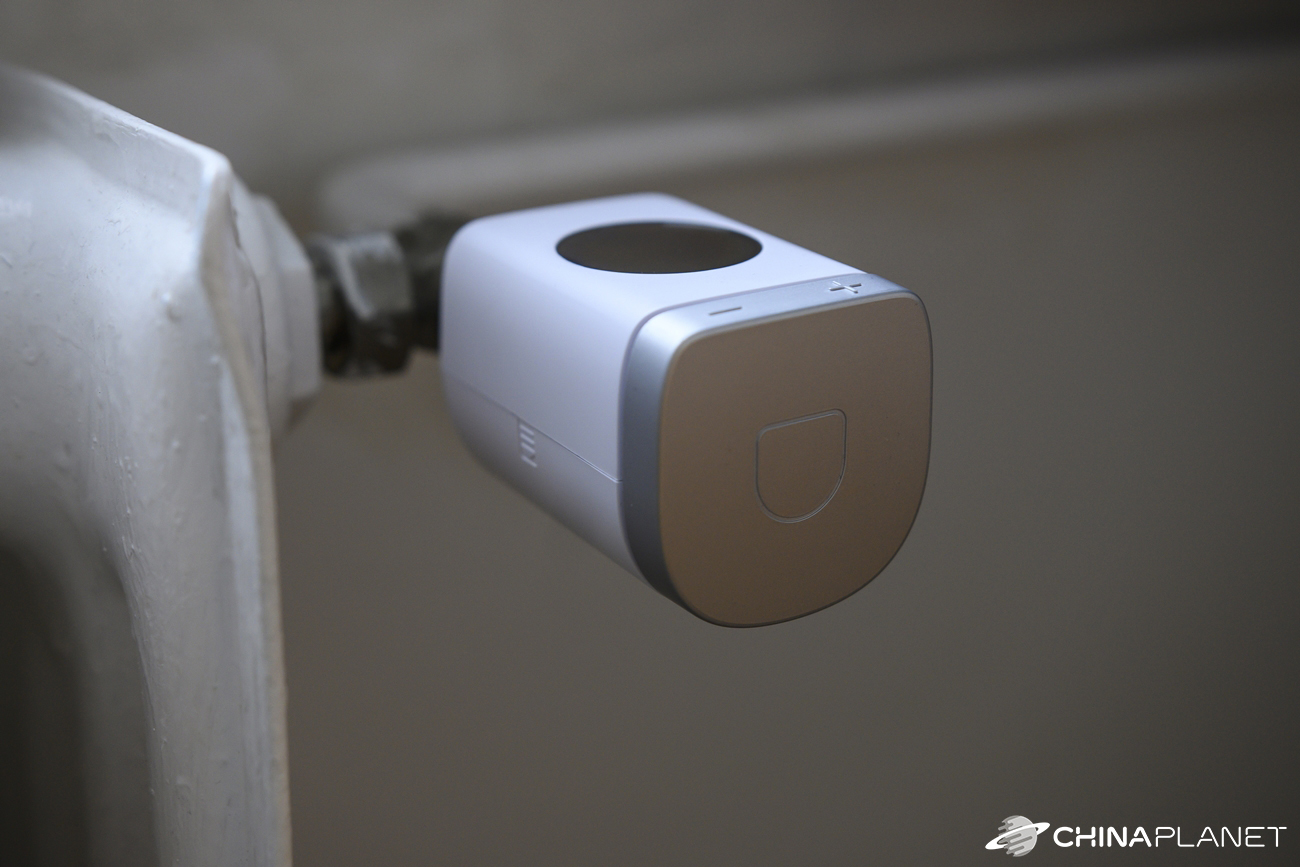
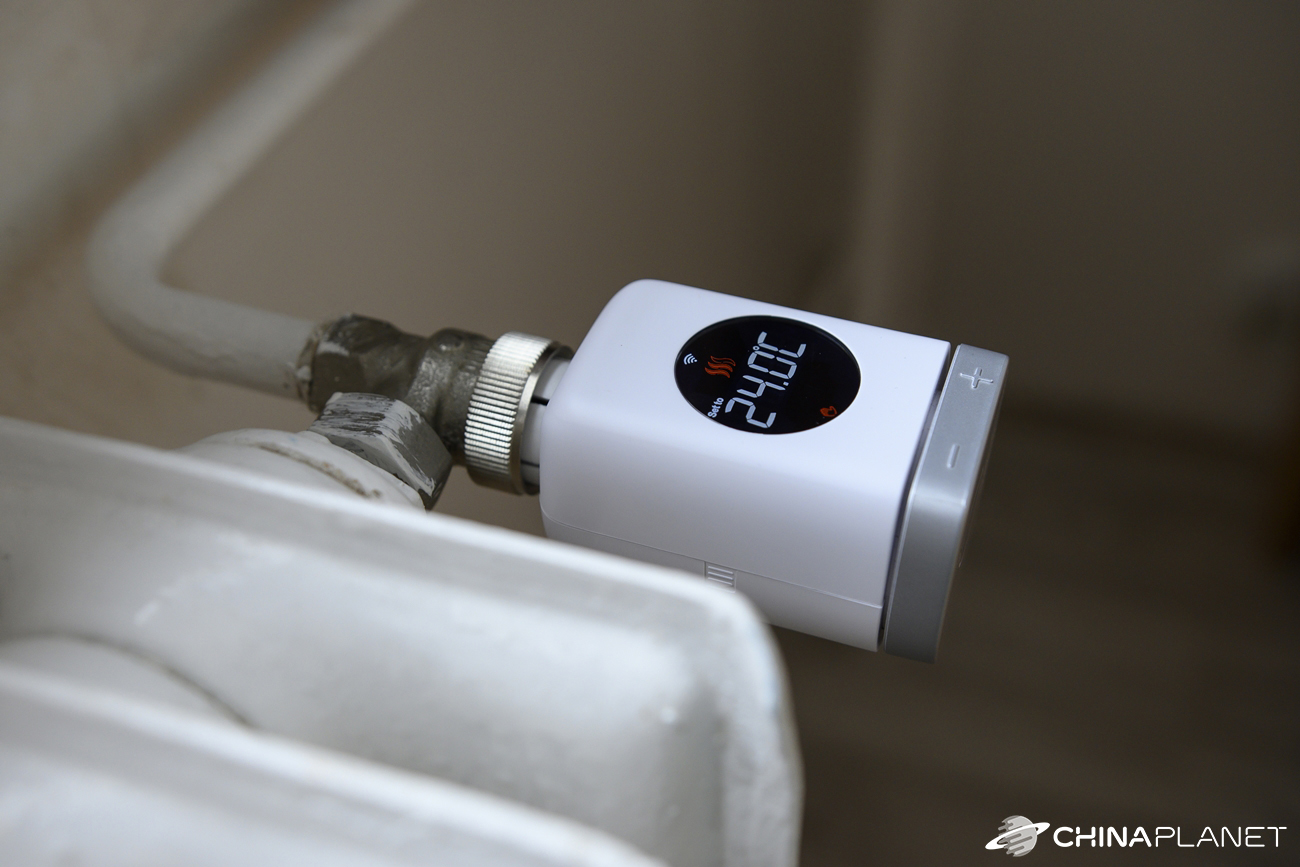
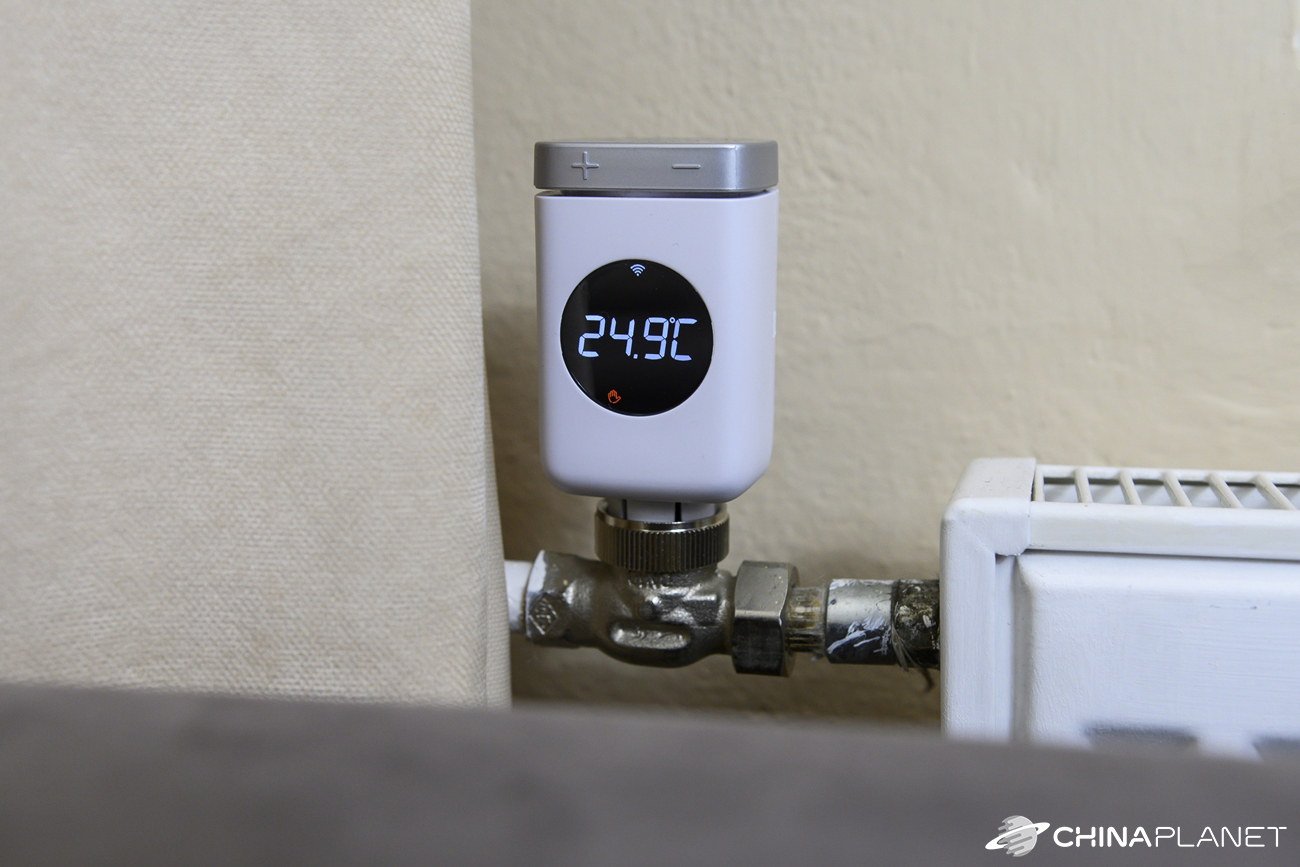
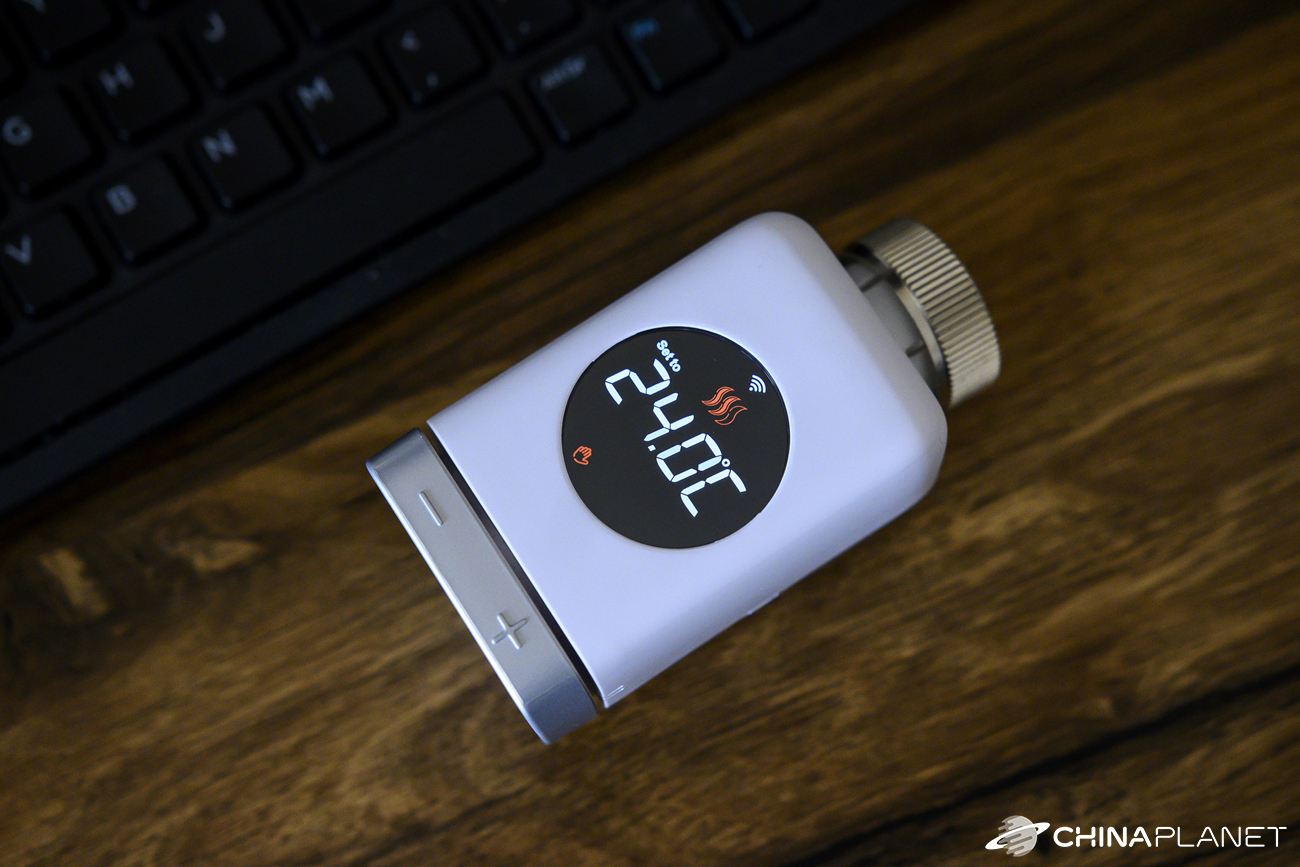
In terms of design, the new MoesHouse thermostatic head is significantly different from the first one we tested earlier. The front is dominated by a round, colorful and relatively large display.
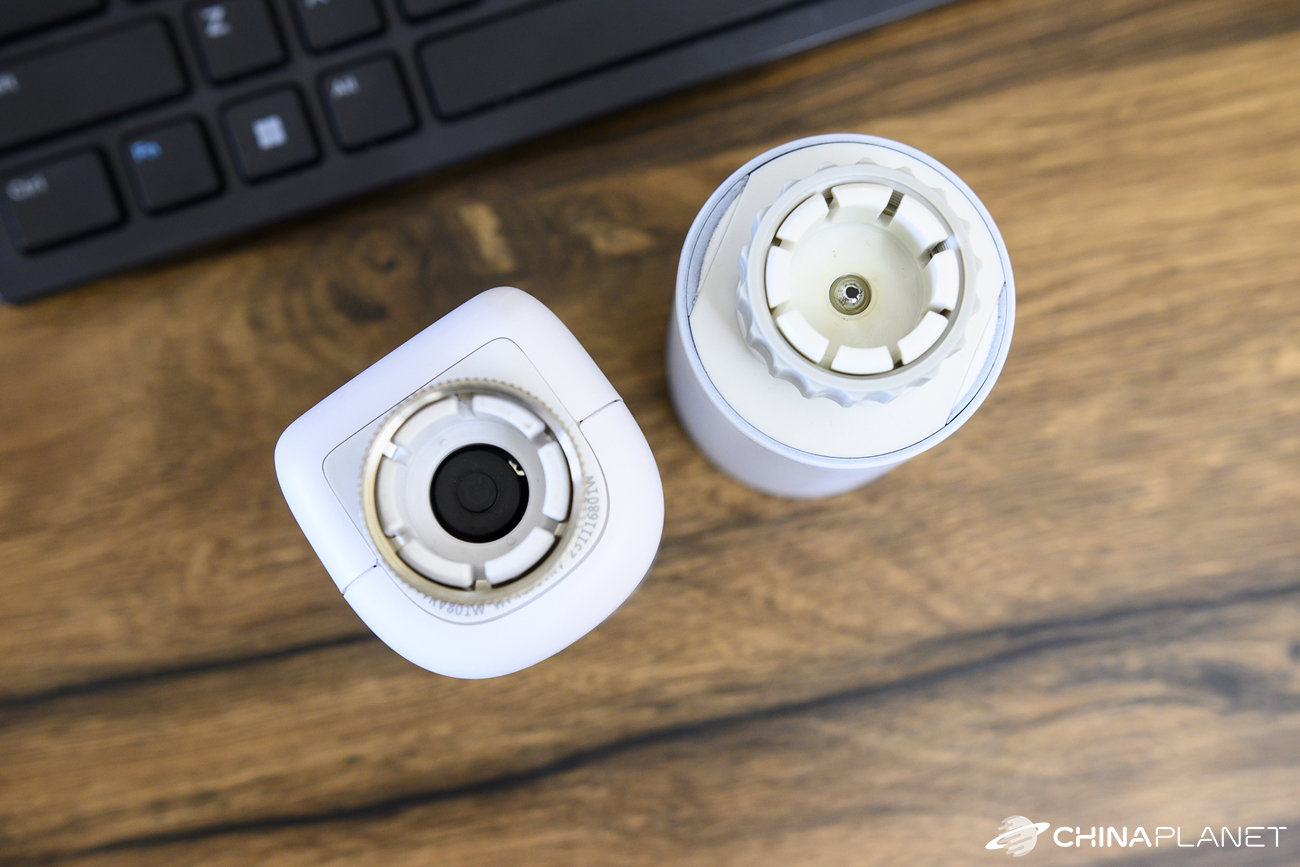
This time we no longer have touch buttons for control, but a rotary element with the function of a button, with which we can set the temperature manually. We evaluate this change positively, as the touch control of the older model was not very comfortable and sometimes did not respond to touches.
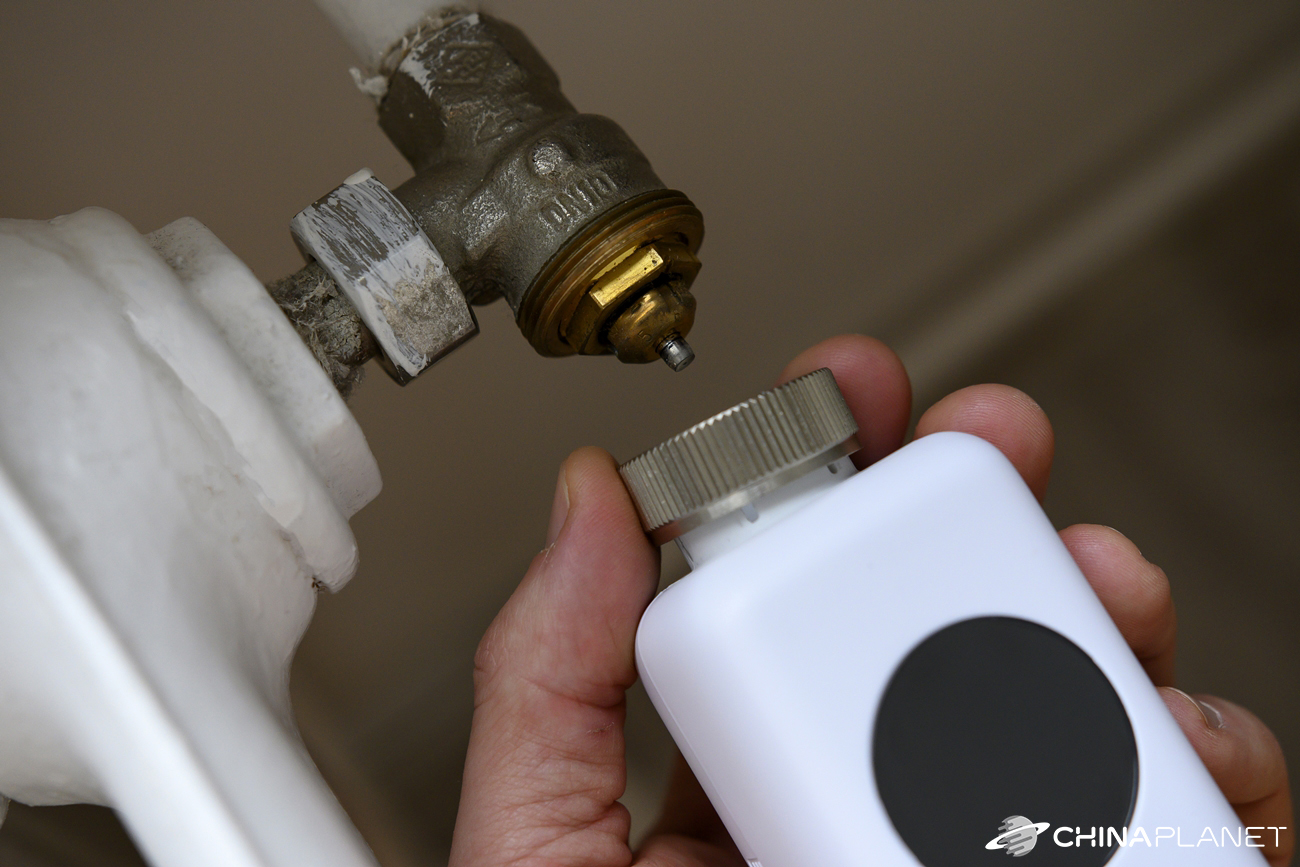
Another positive change is the rotating valve nut, which this time is finally metal, unlike the older model, where it was made of plastic. However, the entire rest of the head is already plastic and the quality is rather average.
This thermostatic head probably wouldn't win any design awards, but let's take a look at the highlights of how it works.
Simple assembly and pairing with the application
One of the novelties is the WiFi version of the thermostatic head, which we just tested. Unlike the older model, where only the ZigBee version was available, which also needed a gateway for its operation, we do not need anything like that with the WiFi version.
The head connects directly to our home WiFi network, without the need for any additional equipment. Works with the SmartLife or TUYA application. We used the SmartLife application.
In the attached manual, we find brief and clear instructions for initial activation, assembly and pairing with the application in English. The first steps led to mounting the head itself on the radiator. We didn't need any of the adapters, so we simply screwed the head onto the radiator valve.
We then inserted the batteries and waited until it appeared on the display in the. When it disappeared from the display in the, we tightened the nut slightly. By pressing the top button, the display will show ada, when the head adjusts the valve and then switches to the standard temperature display. We have 2 options for switching to pairing mode. One is to press the SET button under the battery cover.
The second option is to hold the rotary selector in the counter-clockwise position until OFF appears on the display. After that, it is enough to hold the center button for a few seconds, which will get you into the pairing mode.
After that, it is enough to select the addition of a new device in the application, which the application will search for if it is near the smartphone. Here we enter the password from our WiFi network and the rest of the process will take place quickly and automatically.
Temperature setting
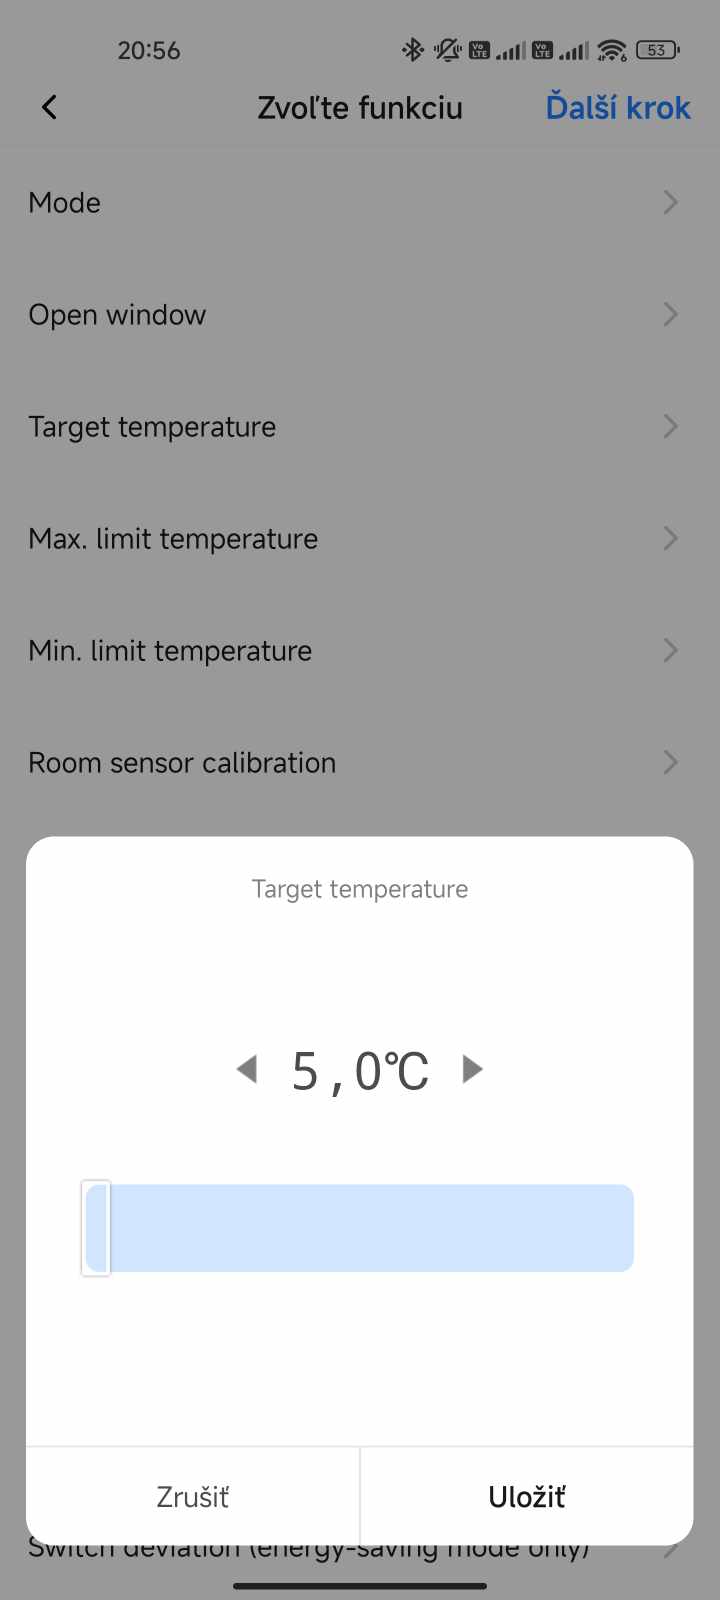
We have two options for setting the desired temperature. The first is a rotary manual selector directly on the thermostatic head and the second is the SmartLife application.
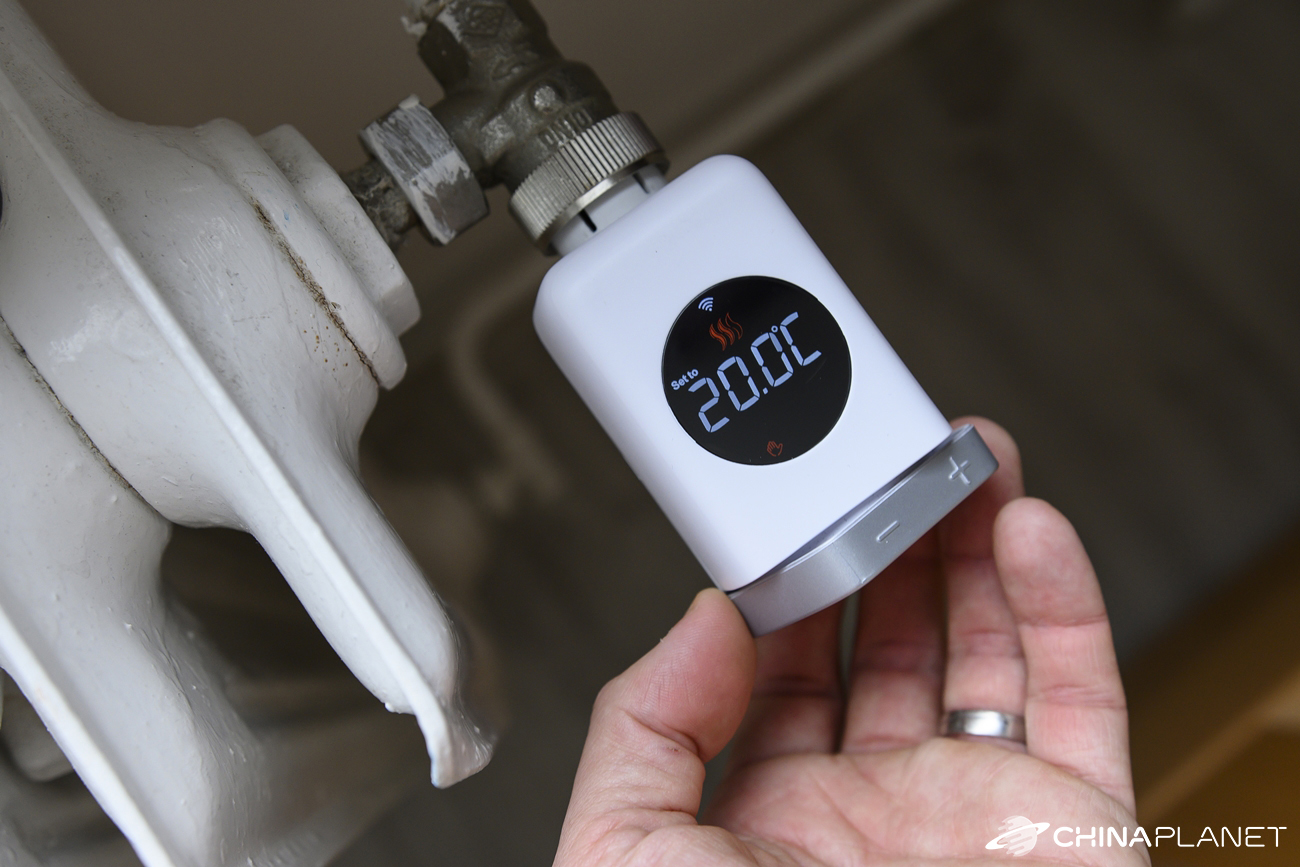
When setting using the rotary selector, we can regulate the temperature in steps of 0.5 °C upwards and downwards. It is the same in the application. We don't have the option of setting the temperature in smaller steps here either.
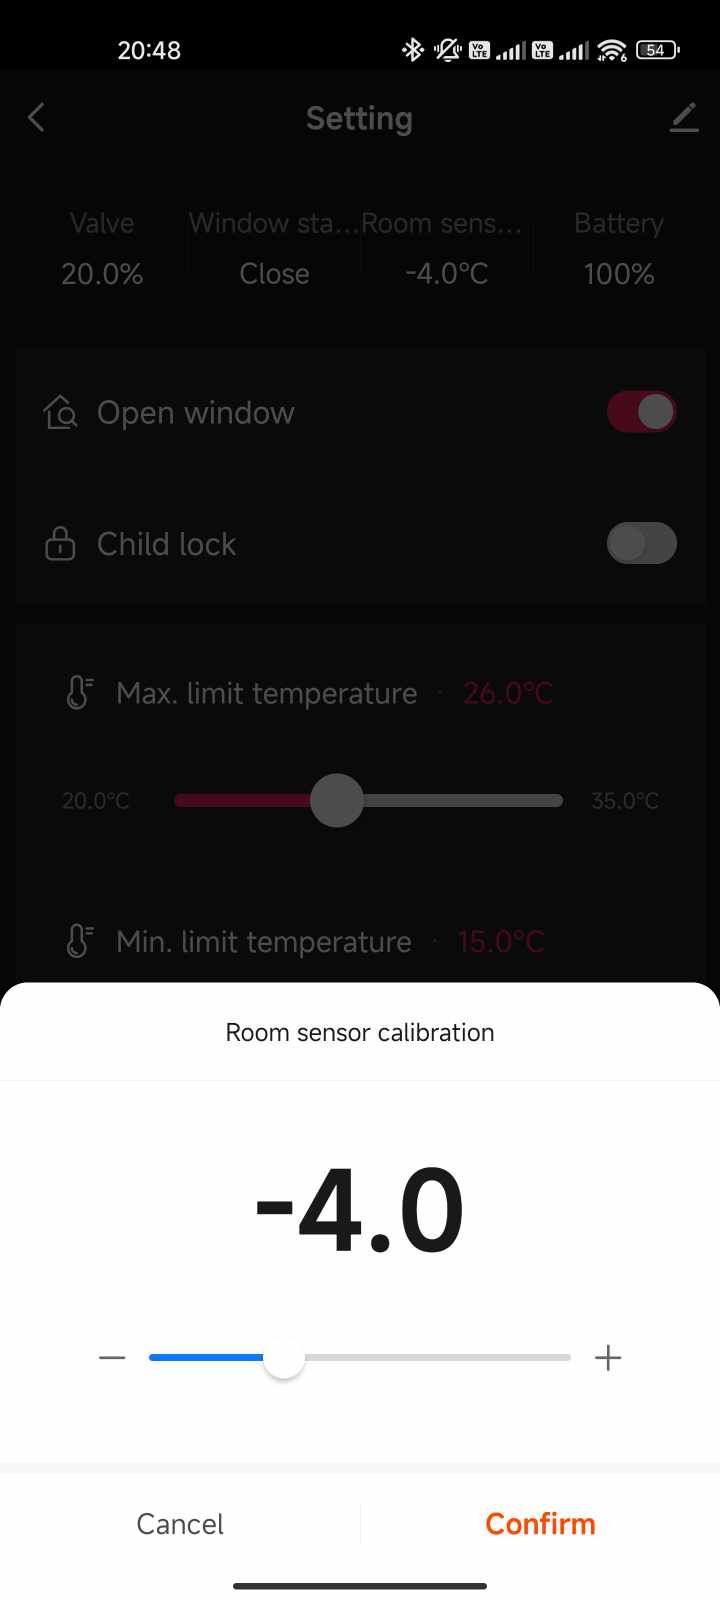
The disadvantage of such heads is the measurement of the current temperature. Since the temperature measurement sensor is located on the head, the value is not very accurate. However, we can adjust it in the application settings by calibrating the room temperature from – 10 to + 10 °C from the currently measured value in steps of 0.1 °C.
So if the head measures 25 °C in the room, but the actual temperature is 23 °C, we choose -2 in the calibration. In this way, the thermostatic head will always subtract 2 degrees from the measured value.
Unfortunately, even with the help of calibration, we were not able to set the temperature exactly so that it was always completely accurate. Despite the calibration, the actual temperature sometimes differed by several tenths to one full degree.
For a more accurate measurement, we would need the head to be able to draw information about the current temperature in the room from an external thermometer. However, it does not support such a function. We can partially bypass this through smart scenes in the SmartLife application, which we will talk about in one of the next chapters.
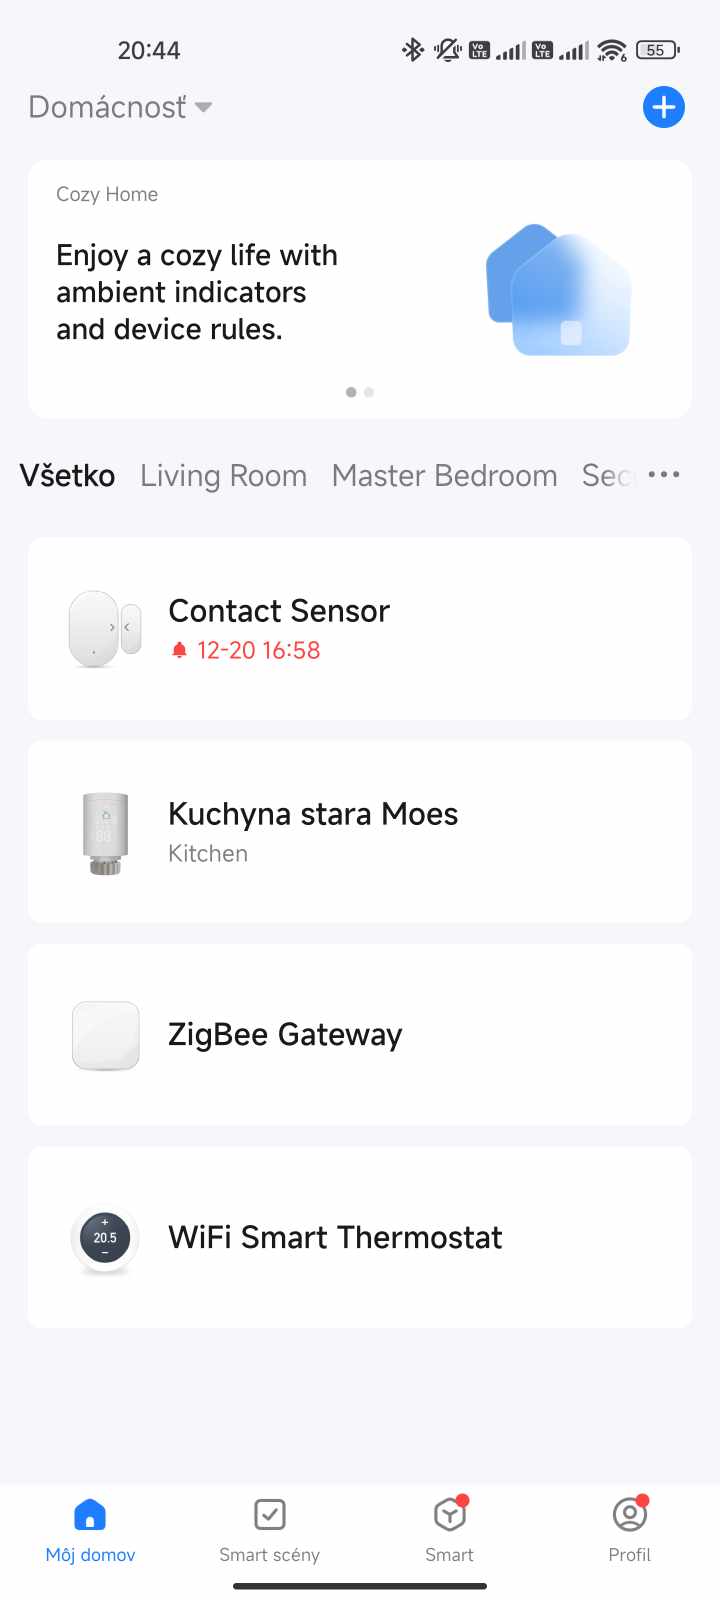
Application and its interface
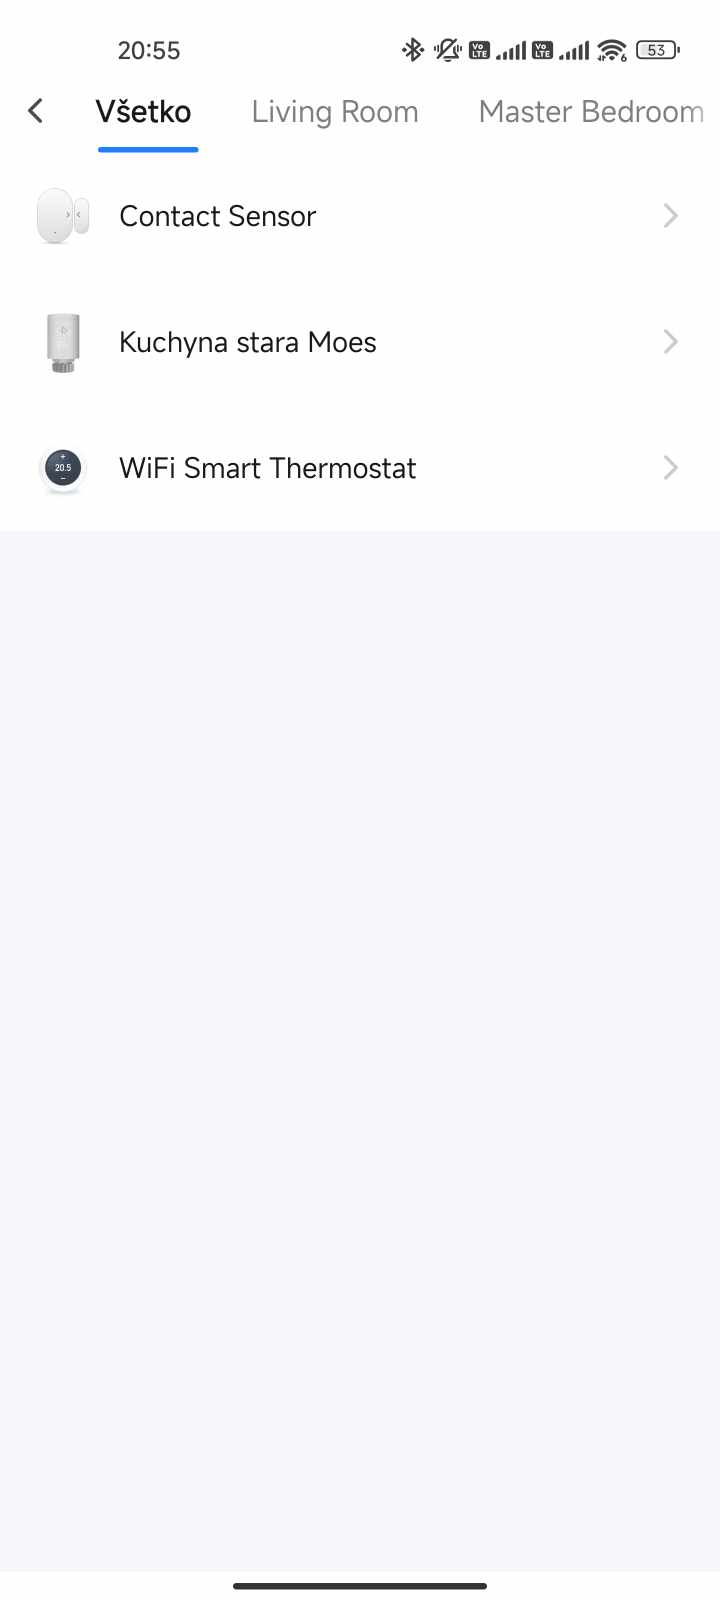
On the home screen of the SmartLife application, we see our smart devices that we have paired, divided by individual rooms. We still have the older head from MoesHouse.
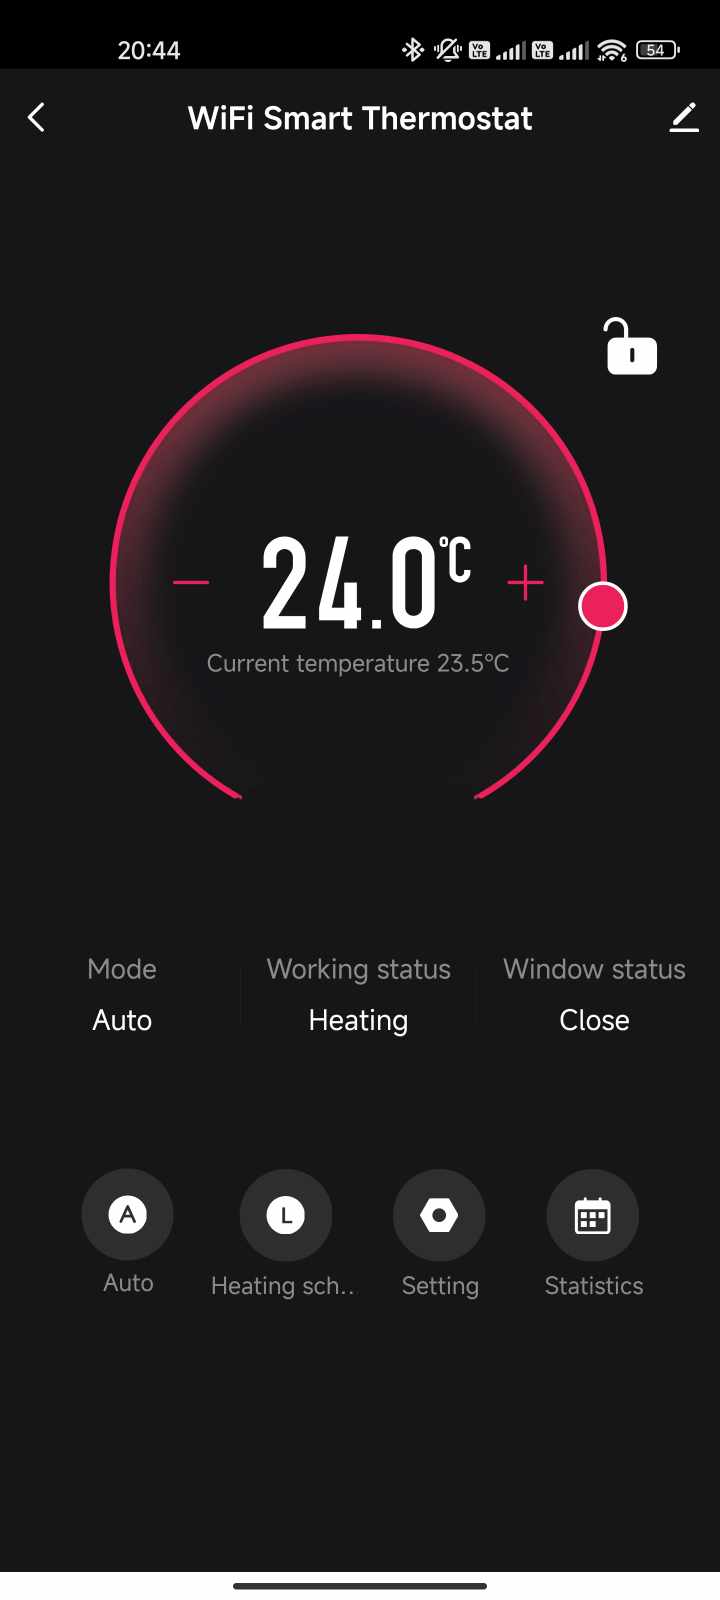
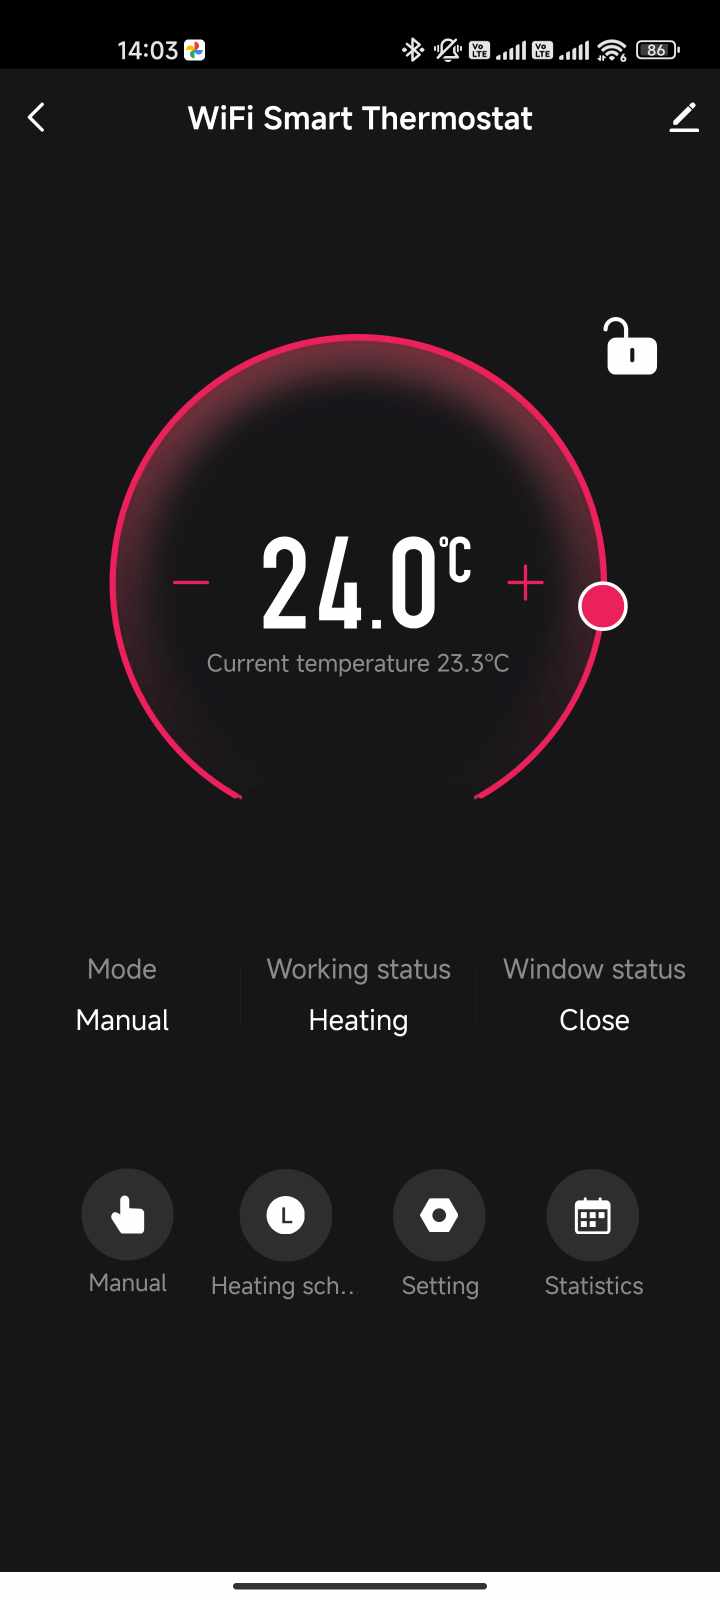
After we choose a new head (WiFi Smart Thermostat), its graphic environment with settings will appear. The dominant element is the circular selector of the current temperature, under which we also find basic information about the current mode, status and window.
Below them are four more icons that are used to change the mode, planning, go to settings and display statistics.
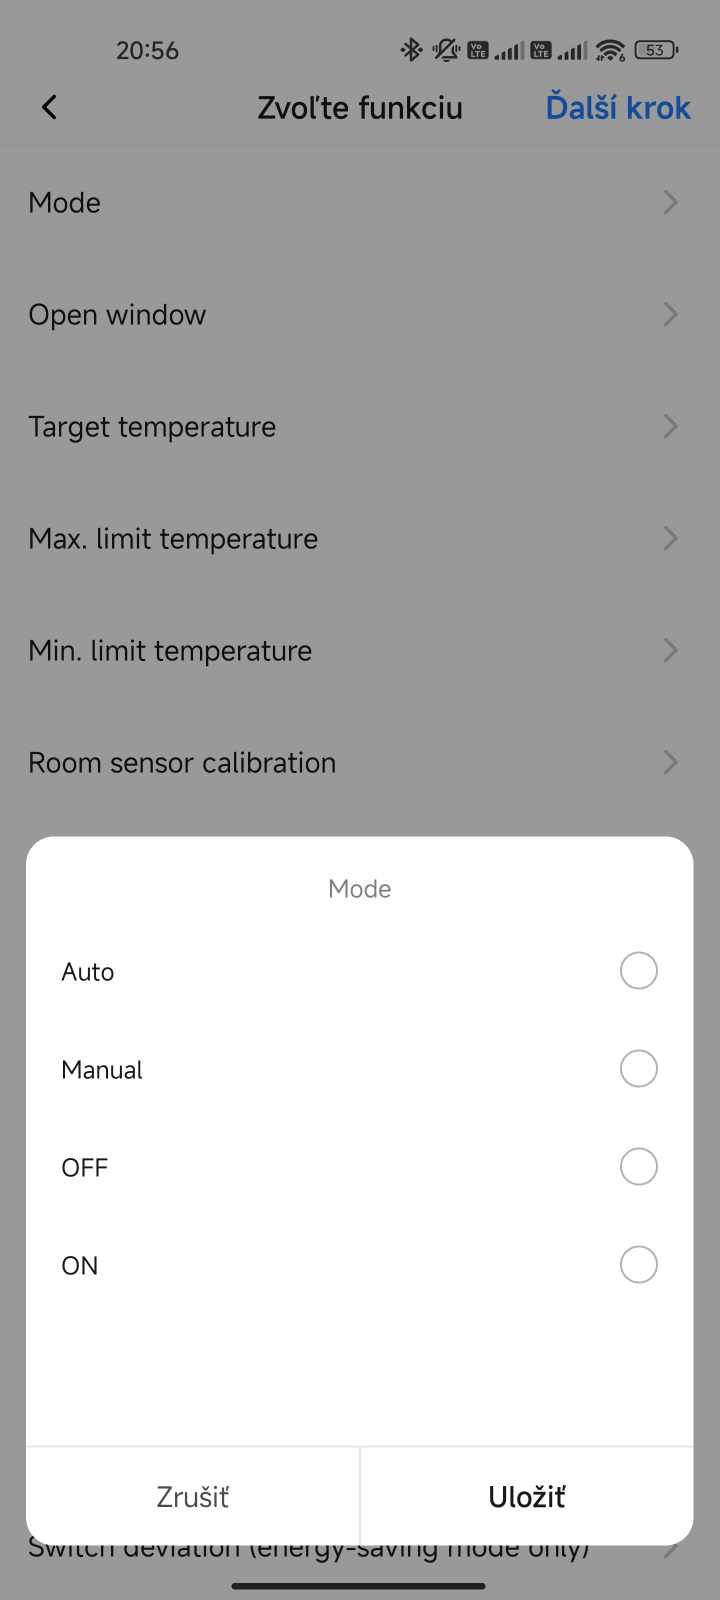
Modes and weekly planning
The mentioned modes offer Auto, Manual, OFF and ON options. The automatic mode is controlled by the scheduler, which we will talk about in a moment, the manual mode heats to a fixed temperature using the app or on the head, and the OFF and ON modes are only for turning it off completely or turning it on with the valve fully open.

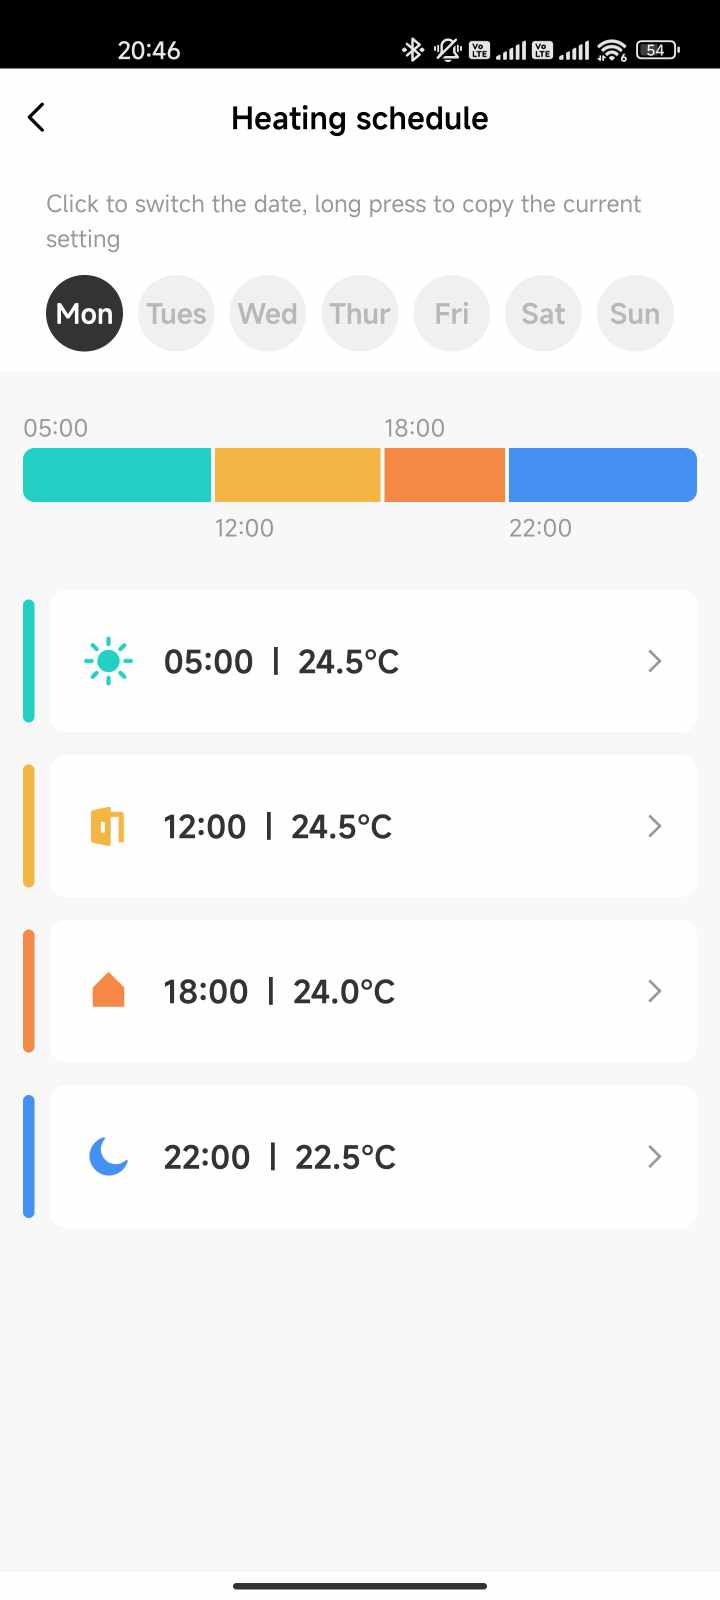
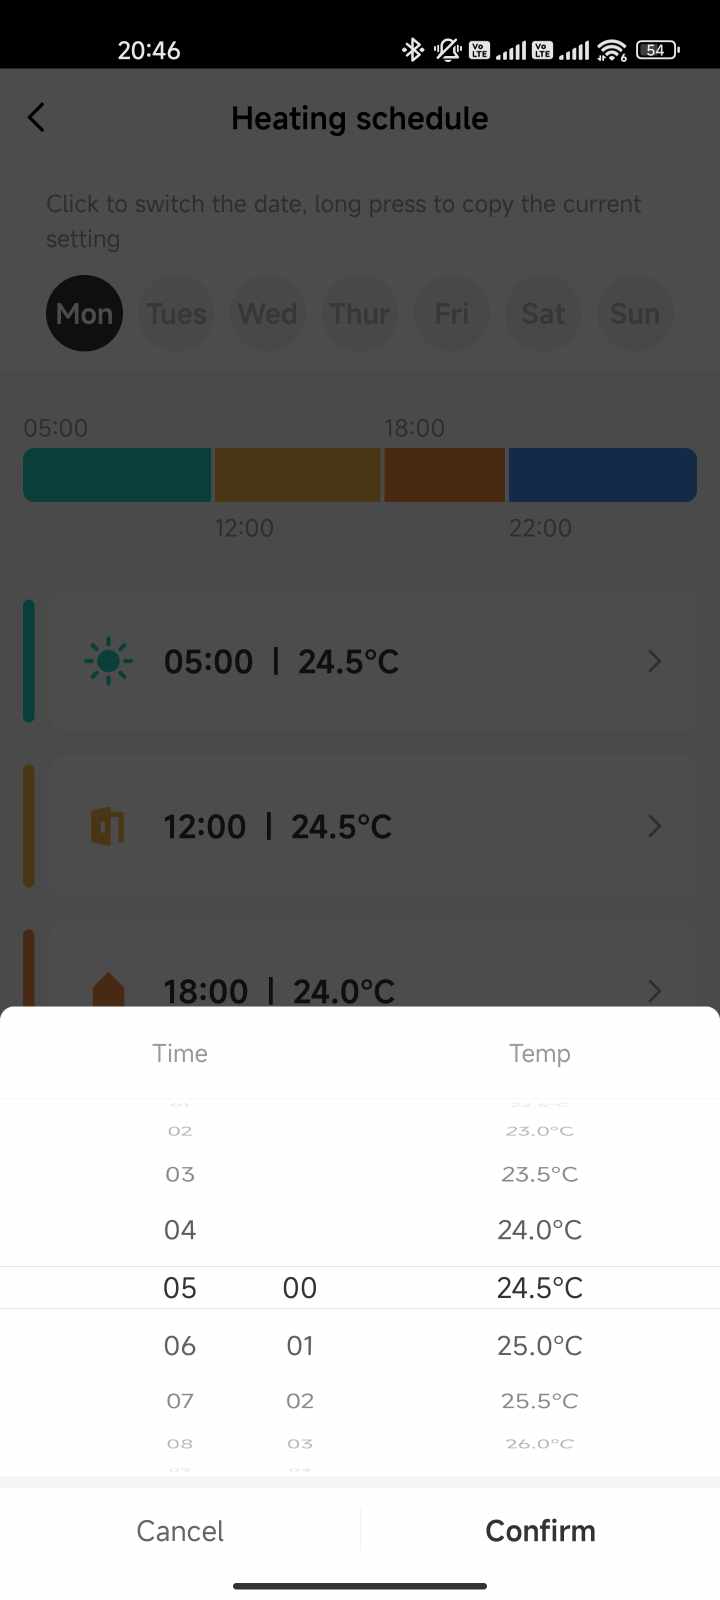
Weekly planning gives us the opportunity to set the desired heating temperatures separately for each day of the week. At the same time, each day we choose four times in which we set the desired temperature. The default times are 6:00 AM, 12:00 PM, 18:00 PM, and 22:00 PM. Of course, we can change the times to the minute and we can regulate the temperature in steps of 0.5 °C.
Unfortunately, the application does not allow you to add more than the mentioned 4 times. With the previous version of the head from MoesHouse, we had 6 times available, but the temperature could only be regulated in steps of a whole degree.
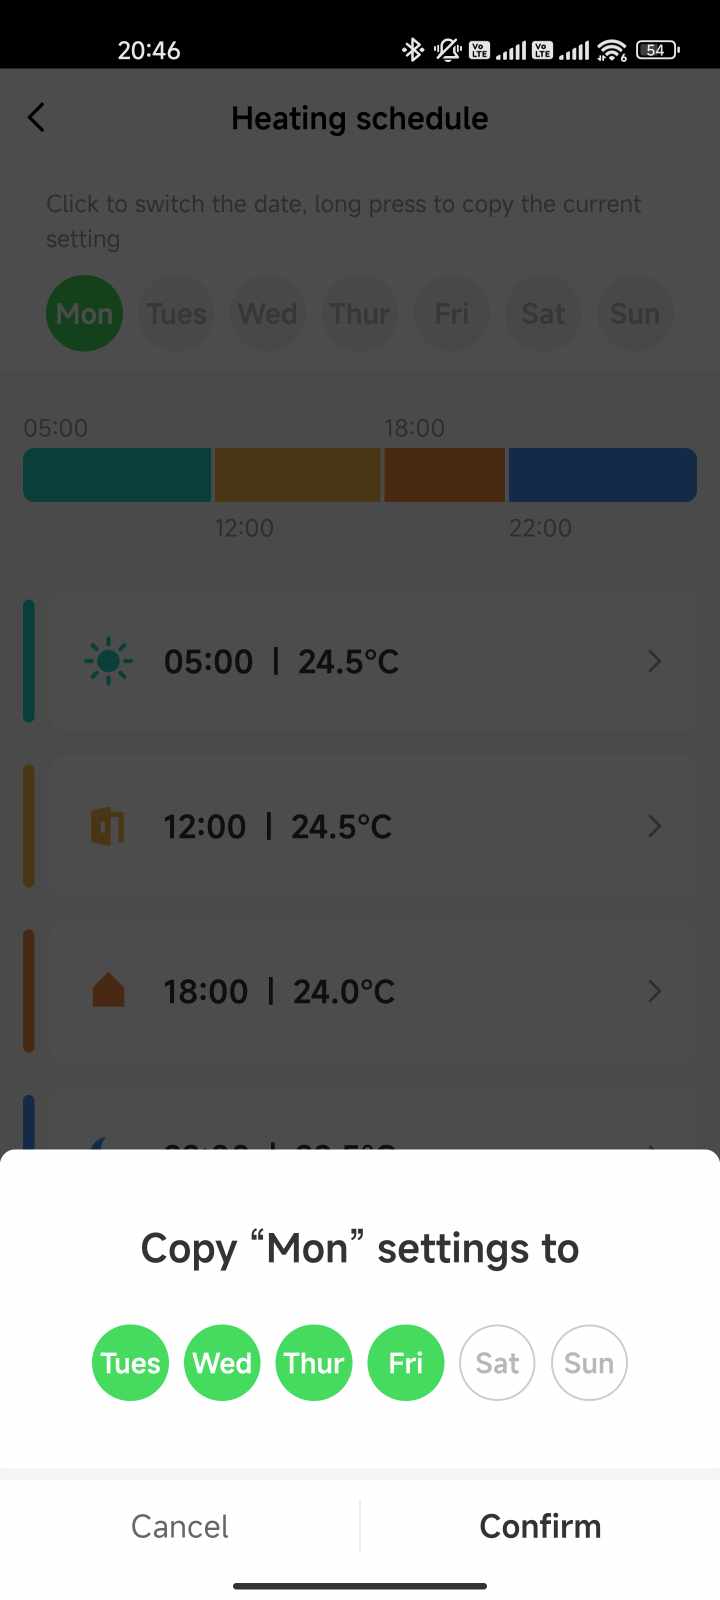
If we would like to choose the same settings for all days of the week, or copy at least some, we do it simply by holding the day we want to copy and then marking the days to which we want to apply the same settings.
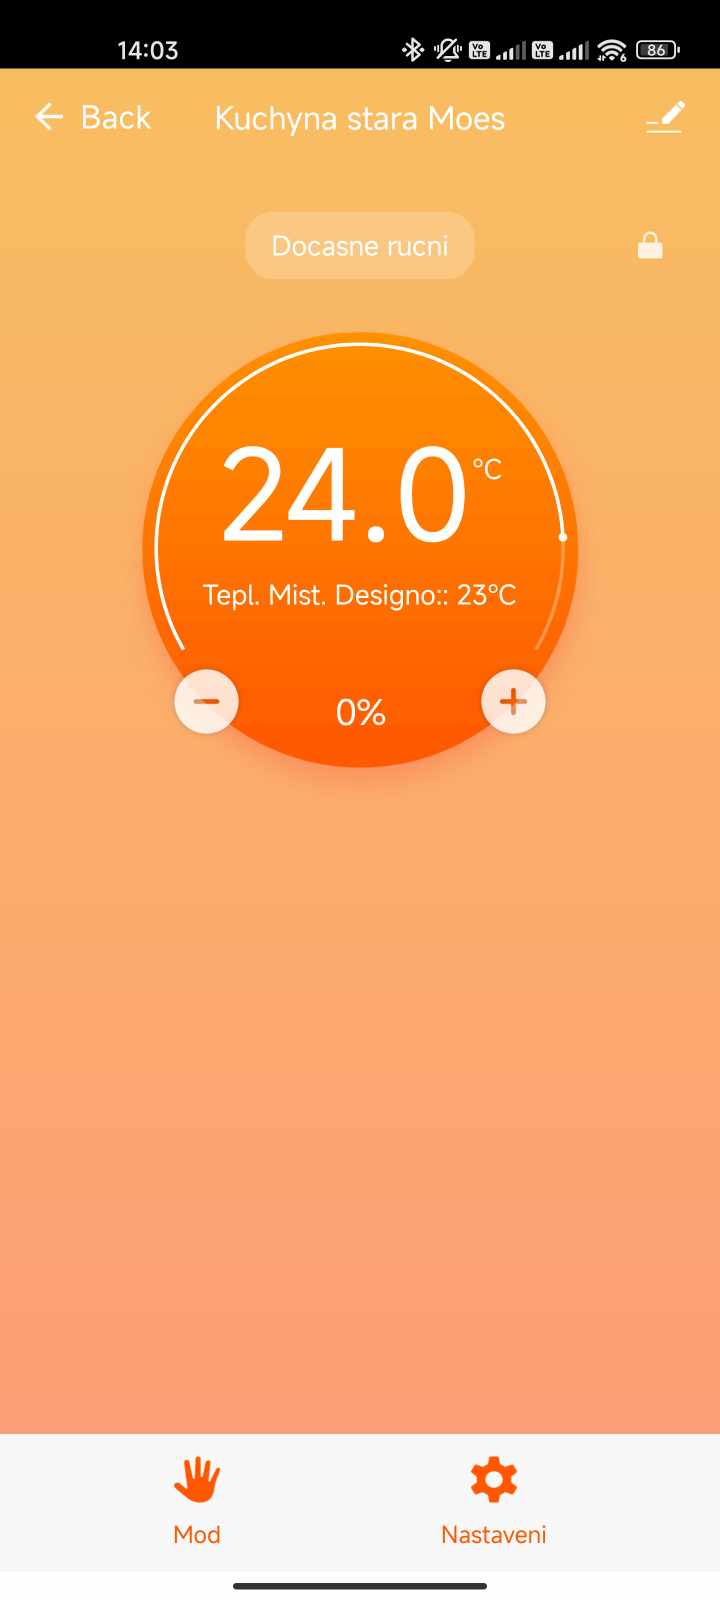
And what happens if the head is in automatic mode and we change the temperature manually on the head? In this case, we get into a temporary manual mode, when the manually set temperature is held only temporarily, until the next temperature change set for the current day in automatic mode. At that point, it returns to AUTO mode.
settings
In the settings, we can find several customization options, as well as a kind of status line with the current valve opening in percentage, the window status, the set calibration and the percentage status of the batteries.
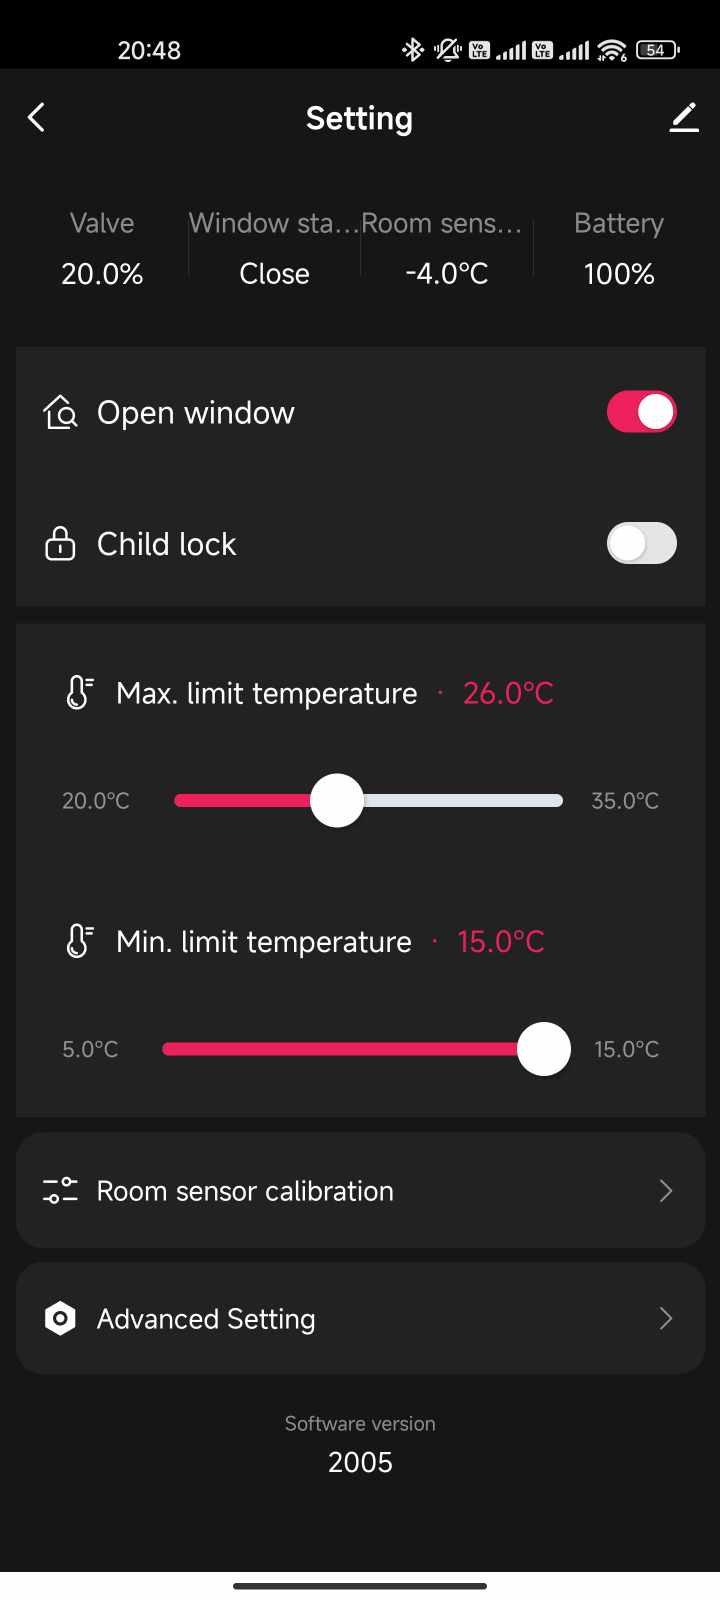
The first option in the settings is to enable or disable the open window tracking feature. If the temperature in the room suddenly drops by at least 1.5 °C within 4.5 minutes, this function will close the radiator valve for 30 minutes. Subsequently, after 30 minutes or after the temperature rises again by 1.5 °C within 4.5 minutes, it turns on the heating again. In reality, it doesn't work very well.
The second option is to activate the child lock so that children do not change the selected temperature manually using the rotary selector. Other settings define the limit for the minimum and maximum temperature that we can set. The minimum temperature can be 5 °C and the maximum up to 35 °C.
It is reasonable to set the limits so that we cannot accidentally set a lower or higher temperature than we normally set. If we set, for example, the maximum to 25 °C, we can regulate the temperature on the head or in the application only in this range up to 25 °C.
Another option is to set the aforementioned calibration of the measured temperature, and the last option is the advanced settings.
Advanced settings and system mode
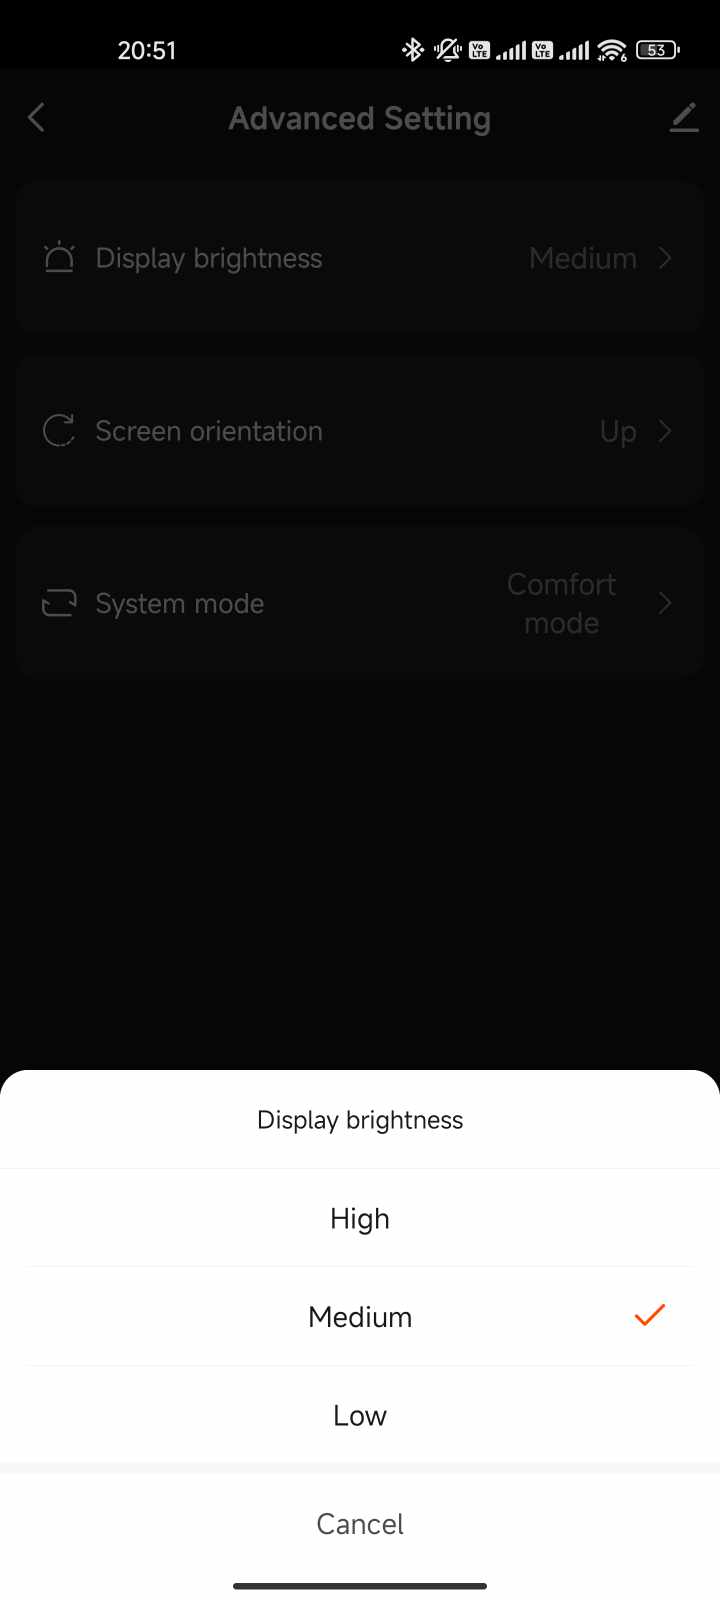
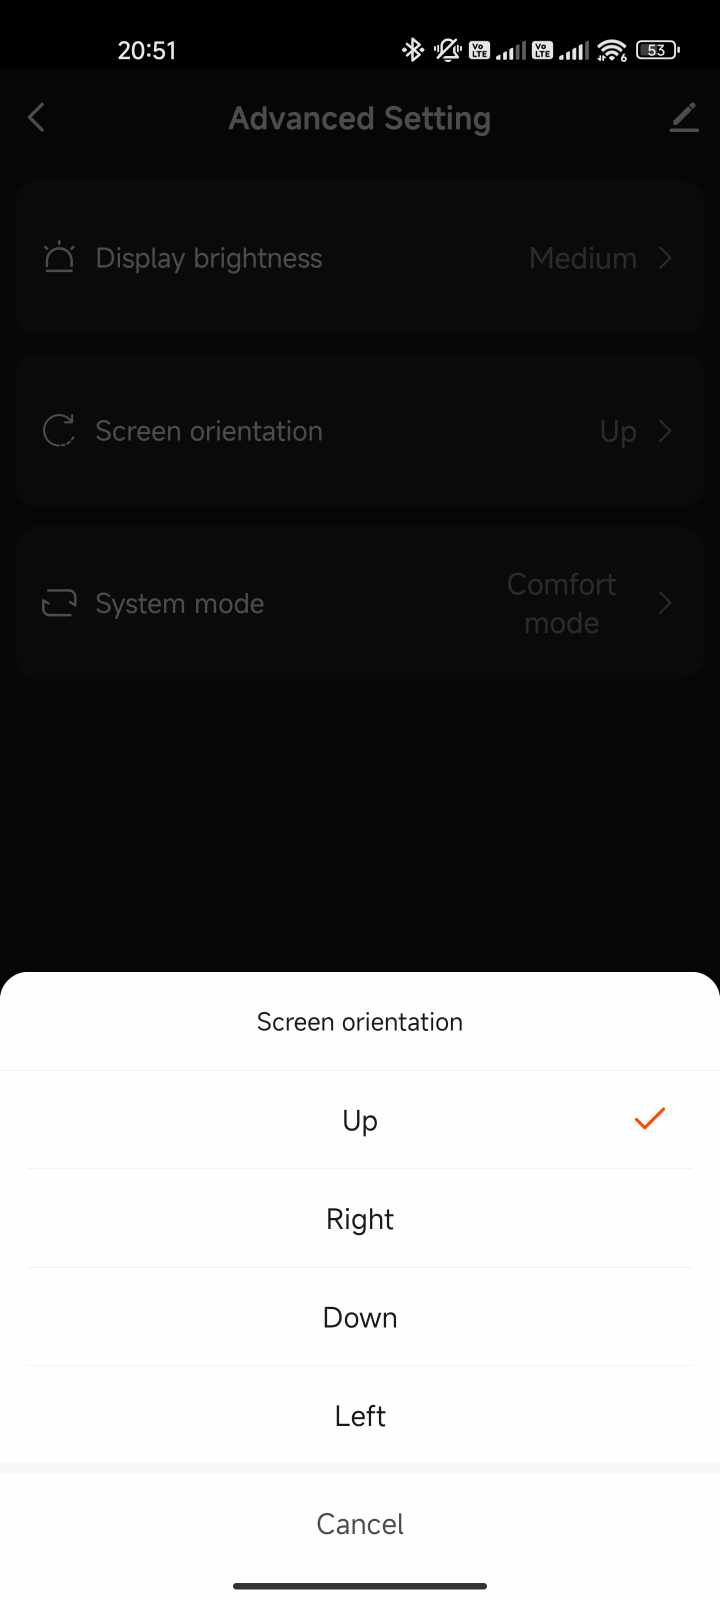
In the advanced settings, we can choose the brightness of the display in three levels and rotate the data on the display in all four directions, so that the data is always readable for us, no matter what position the head is placed on the radiator.

However, more interesting are the system mode settings, which directly affect battery life. The default is the saving mode, in which we define the deviation on the scale from 0.5 to 5 °C in steps of 0.1. In this mode, the head turns the valve on and off (at 0 or 100%) depending on the selected temperature so that the resulting temperature stays within the set deviation.
In this mode, the radiator does not heat continuously, but it always turns on and off, which is how the MoesHouse thermostatic head should achieve savings.
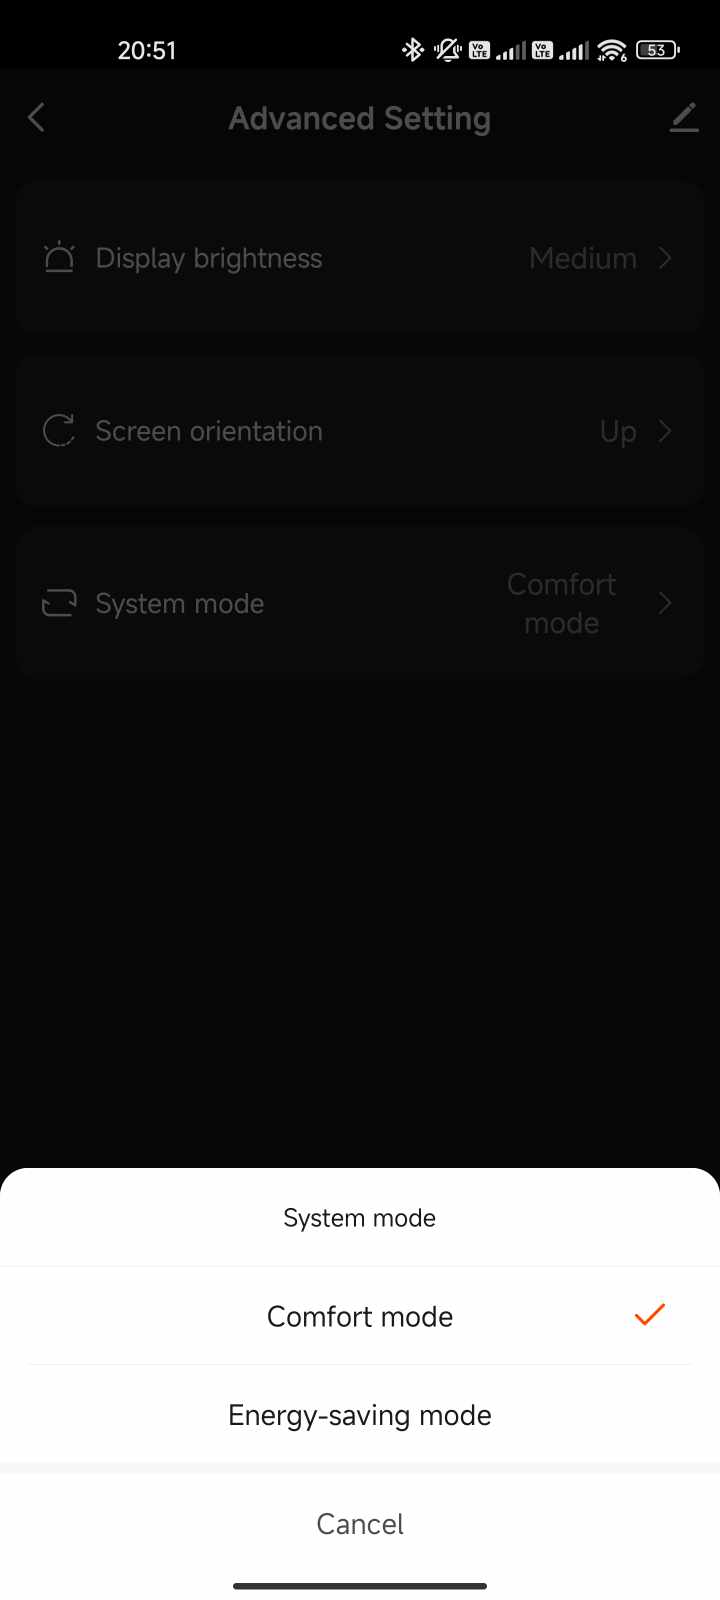
The second is the comfort mode, where we no longer set any deviation, but the head tries to keep the set temperature as accurately as possible. During this, it constantly adjusts the valve opening rate based on current needs. This mode has a higher energy consumption, so the batteries in the head will last a shorter time.
We can also see this activity of the individual modes in the status line in the settings, where the percentage opening of the radiator valve is displayed. While in economy mode we see here 0 or 100%, in comfort mode the valve opening varies in percentages with steps of 1%.
Our experience and comparison with the older version
In the review, we tried to focus mainly on your questions that you asked on social networks, since thermostatic radiator heads are quite popular at this time.
We will share a few more of our experiences. Compared to the first version of the head, which we also tested, we have a better feeling about the new version. Control using a manual rotary selector is much more convenient than working with touch buttons.
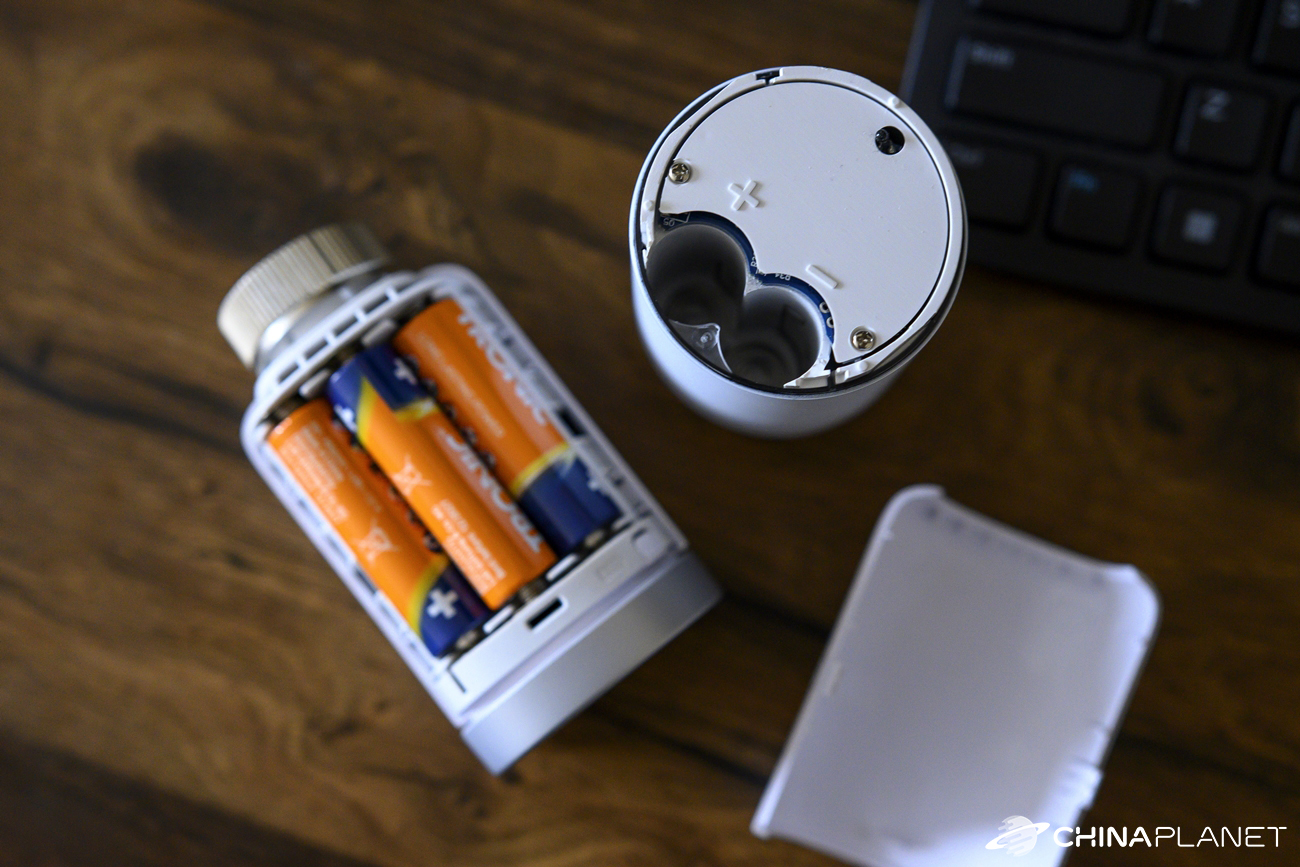
The problem with the older version was the poorly designed battery cover, which broke very easily. Here, the cover simply slides out and snaps nicely into place when closed. We also praise the use of a metal thread for attachment to the valve.
With the older version, it sometimes happened that we manually set the desired temperature, but somehow it was not saved, and after closing and opening the application, the temperature was set to the original, that is, it did not change. Here, for a change, the application for manual temperature change sometimes responded incorrectly. Sometimes we observed a kind of longer delay, as if there was a problem in the communication between the application and the head.
Unfortunately, we lost some functions compared to the older version. For example, the so-called holiday mode, with which we could reduce the temperature for a defined number of days with one click. We also lost the BOOST mode or weekly planning separately for weekdays and separately for the weekend with easy switching between them (weeks 5+2, 7, 6+1).
Many people are certainly interested in whether they can hear the operation of the head and whether this sound is disturbing during sleep. The motor in the thermostatic head can be slightly heard when the room is completely quiet, and it hums, so to speak, when the position of the radiator valve is changed. We personally didn't mind such a sound, and we never woke up to it during our sleep. During the day, during the normal daily bustle, we did not notice this sound at all.
Smart scenes
If you want to take your smart home to a higher level, the application offers the creation of your own smart scenes. Scenes are one of the most interesting elements of a smart home.
In order to make the best use of this functionality, you will need other smart sensors, such as temperature, humidity or door and window sensors, or other smart devices.
We currently only have one door and window sensor available, which is connected to our smart home using a ZigBee gateway. It is also available in a WiFi version, but you can also use different types of devices in the scenes, since communication takes place via the cloud.
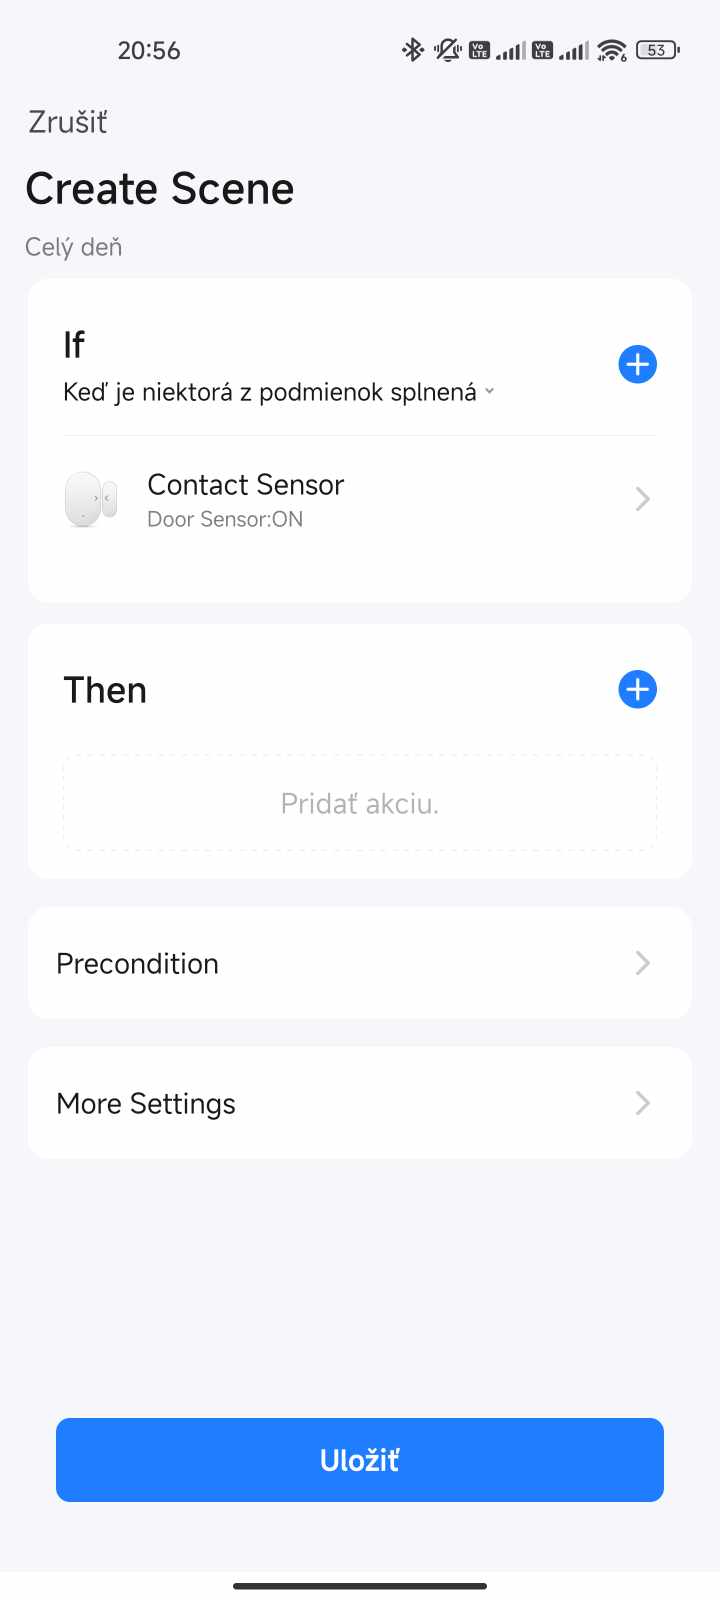

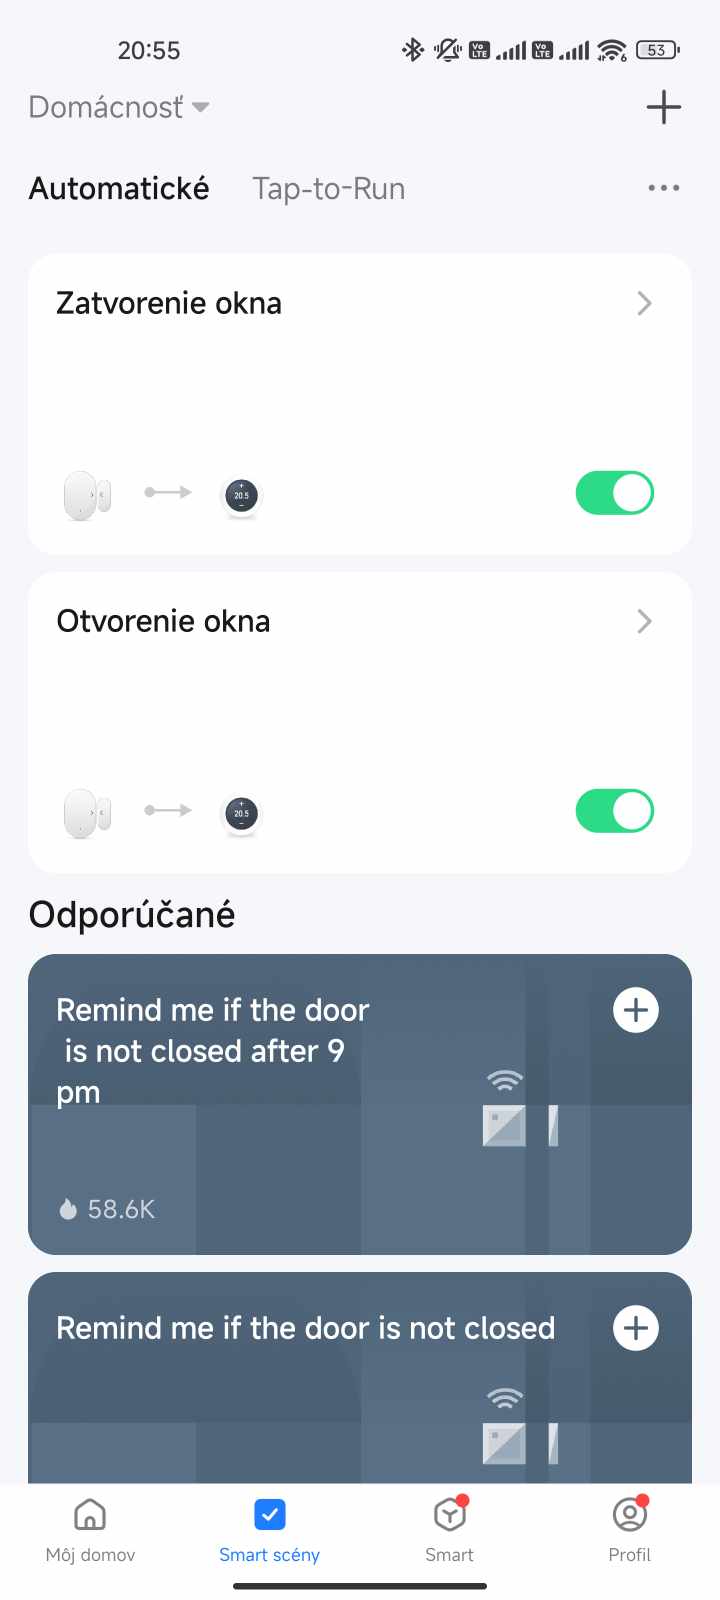
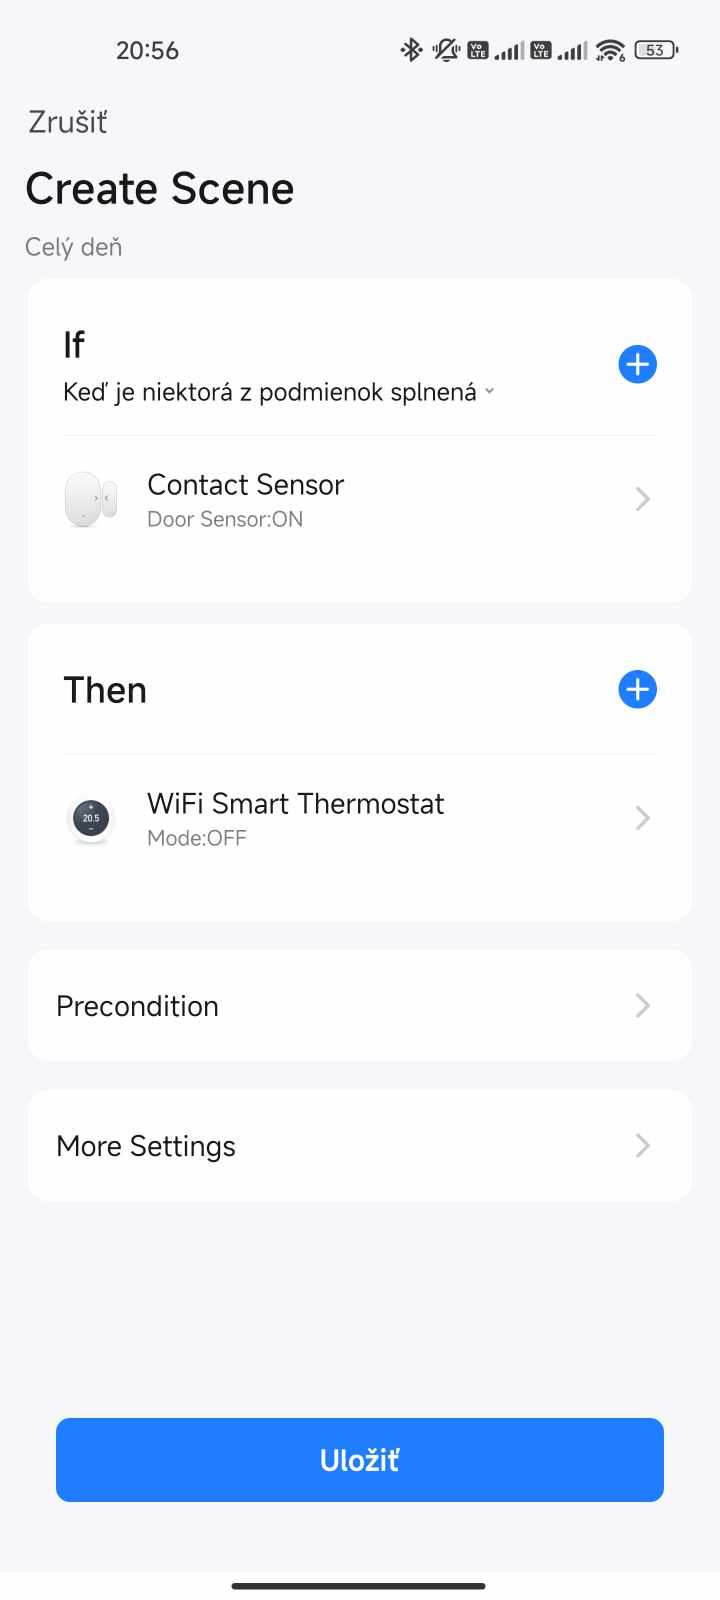
Using the sensor, we set up a couple of scenes. One to close the radiator valve if the sensor detects the opening of the window and the other to return to automatic heating mode when the window is closed.
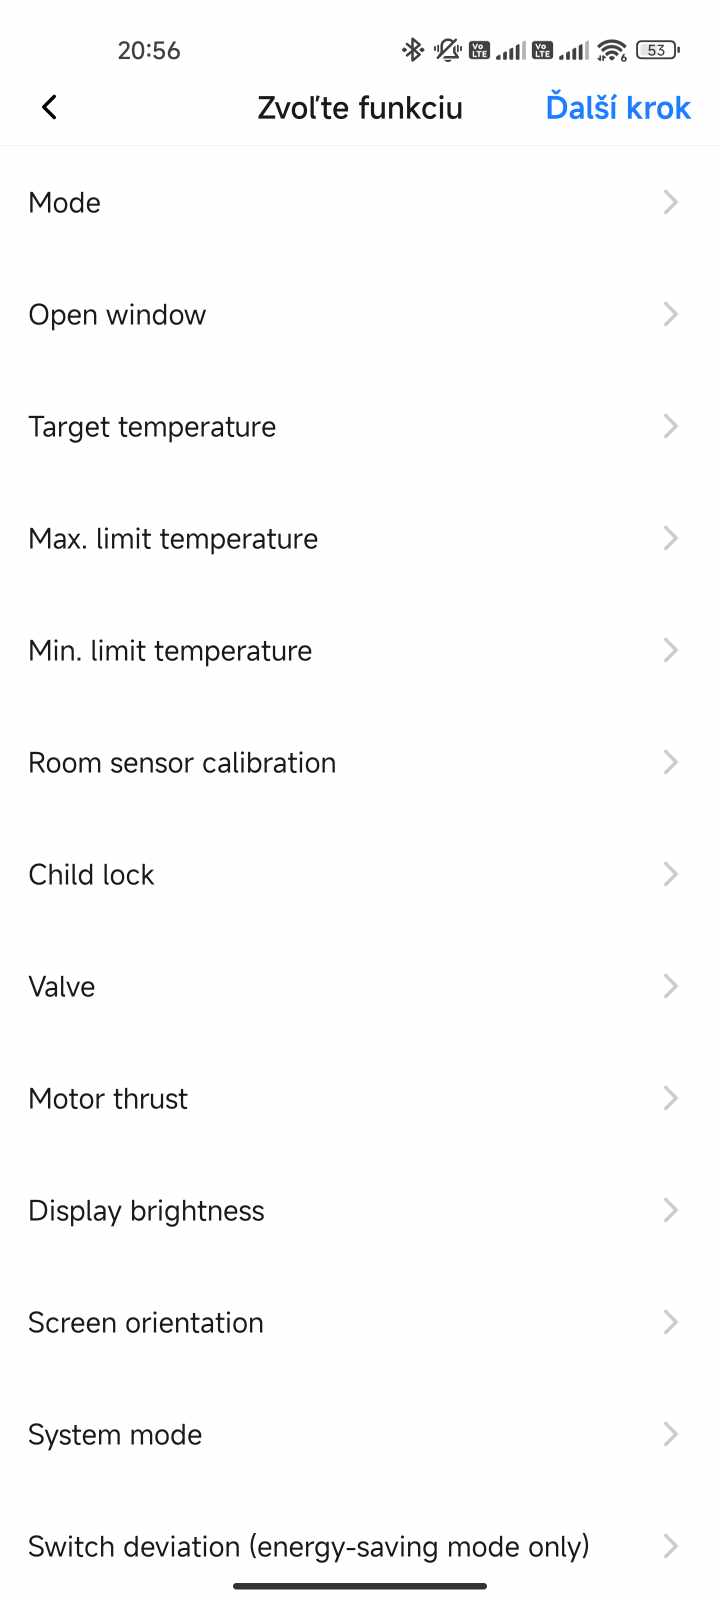
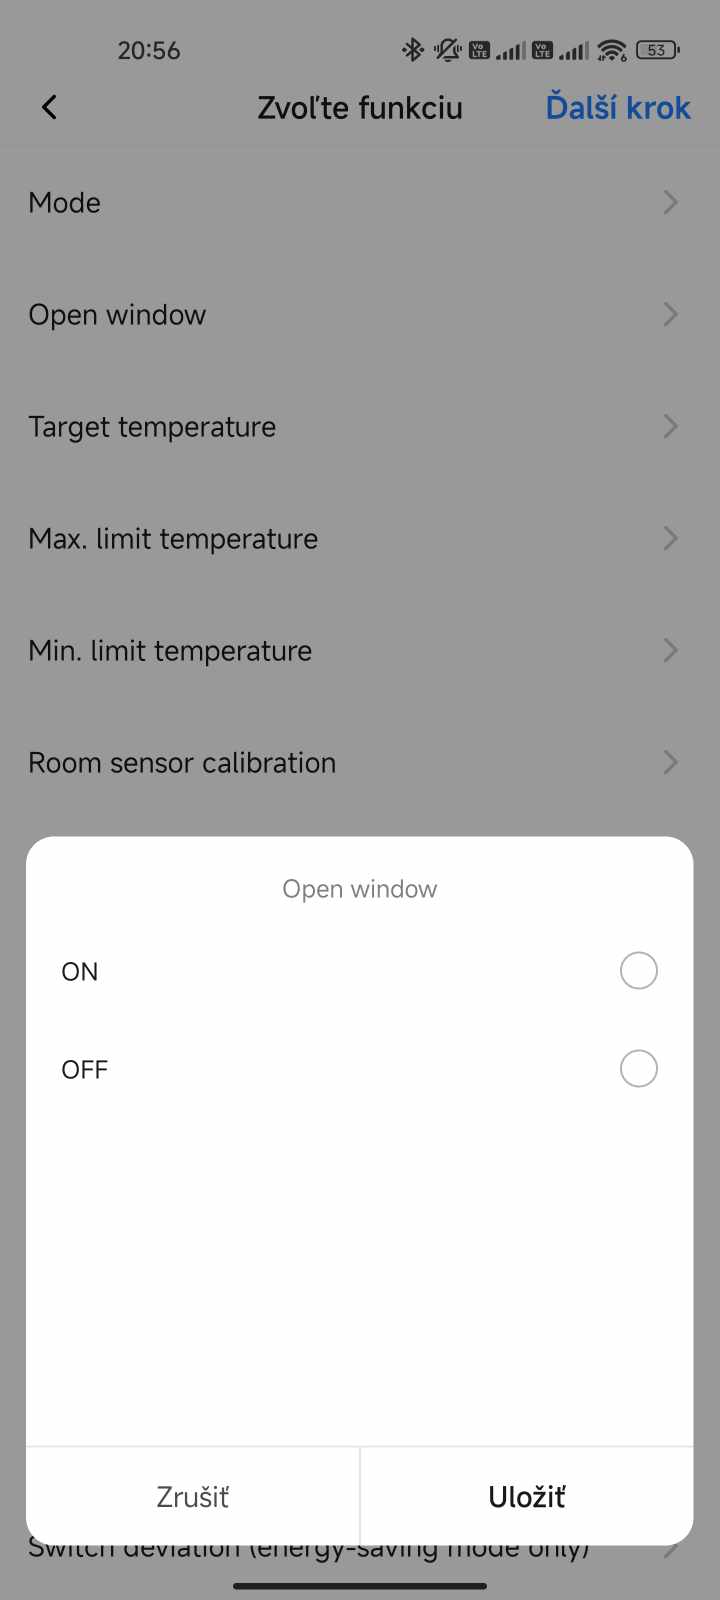
When creating scenes, all settings of the thermostatic head are available, such as changing the mode, temperature, limits for the maximum and minimum temperature, calibration, child lock or even the brightness of the display, its orientation, etc. We can also set the opening of the radiator valve in percentages, in steps of one percent.

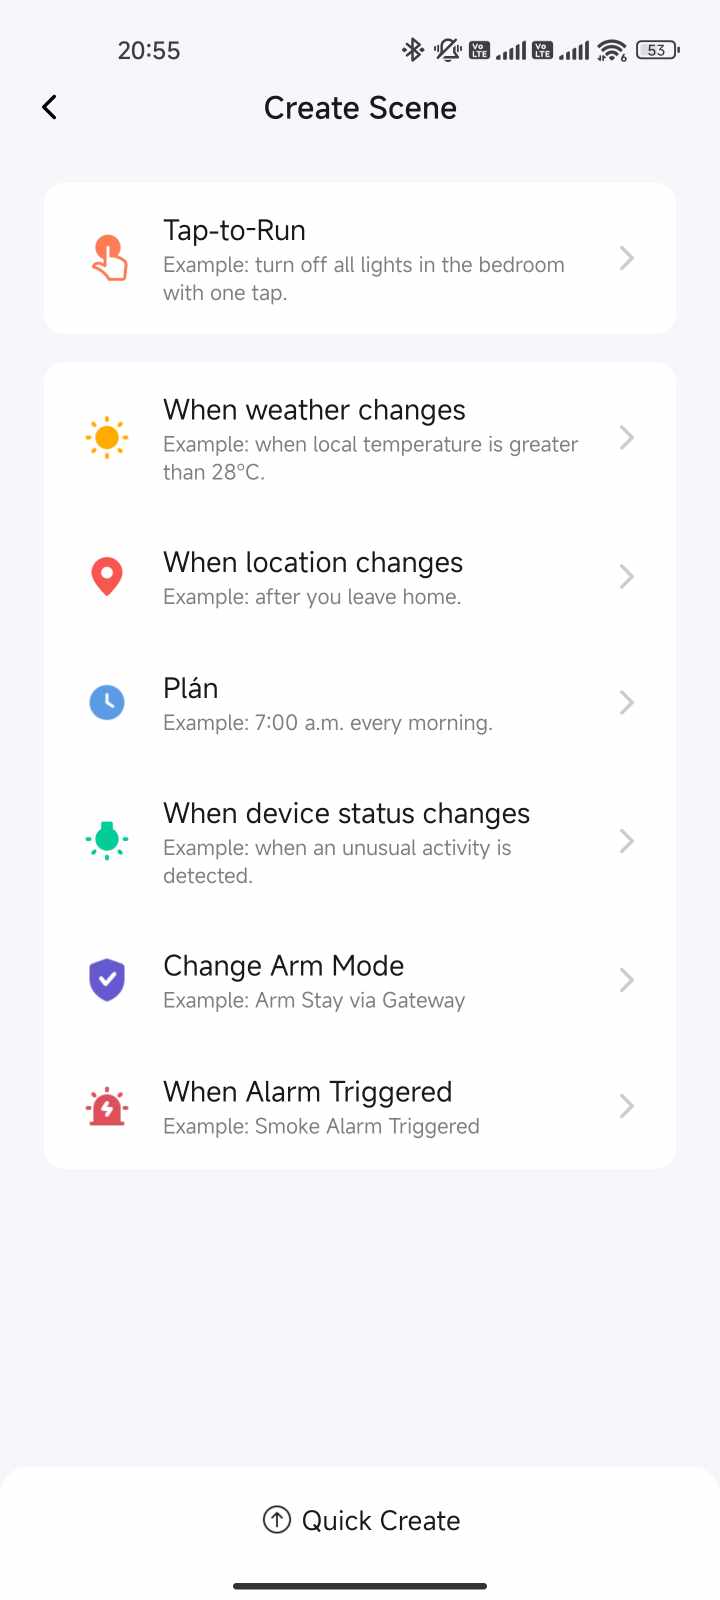
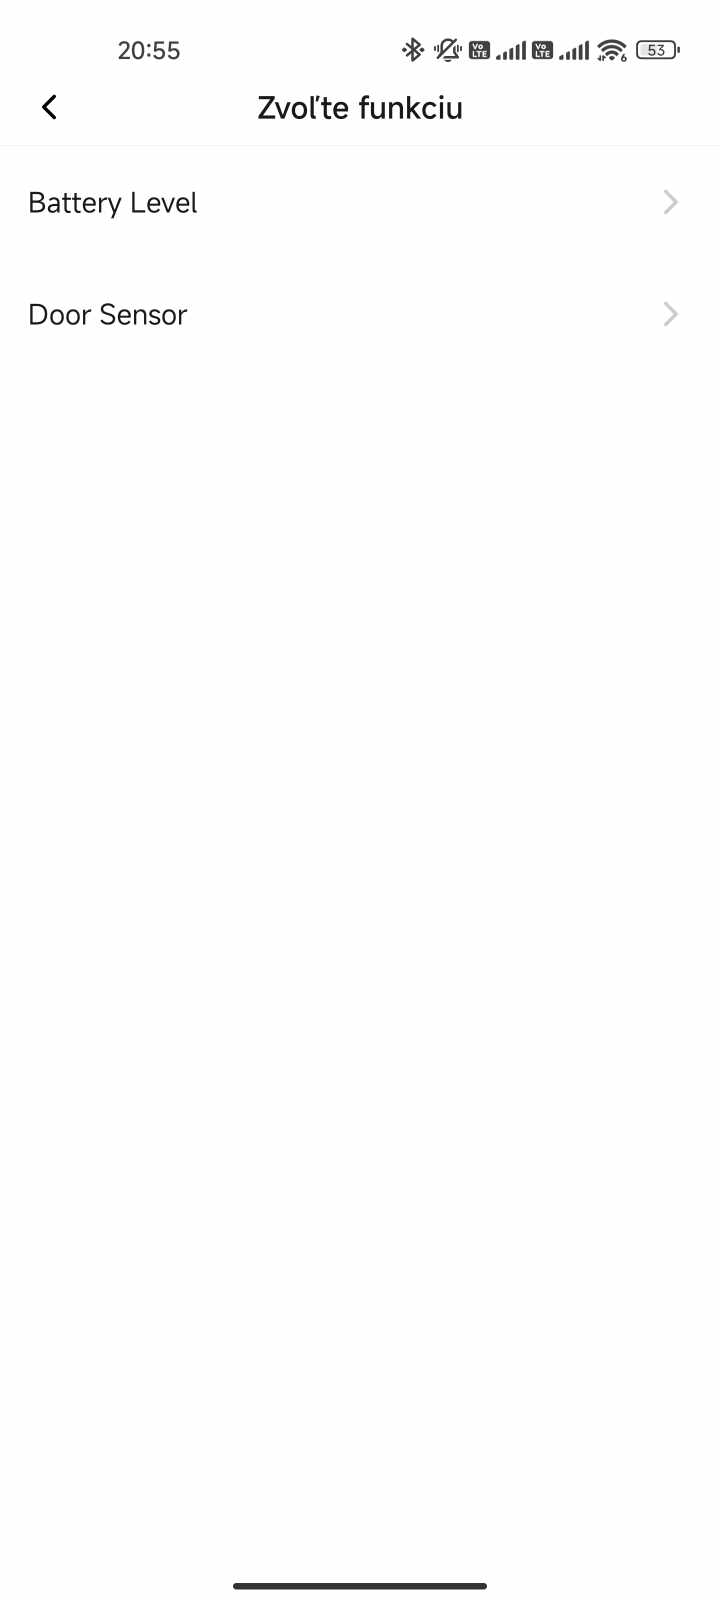
We can create scenes even without additional devices. A condition for starting the scene can also be some condition, for example the battery condition or the time or weather change. We personally set the scene to automatically dim the display brightness every day at 19:00.
It's up to you how you use these scenes. However, it is definitely an interesting option for a real smart home.
Battery life and statistics
The life of three AA batteries should be weaker compared to the ZigBee version. WiFi generally has a higher consumption and the total endurance also depends on whether we use the head in energy saving mode or in comfort mode.
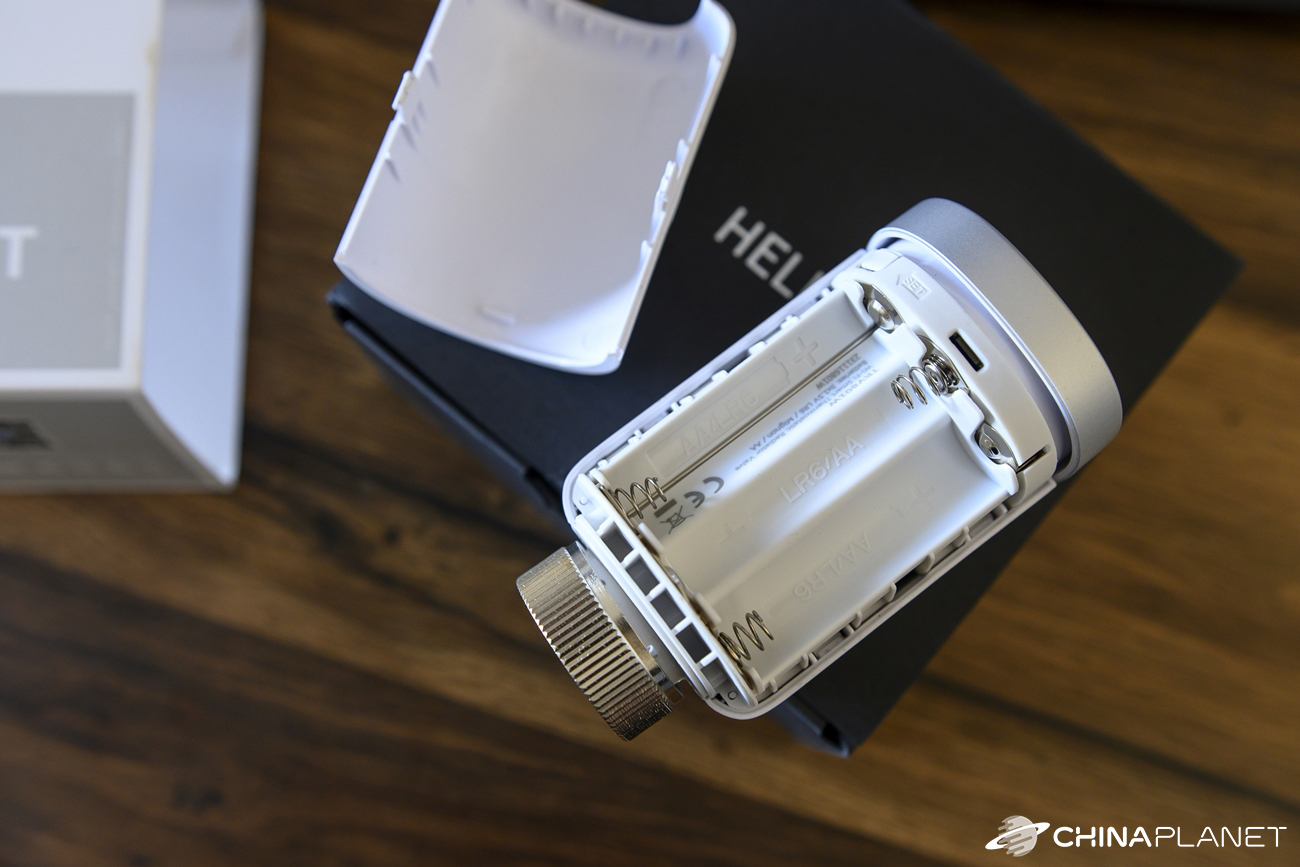
We used completely ordinary, cheap alkaline batteries in the head, which we bought in a supermarket (Tronic brand). After three weeks of use, the capacity dropped only minimally and the app showed 98% battery.
The MoesHouse thermostatic head remains connected to our radiator, so we will keep an eye on the temperature during the next period and we will update the article later.
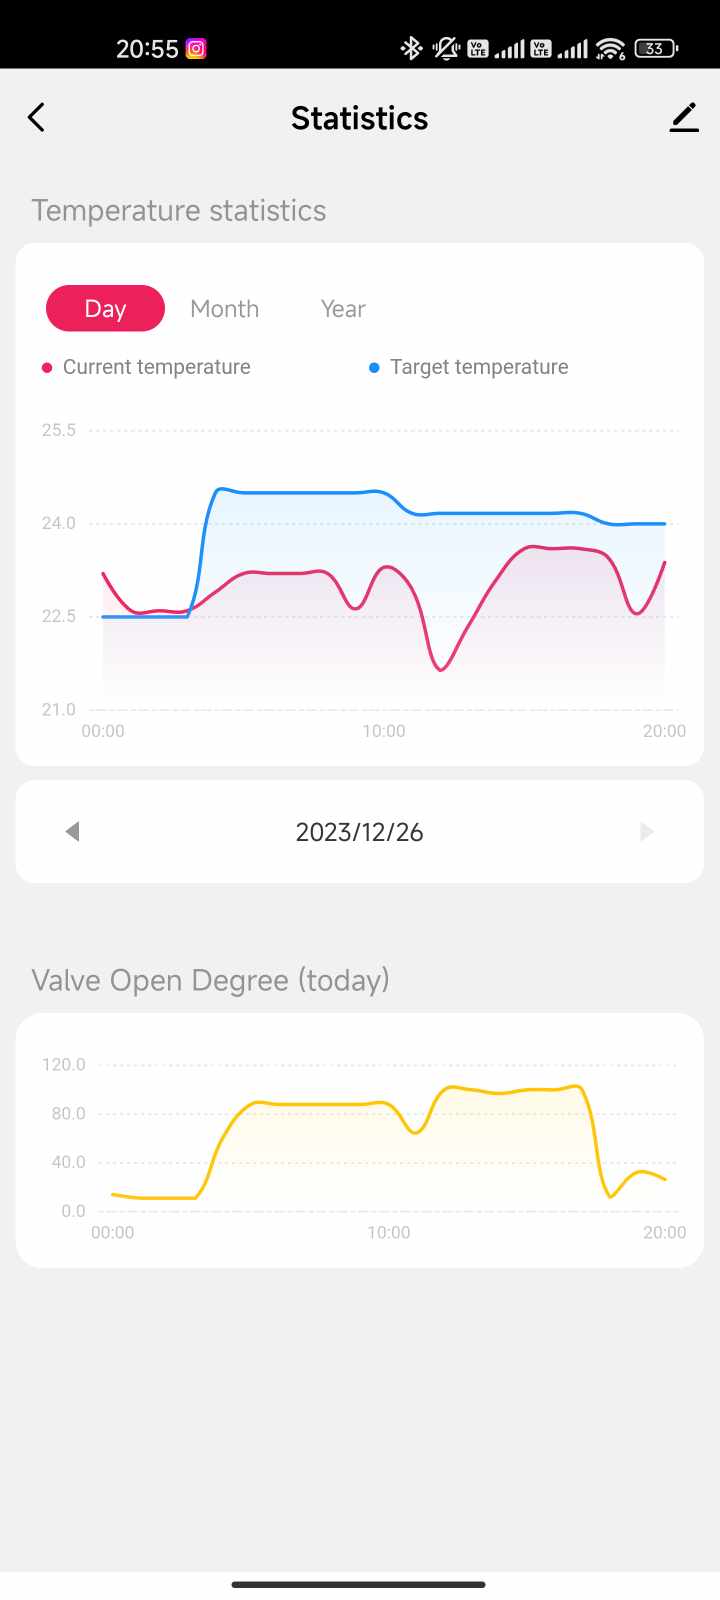
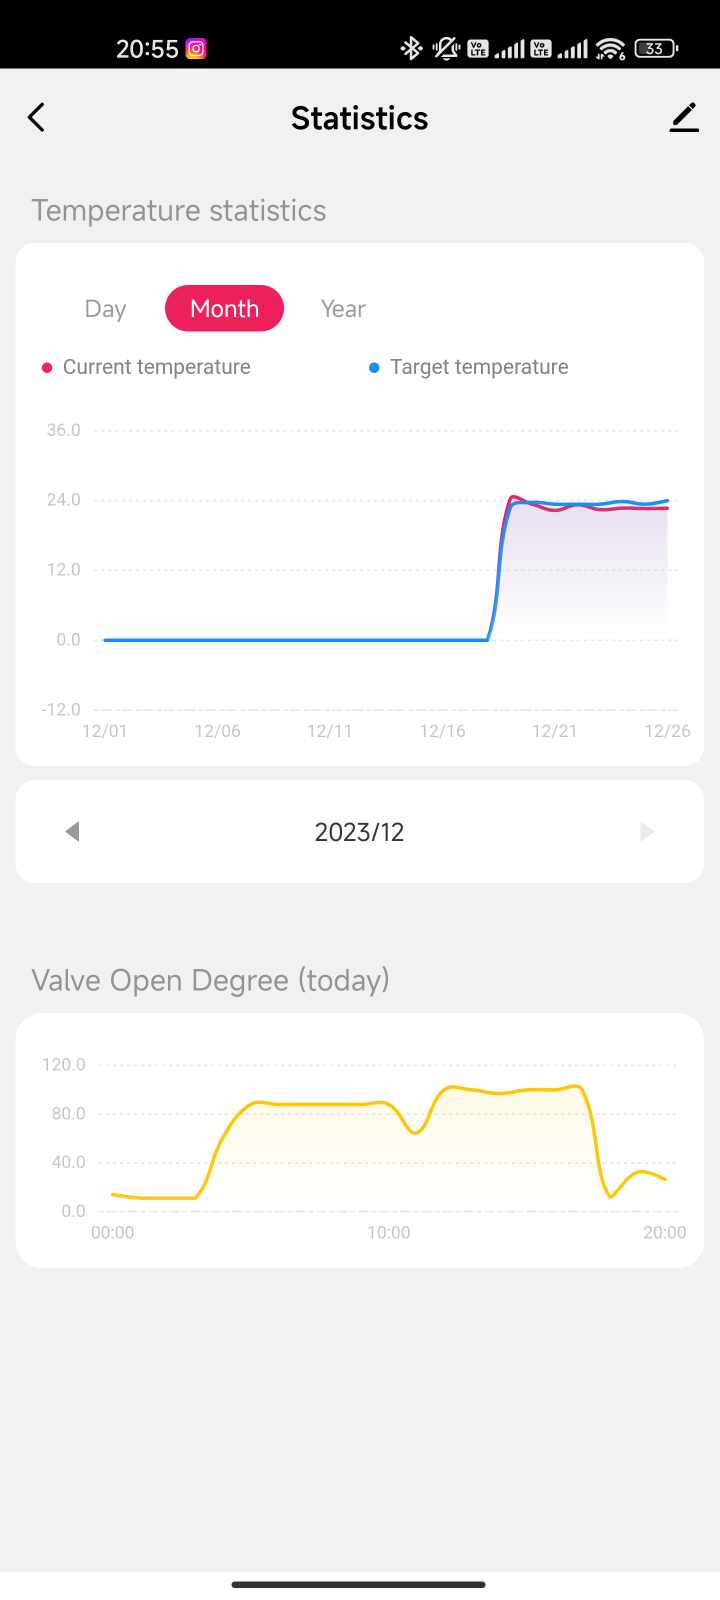
Statistics are one of the options offered by the application. The first graph shows the target and current temperature, while the second shows the valve opening rate. In the second graph, we see statistics for the current day only. The graph with the current temperature does not seem very accurate to us.
MoesHouse thermostatic head: Final evaluation
The latest version of the MoesHouse intelligent thermostatic head offers several improvements compared to its predecessor. It comes with a completely new design including a round color display, a metal nut for mounting on the radiator valve and a new battery location.
Also gone is the impractical touch temperature control, which was replaced by a rotating cuff in the upper part. The Moes radiator head is also available in the WiFi version that we tested. It does not need any gateway and thus connects directly to the home WiFi network.
The application environment is also new, and overall we are more satisfied with this head than with its predecessor. The only drawback is perhaps the measurement of the current temperature in the room, which is not very accurate and for its calibration it is difficult to find a value that would not need to be changed any more.


Is it possible to set the Slovak language somewhere like with the older head? I couldn't find it anywhere
Nice review. You write that we can adapt the temperature measurement on the head to the external temperature via Smart scenes... How to do that? I have a Tuya external temperature sensor, but I somehow couldn't set it up. Thank you.
It cannot be done fully. Just by setting the scenes according to the external thermometer, i.e. to what temperature should the heating be according to the temperature from the external thermometer. It's hard work this way. It cannot be set to draw the temperature from an external sensor and adjust the valve accordingly.
V this video that is nicely explained.