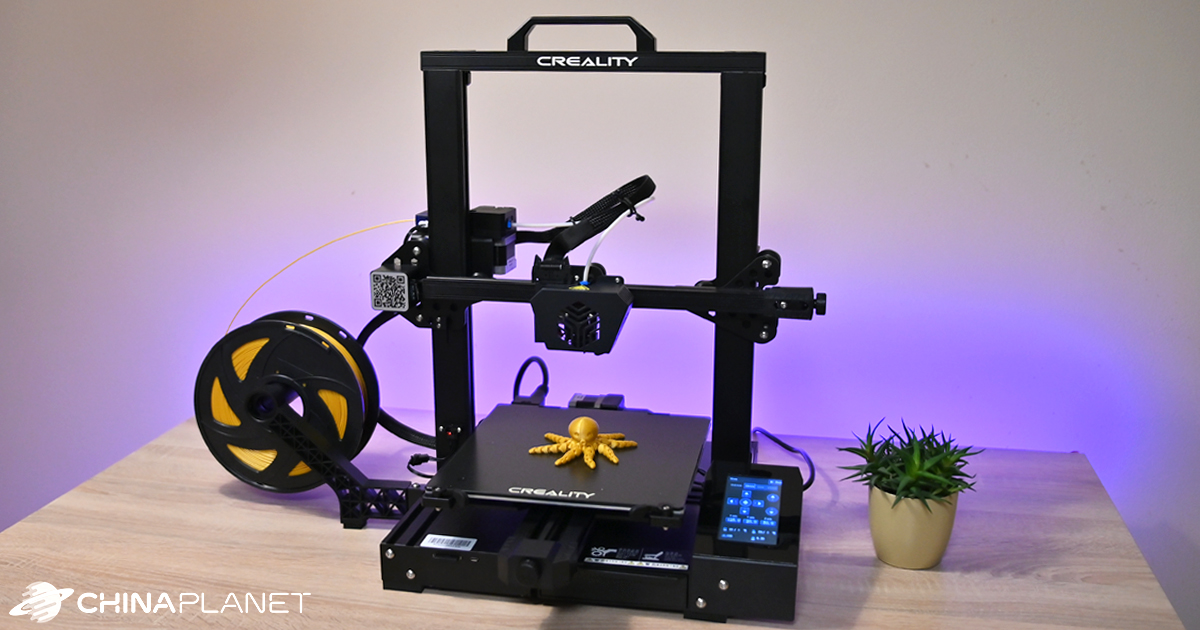
Are you interested in 3D printing, but have no experience in this field? We tested a 3D printer in the editorial office Creality CR-6 SE, which should be suitable even for complete beginners who have never used a 3D printer. It's true? Can even a person without any experience drive it? Read our review and learn more.
Where to buy Creality CR-6SE
3D printer Creality We purchased the CR-6 SE for the purpose of this review from our favorite partner Banggood. The printer was available in a European warehouse so delivery was very fast. It was brought to us by a courier without any fees within a few working days.
Creality CR-6SE

EU warehouse
EU warehouse

Express delivery from a European warehouse free of duty and VAT.
This product will be delivered to you expressly from your local warehouse in Europe. Delivery from EU warehouses usually takes 7-10 days and delivers courier. No extra charges, no customs duties or VAT.


Express delivery from a Polish warehouse free of duty and VAT.
This product will be delivered to you expressly from a local Polish warehouse. Delivery from Poland usually takes 7-10 days and is delivered by courier. You do not pay any additional fees, no duties or VAT on delivery.
Basic features of a 3D printer Creality CR-6SE
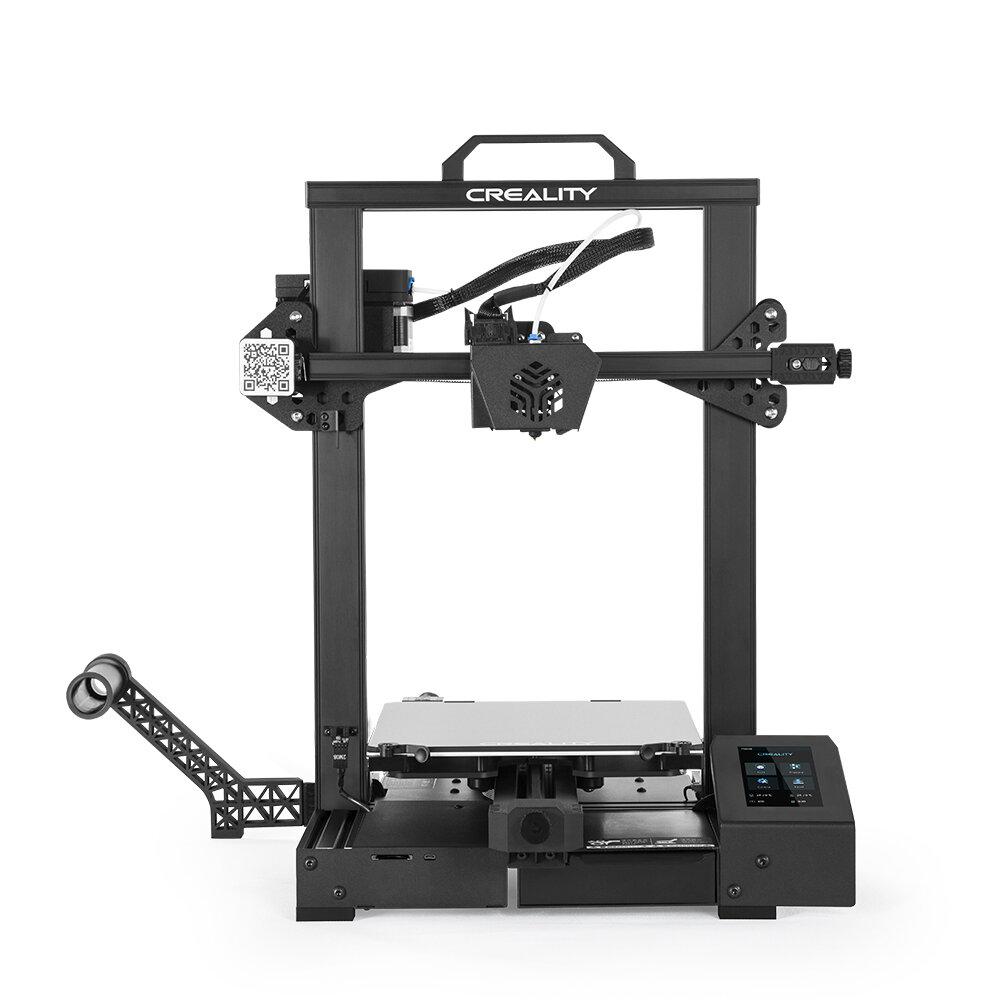
Creality The CR-6 SE is one of the 3D printers of the FDM/FFF type (abbreviations from Fused Deposition Modeling / Fused Filament Fabrication). It is the most affordable type of 3D printers that work on the principle of melting a plastic string. The molten plastic is then applied in layers through a nozzle with different diameters.
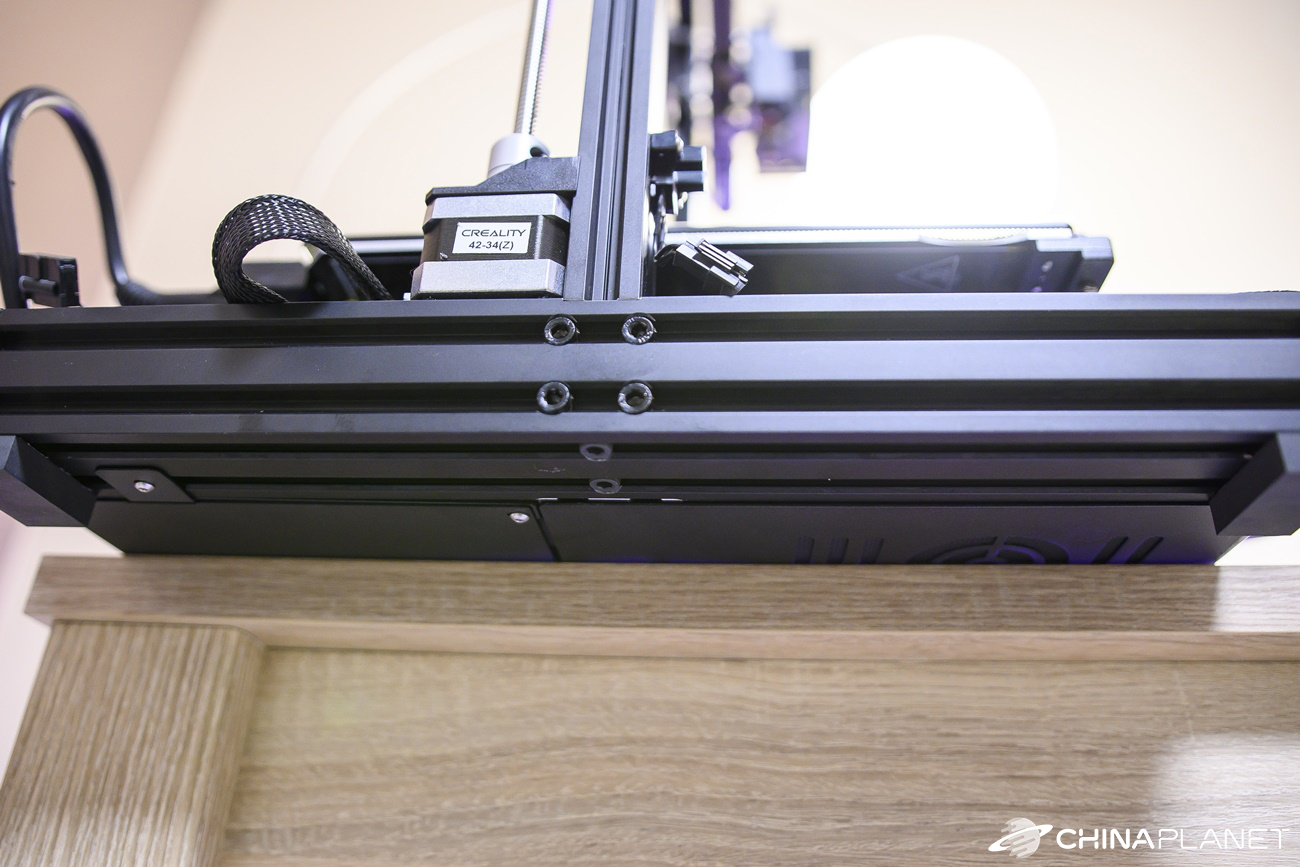
If we take into account the construction itself, this 3D printer belongs to the so-called Cartesian printers. They are based on the principle of movement along three axes - X, Y and Z. In the X and Z axes, the print head moves and along the Y axis, the pad on which the object is printed.
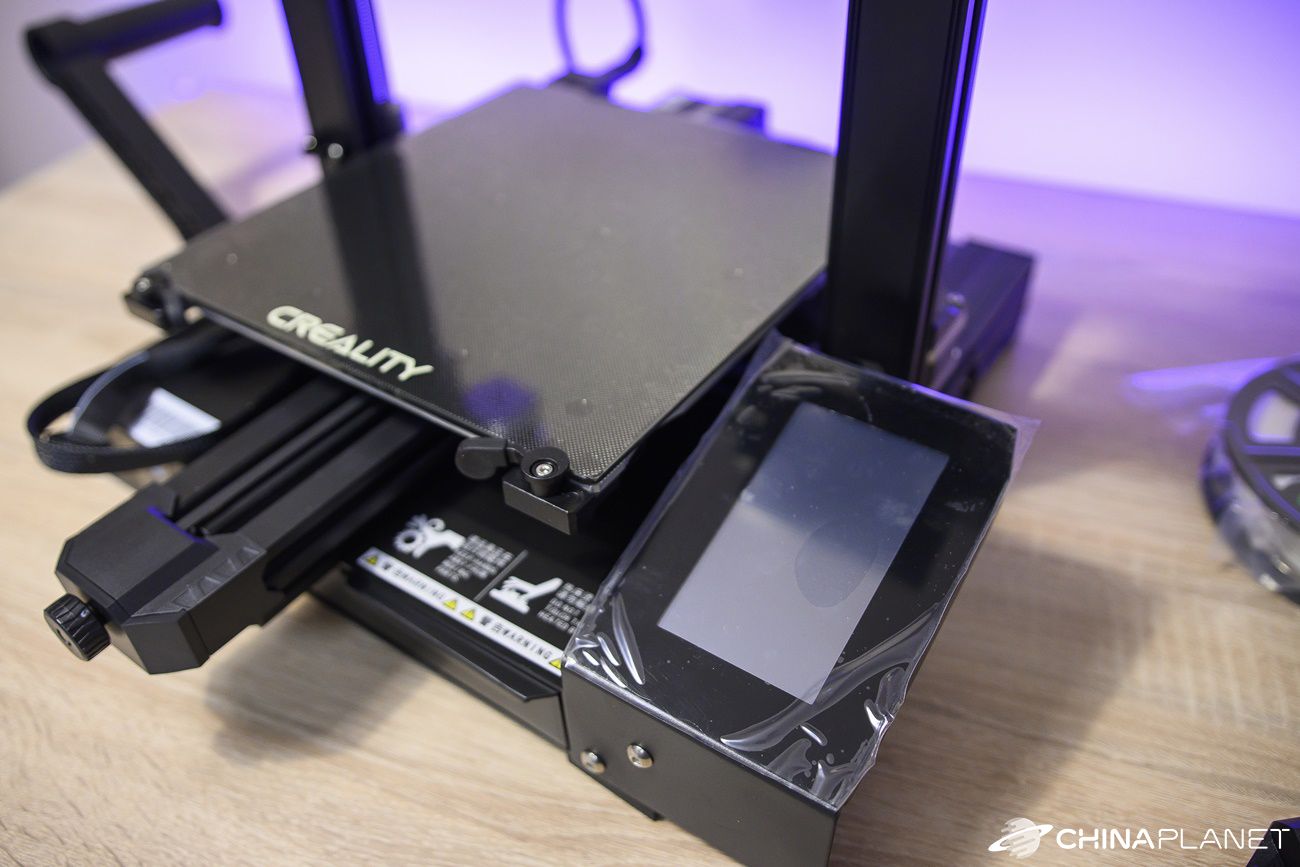
Creality The CR-6 SE has a printing area of 235 x 235 x 250 mm, which determines the maximum dimensions of the printed object. Its great advantage is the automatic adjustment of the height of the pad, the so-called leveling. This feature is great for beginners as there is no need for manual settings. The cheapest models do not have this feature.
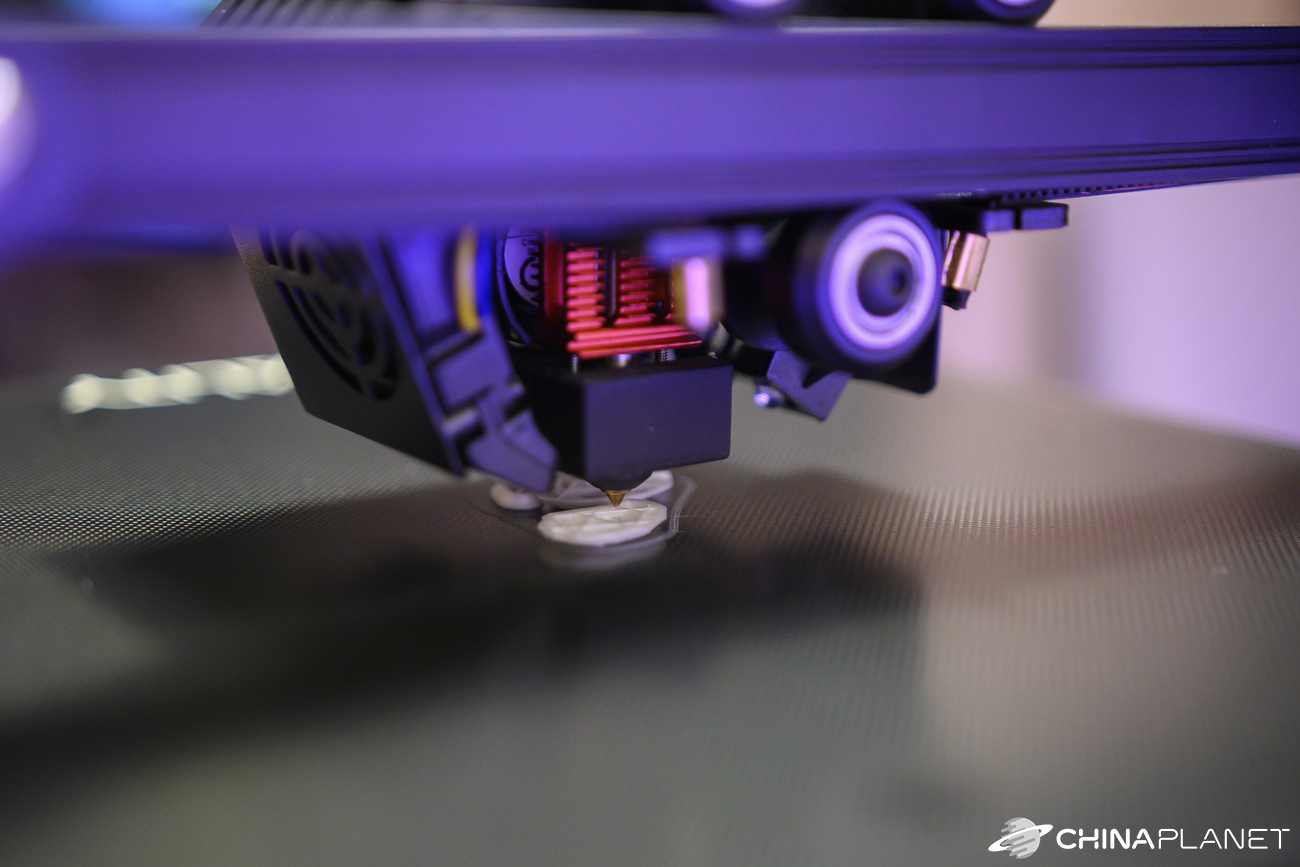
The plate is made of glass, heated to a maximum temperature of 110 ° C and has a carborundum layer on its surface. The printer promises quiet operation thanks to an improved print head (extruder). The nozzle has a diameter of 0.4 mm, but is replaceable. It can heat up to 260 ° C.
The printer is controlled by a 4,3 ″ HD LCD display, there is a memory card slot and various functions, such as automatic resumption of printing after an unexpected interruption. Supported materials that the printer can work with are, for example, PLA, TPU, PETG, ABS, or even wood.
Contents of the package
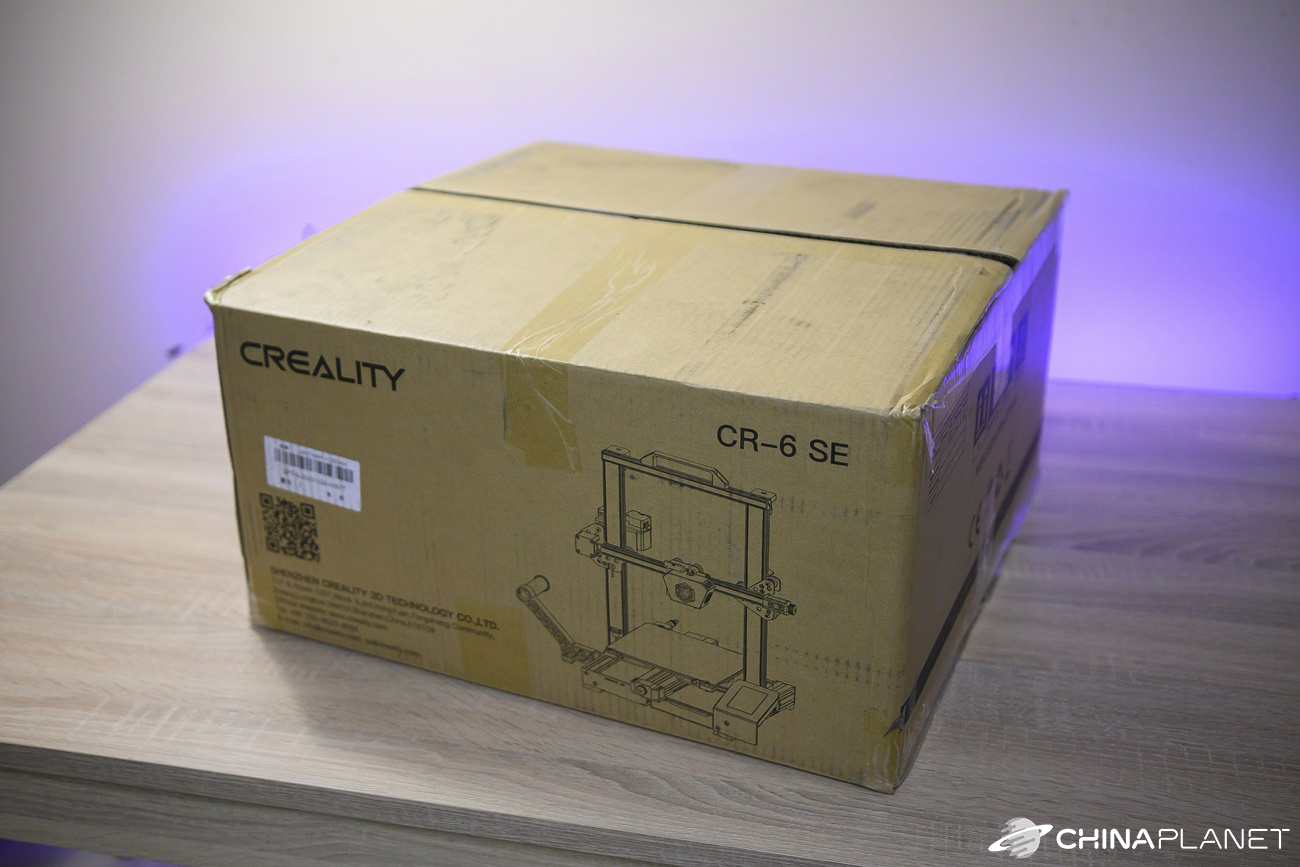
The printer comes in a fairly large box. Since it has a metal construction, you can immediately recognize it on the weight, which is almost 10 kg. The printer does not come ready to use, which may discourage complete beginners. But folding it shouldn't be a problem. So far, we haven't had any experience with 3D printing either, so we were wondering how we could handle it.
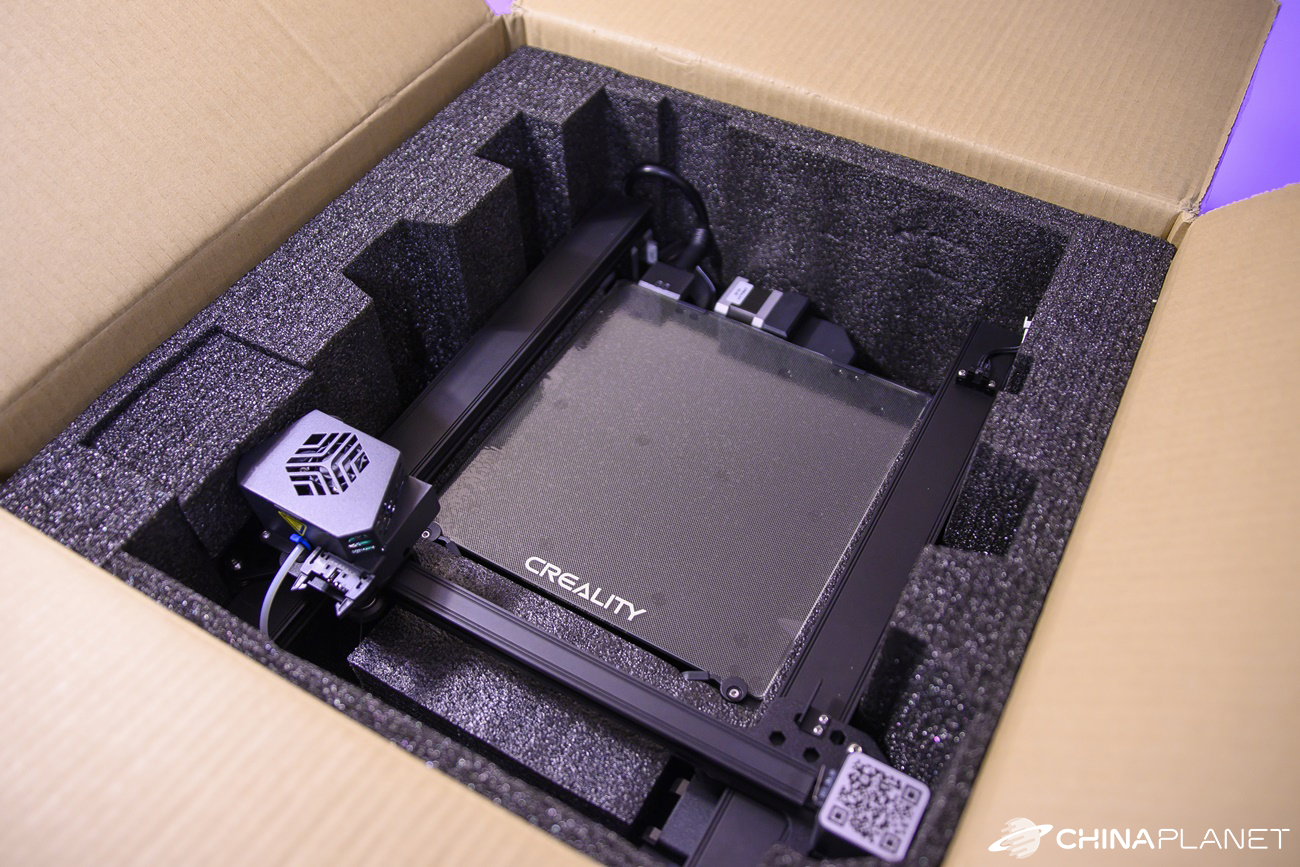
All individual parts are nicely stored in a box in a soft reinforcement. The packaging looks very luxurious and all parts are perfectly protected in a box. The printer therefore consists of the following parts, which need to be assembled together: a frame with a print head, a frame handle, a base with a glass pad, a filament holder divided into 2 parts and a display. We also had in the package 200 g white filament PLA, screws needed for assembly and instructions. It is in English and Chinese, also contains pictures and is clear.
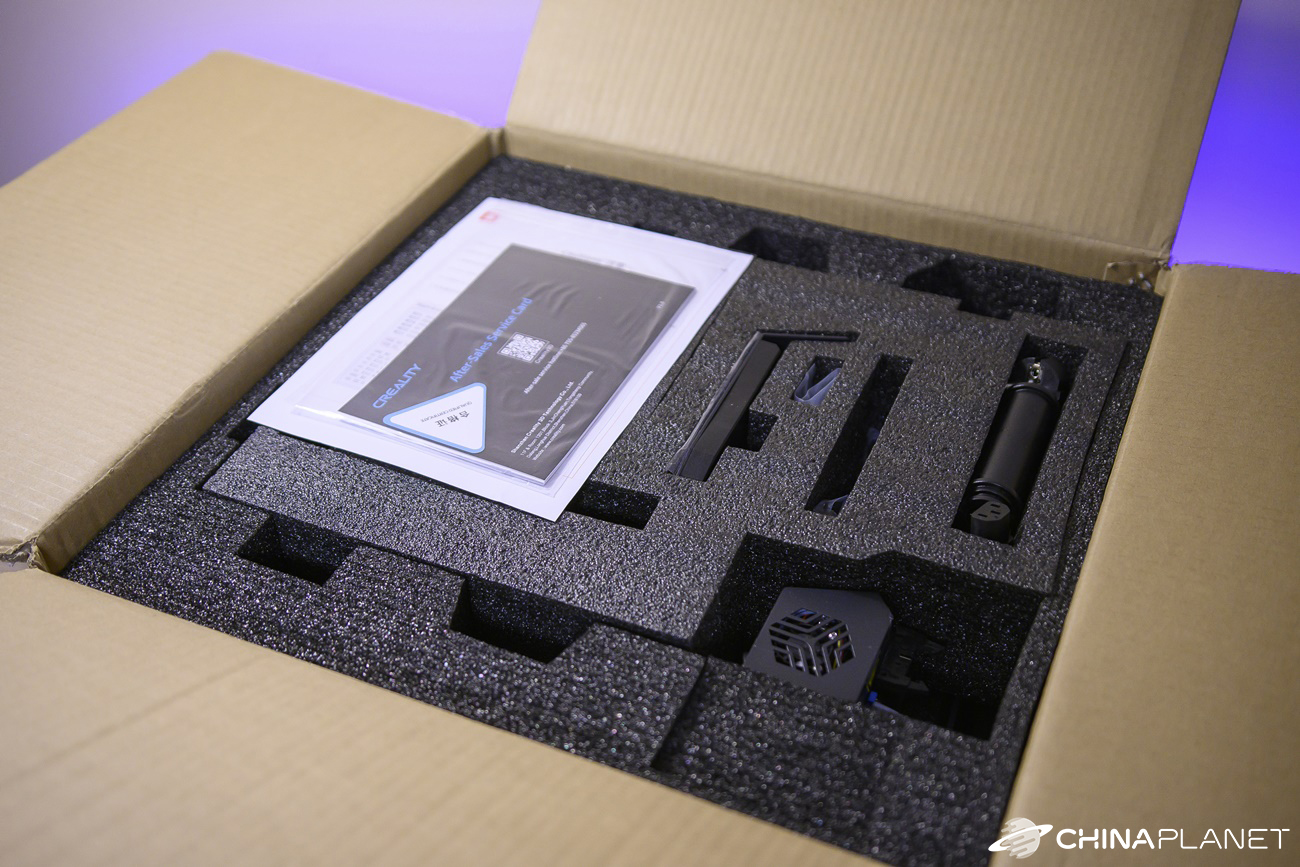
The manual also shows a set of tools and other accessories, which we did not find in the box. However, after watching the video on YouTube, we found that these items are located in a small drawer that is in the base of the printer. However, there is no mention of this socket in the manual and we did not notice it at all.
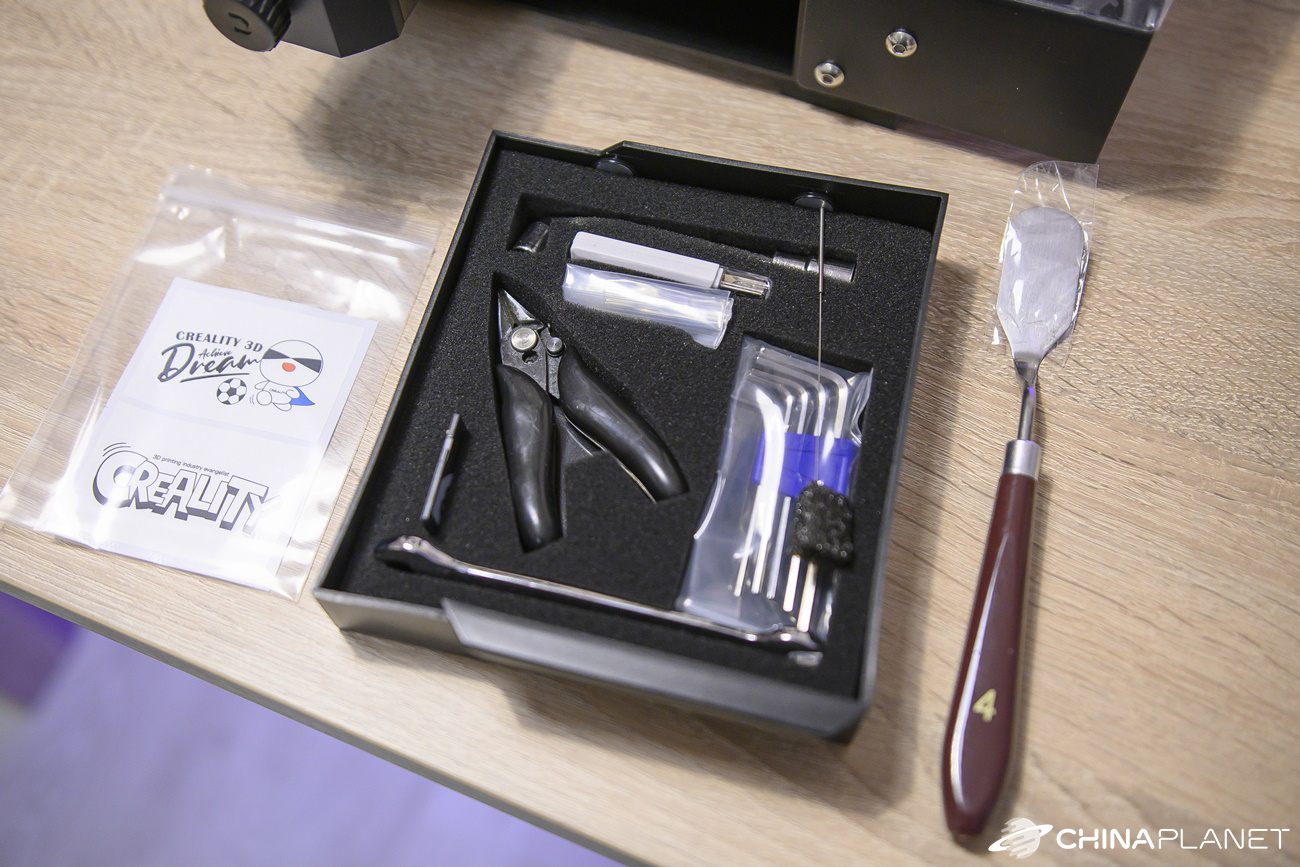
In the hidden drawer there is a spatula for removing the printed object from the mat, a flat wrench for tightening screws, a socket wrench, a set of Allen keys, a nozzle cleaning needle, small pliers, a memory card and a USB memory card reader, 2 spare nozzles, Creality stickers and plastic clips for fixing cables.
The packaging is really very rich and contains everything you need to assemble the printer, as well as for its operation and maintenance. Additionally, we ordered a 1 kg package of PLA filament of a different color.
Installation of a 3D printer
The first step in folding the printer is to connect the two supporting parts - the base with the frame on which the print head is located. The frame is simply screwed with four screws from the bottom of the base. After this step, we checked the tightening of the rubber belts, which are used to move the pad and the print head. These must not be tightened too tightly to prevent them from tearing. In our case, they were just pulled in, so we didn't have to adjust anything.

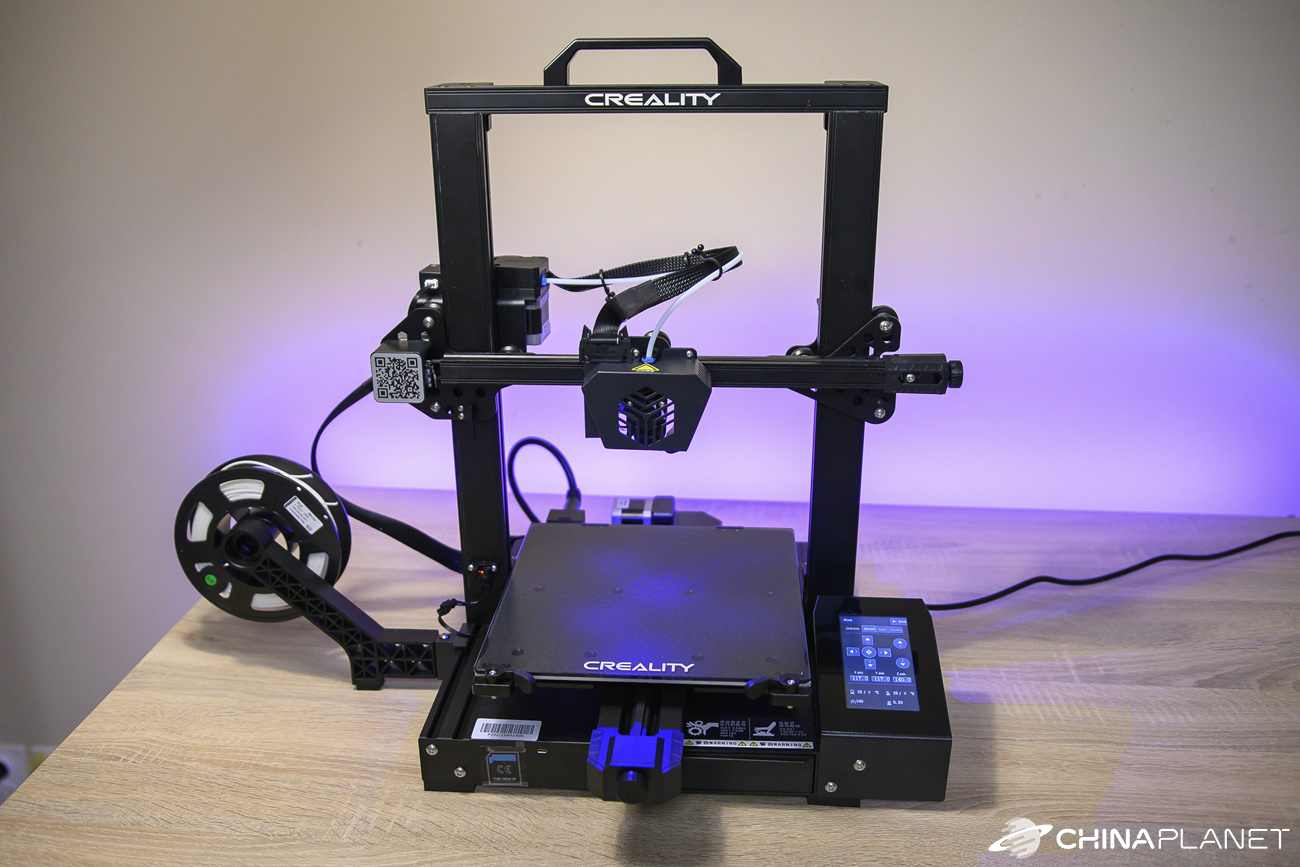
The next step is to mount the display, which is located on a metal part. After screwing this part, we connected the cable from the display to the appropriate port. Subsequently, we simply clicked the filament holder on the side. This holder consists of two parts that need to be joined first. Thanks to the two-part construction, the holder can be folded parallel to the base so that it does not take up unnecessary space during storage.
The printer also has a practical holder that mounts to the top of the frame. The printer is quite heavy, but it is better carried with this handle. One of the last steps is to connect all the cables that are taped to the base. Each cable has its own connector, which only plugs into the appropriate port. There is a drawing in the instructions, but we managed it without it.

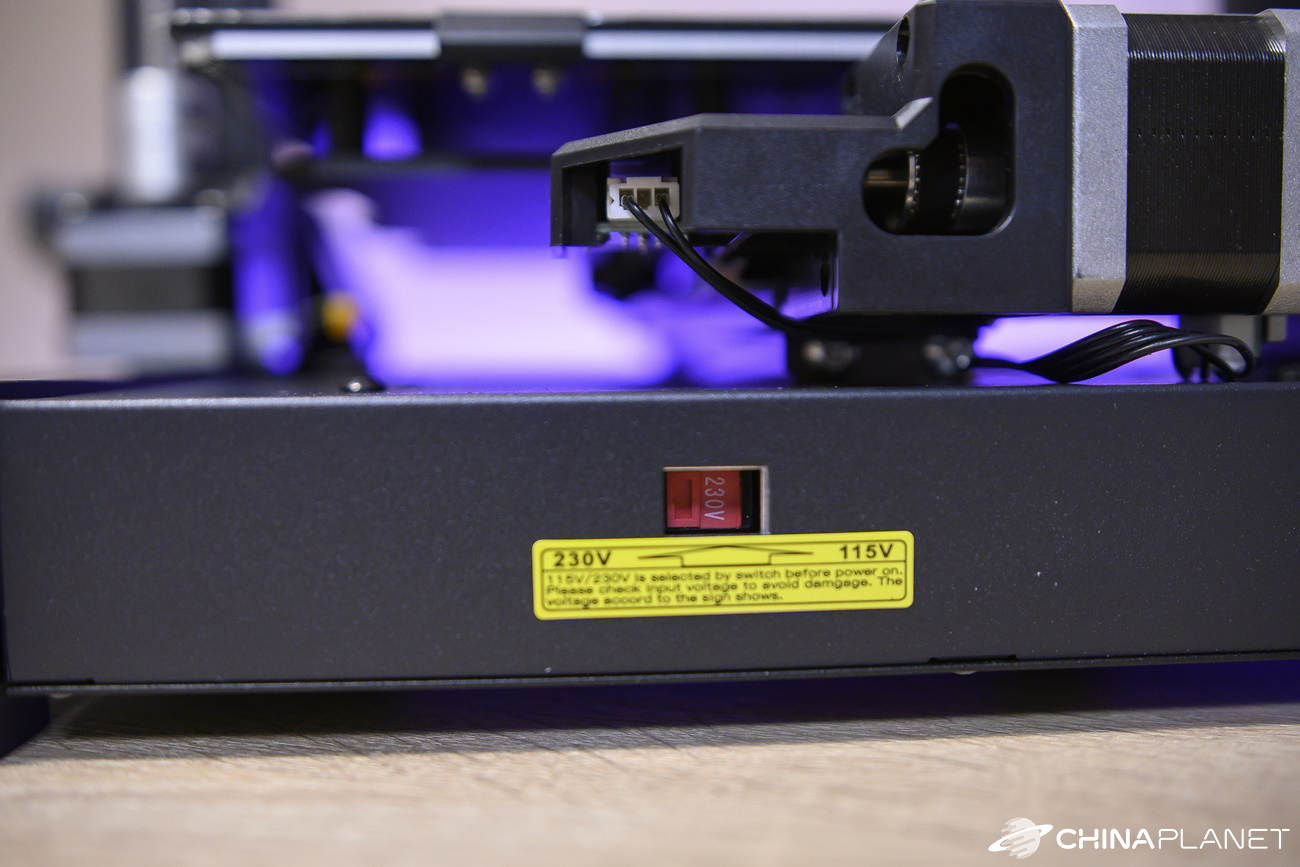
The last step is to just check the switch between 110 and 230 V on the back of the printer. Ours was switched correctly, to 230 V. After connecting the power cord, the printer turns on the side. Folding was very simple and fast. Everyone can do it.
First turn on and first print
After switching on, the main menu appears on the display. The first step should be to set up the pad, which is automated with this printer. Just select the Level option and the printer will adjust the pad automatically. This process takes a while as the printhead travels through multiple positions, but it saves us the hassle of manual adjustment.
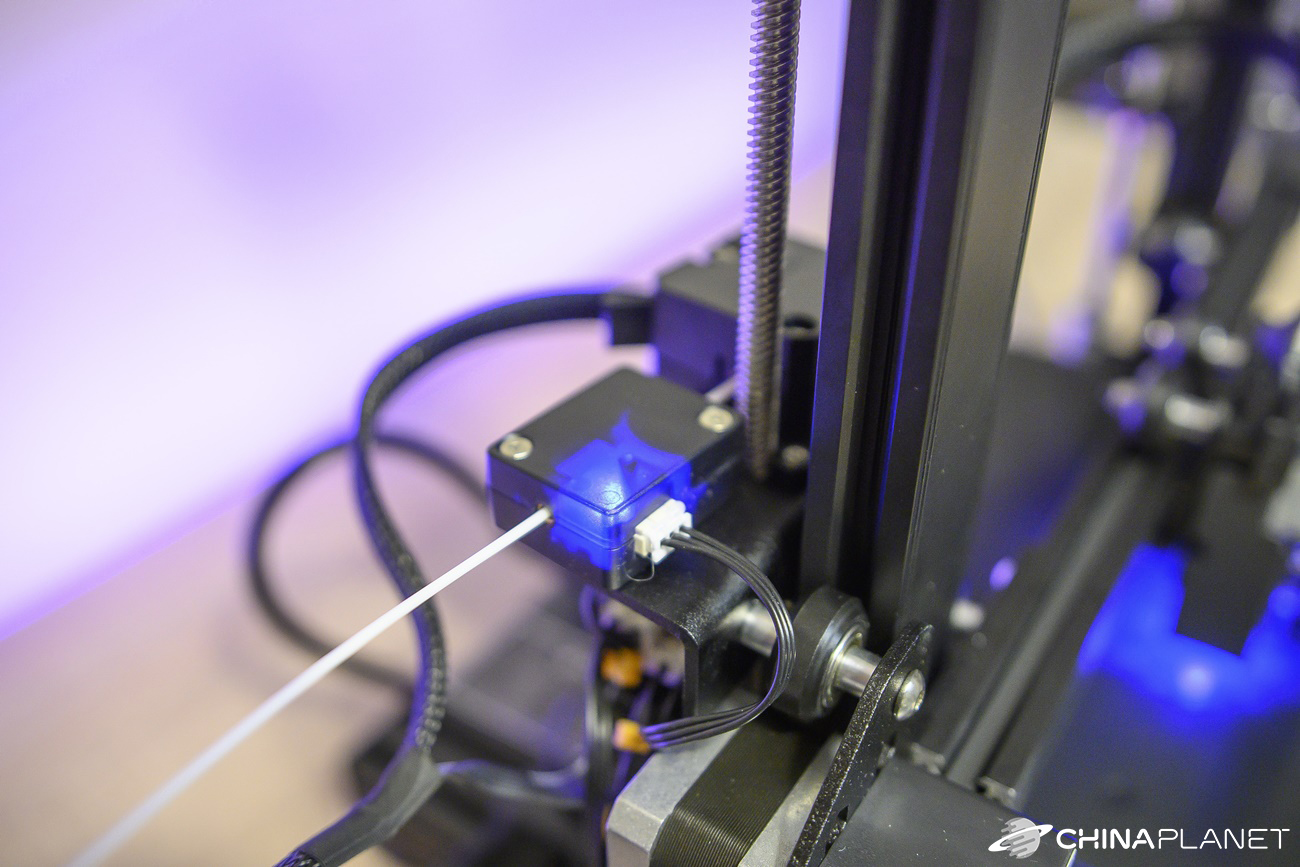
In order to start pushing, we need to get the filament to the nozzle. We used the white filament that was in the package. We placed it on the holder and cut the end at an angle of 45 °. In the menu on the display, we have selected the option Prepare and then Preheat PLA, which will heat the pad and nozzle to the desired temperature.
We then released the fuse on the extruder so that we could push the filament through the filament monitor, extruder and Teflon tube up to the nozzle. Since the nozzle has meanwhile warmed up, we pushed the filament out through the nozzle out onto the printing pad. We removed this leaked filament before printing. After securing the fuse, the printer was ready to print.
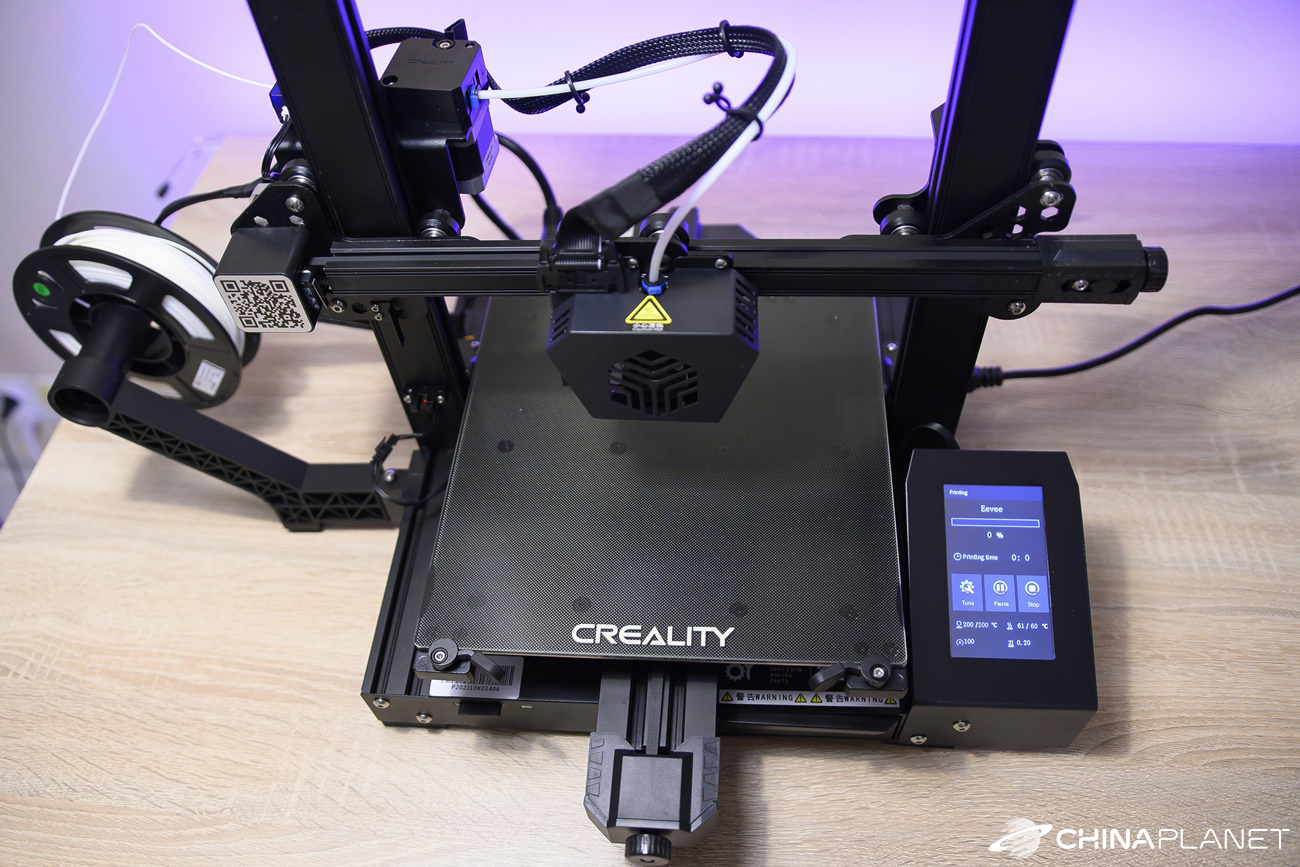
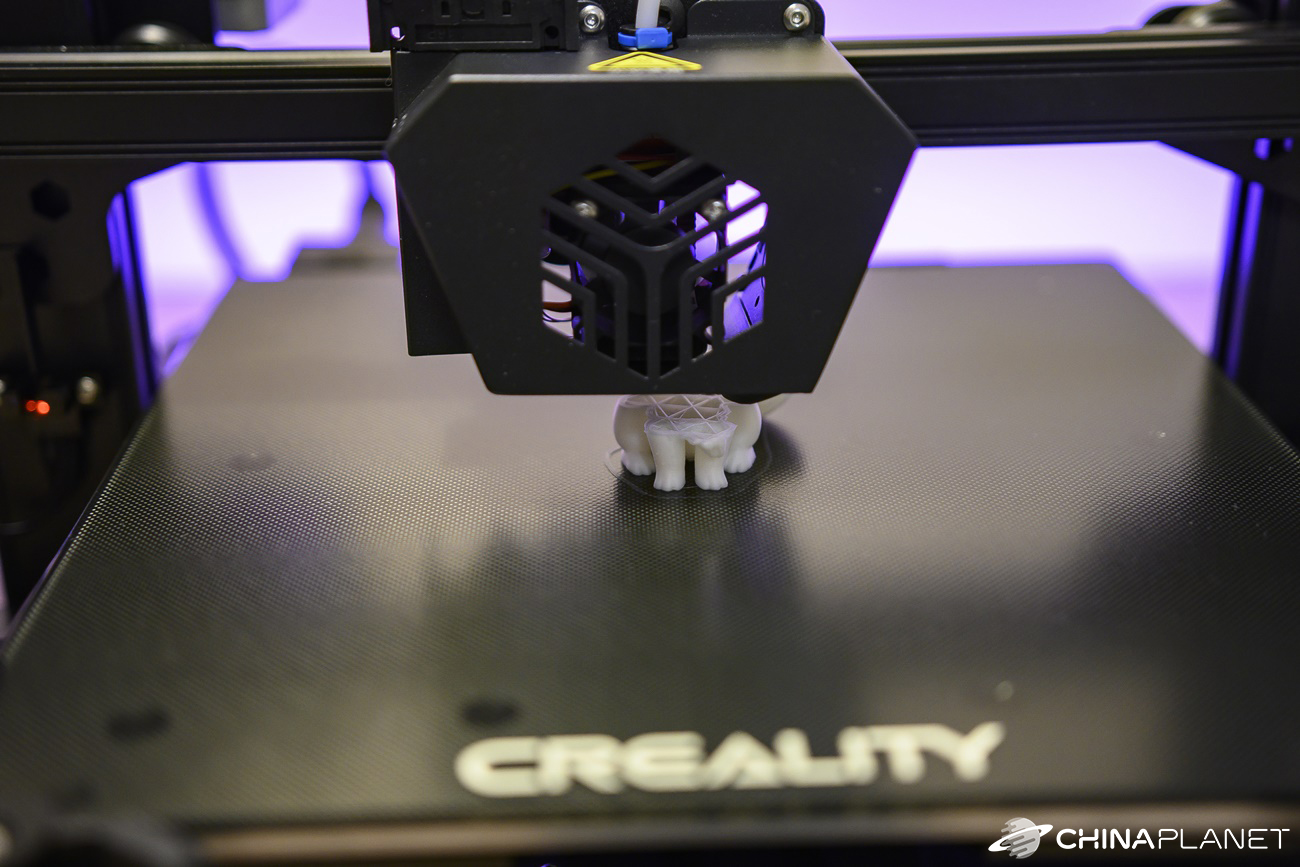
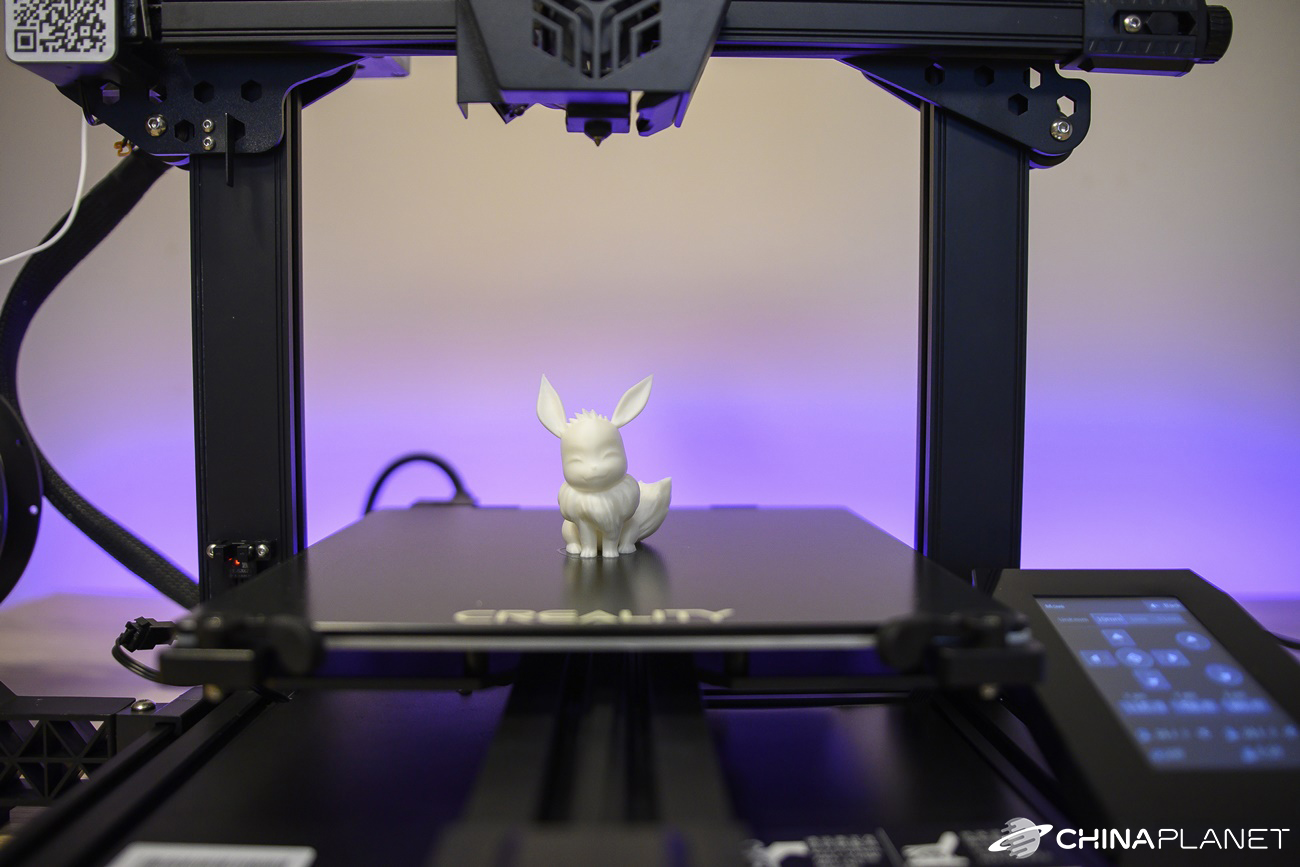
The enclosed SD card contains several models that are ready to print. For an unknown reason, the printer could not load these models, but after copying them to another memory card, we no longer had a problem. Nowhere in the manual is it stated what models are on the card, so it remains only to deduce from their name. We chose the Pokémon Eevee. The printer first demarcated the space where it would be printed with a thin layer of filament and then began to create a printed object, layer by layer.

On the display we could see the individual temperatures of the pad and the nozzle, as well as the time that has elapsed since the beginning of printing. The Pokémon measures approximately 3 x 7.5 x 5 cm and has been almost 5 hours to print. We removed it from the pad with a spatula from the printer's secret drawer. Products that have a larger contact area with the pad peel off a little harder, but it always went without any damage to the printout or pad.
Noise level, working with the display
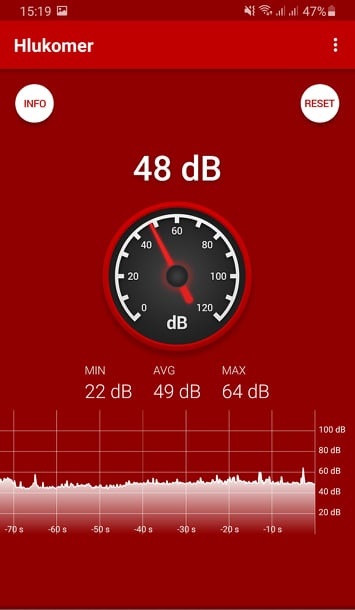
As for the noise level during printing, it is around 50 dB. The movements of the pad or the print head in the individual axes are very quiet, but you can mainly hear the fans, which are used to cool the individual components.
The display has a blue backlight and is a touch, pressure. This results in slight inaccuracies. Sometimes it happened to us that for the first time we failed to hit the selection of an item on the display. It's not a big deal, but a more accurate display would please.
Because larger objects take a long time to print, we often let the printer run overnight. A slight downside in this case is the fact that the printer does not turn off automatically when printing is complete, and therefore continues to hum until you turn it off manually. Although the noise level is slightly lower after printing, as neither the pad nor the nozzle heats up, the printer does not turn off completely.
Printer settings
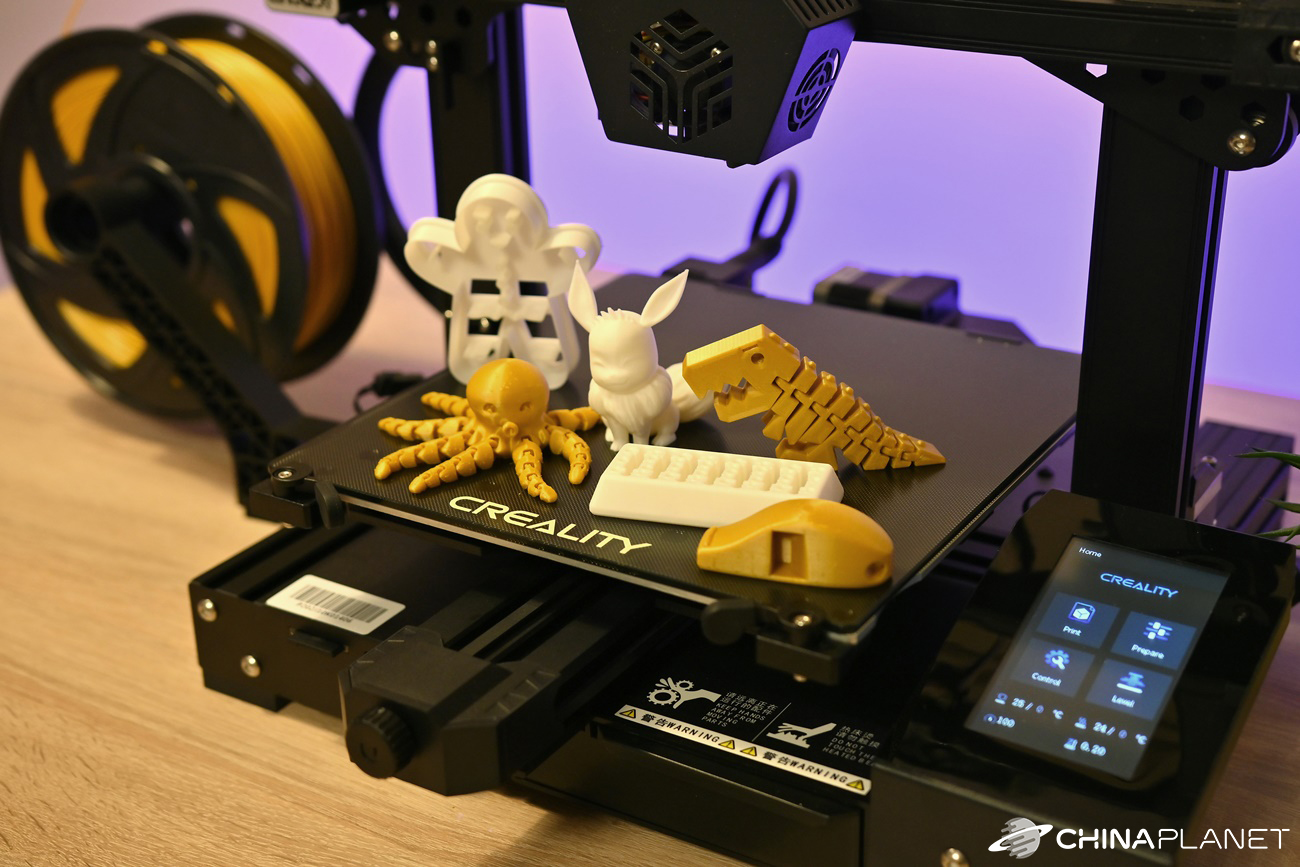
Creality The CR-6 SE offers several different settings that you can access from the main menu. It contains only 4 items – Print, Prepare, Control and Level. Only ready-to-print files loaded from the memory card are displayed in the Print menu.

You will find several options in the Prepare section. The first is the manual control of the print head and pad. If you need to adjust something or test the movement of the head or pad, here you can manually move all three axes by 10, 1 or 0.1 mm. There is also automatic centering on the center of the pad.
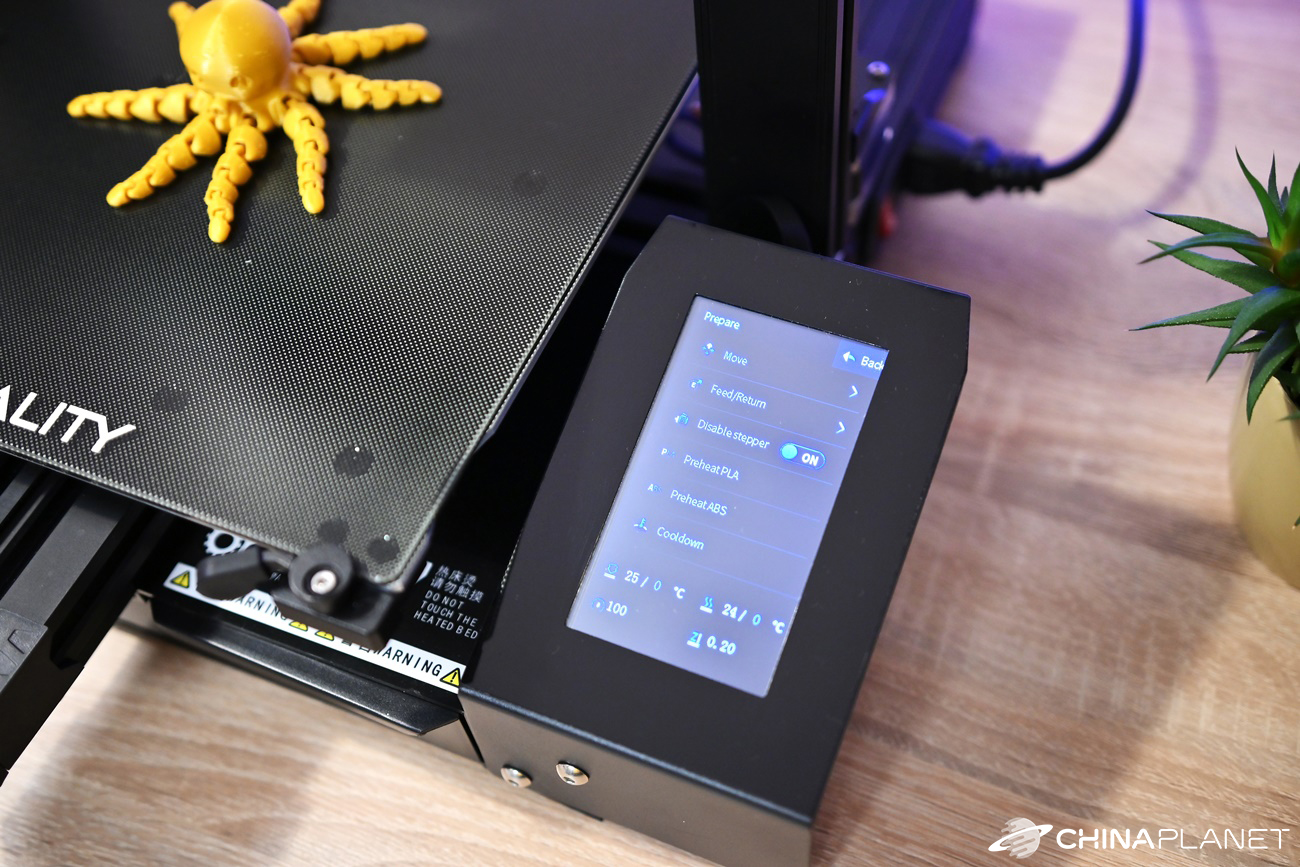
You can also move the filament in both directions - in or out of the nozzle. You will also find options here such as preheating for some basic materials or cooling.
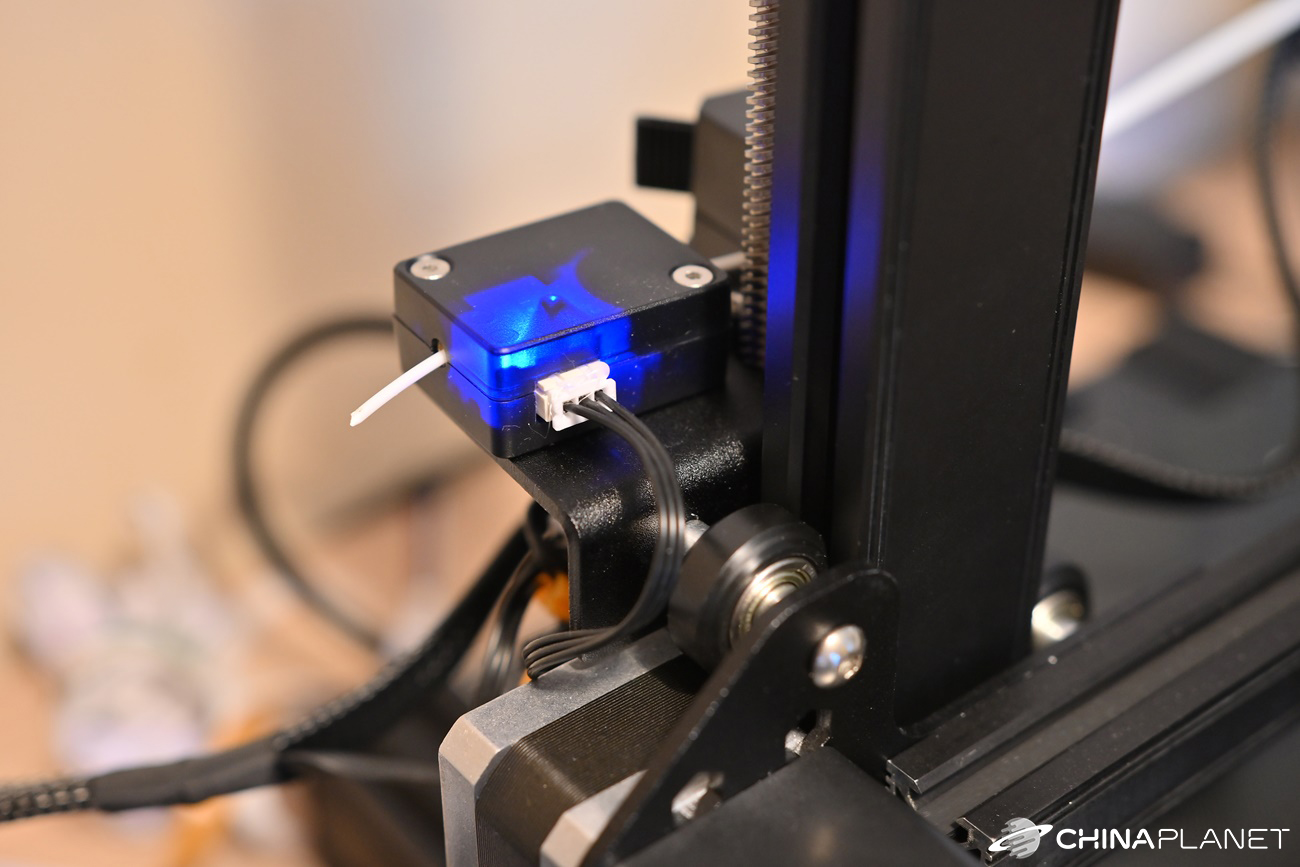
In the Control section, the temperature of the nozzle, the pad, the automatic preheating or switching the fans on and off and the LED that lights up at the nozzle are set. The settings also offer a language change, but you'll only find English and Chinese here. The last, fourth option in the main menu is the automatic calibration of the pad, which is a huge advantage of this printer.

Other, more important settings that affect printing can be adjusted in the slicer, which converts the 3D object into a file with instructions for printing, the so-called gcode. We used slicer Cura and Creality slicer.
Our creations, observations and the course of printing
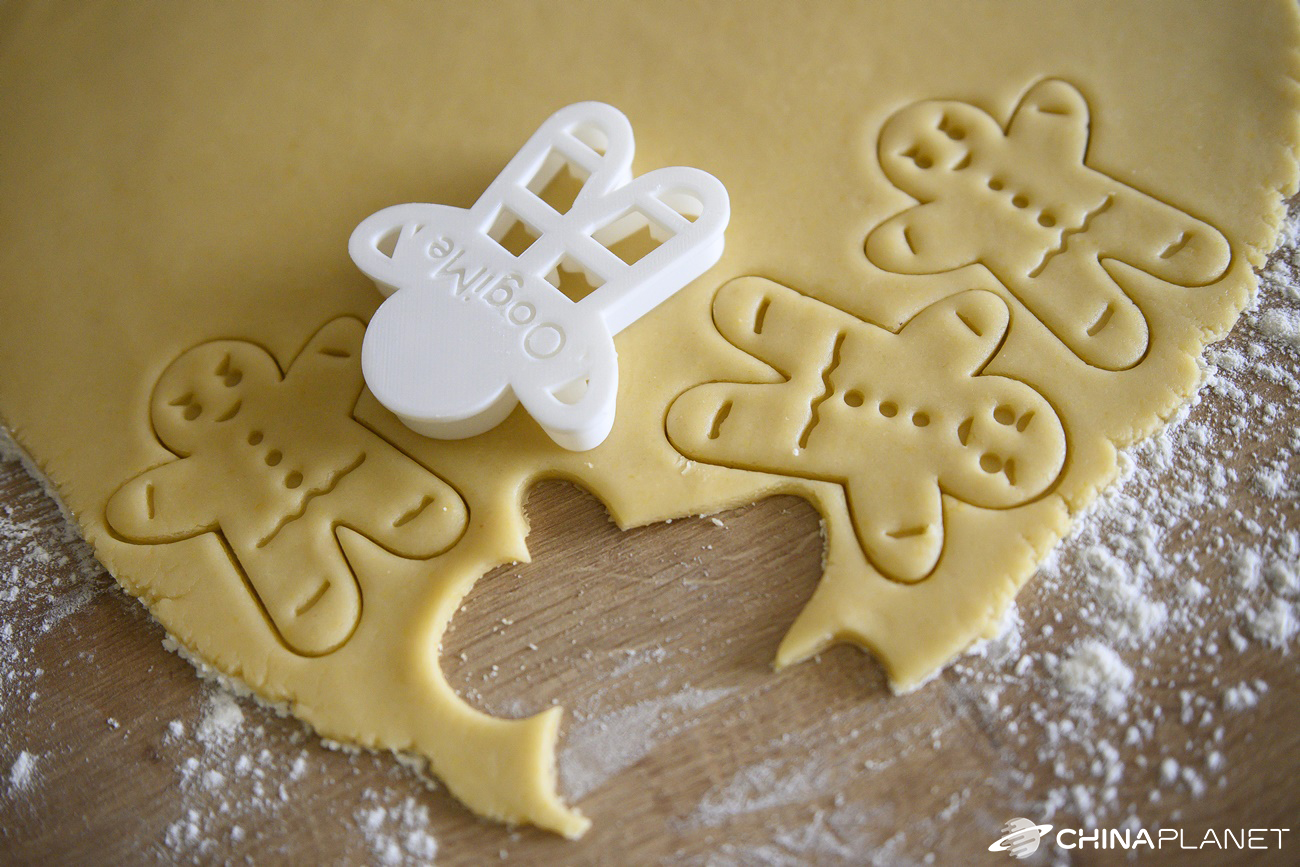
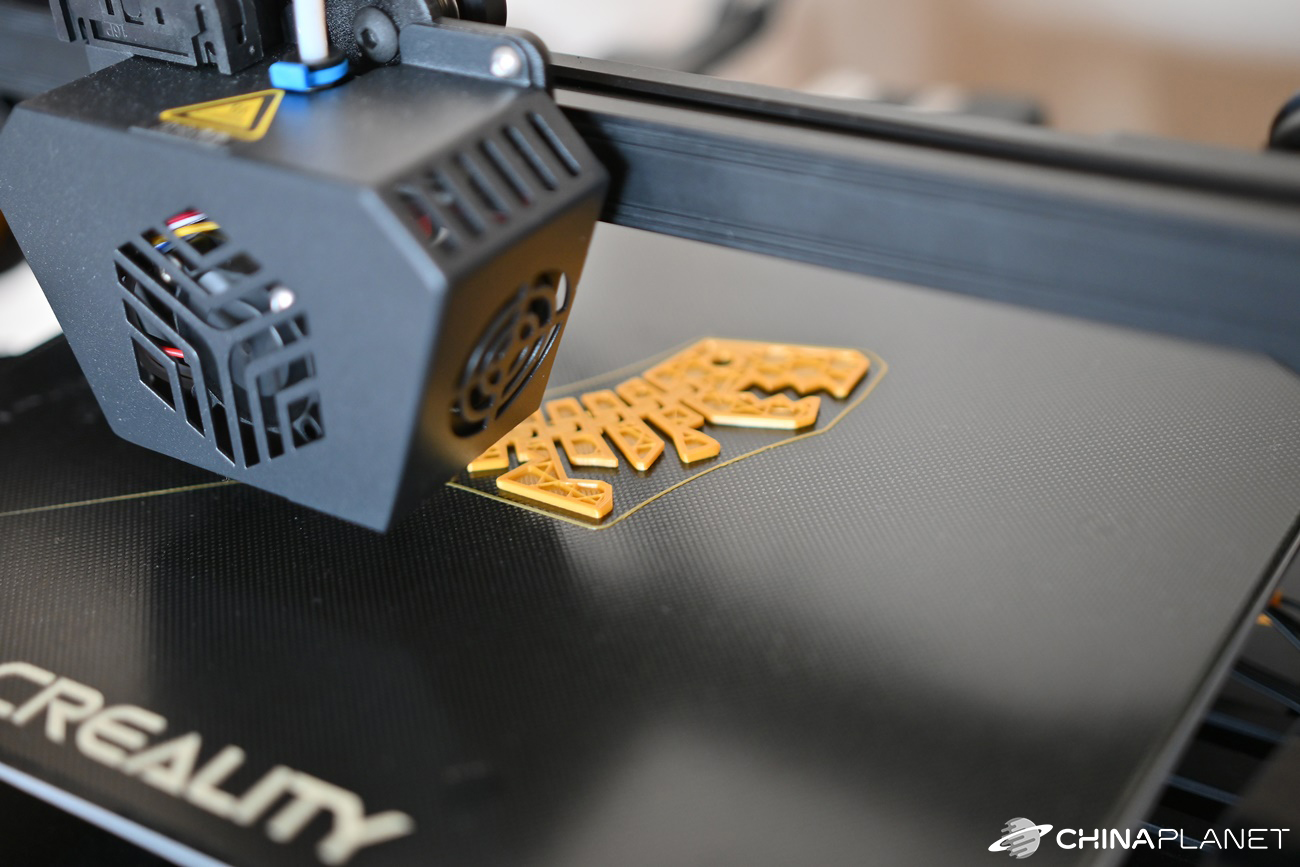
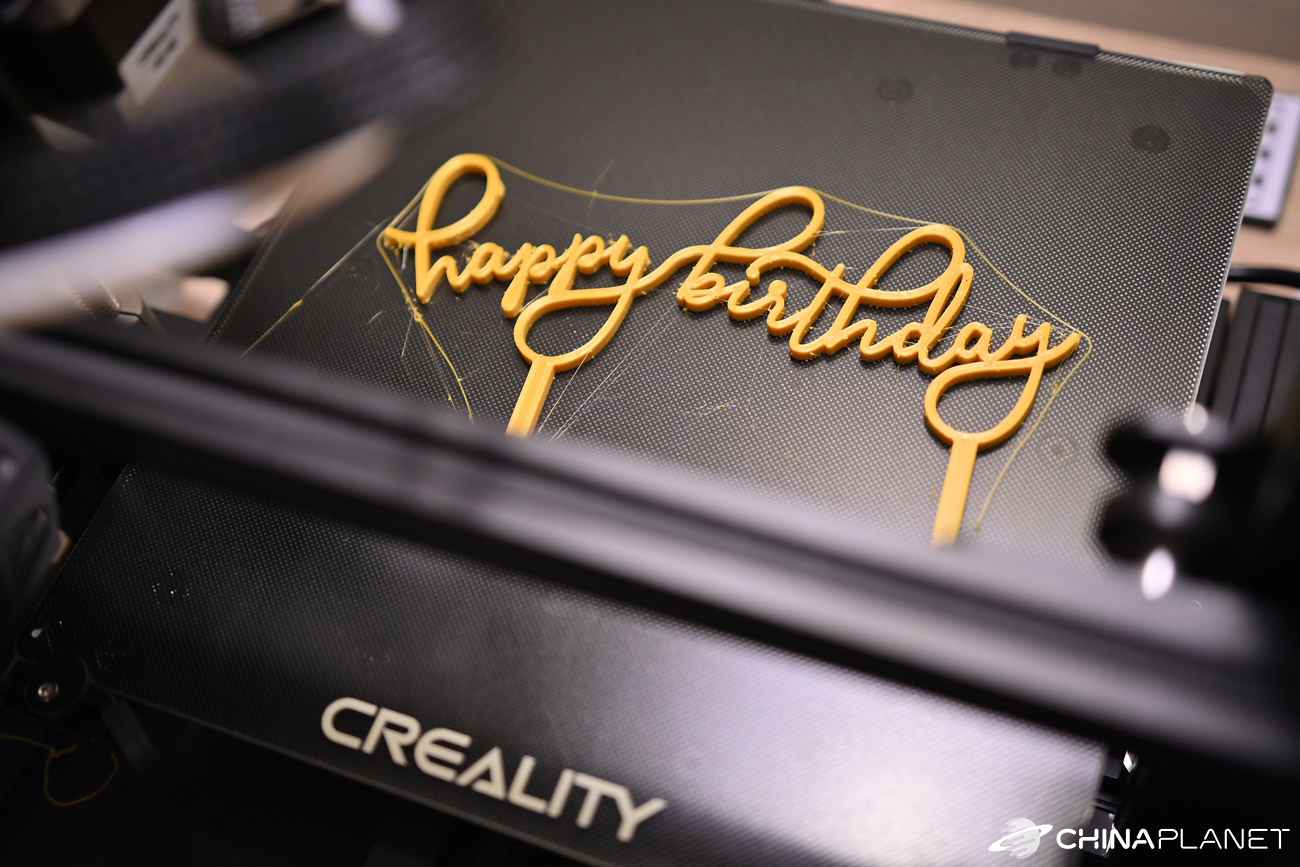
During our testing, we printed several different objects, which you can see in the following photo. We did not create the models ourselves, but we reached for freely available models, which you can find, for example, on the page Thingiverse.
You can watch the printing process of one of the models (whistle) in a time-lapse video.
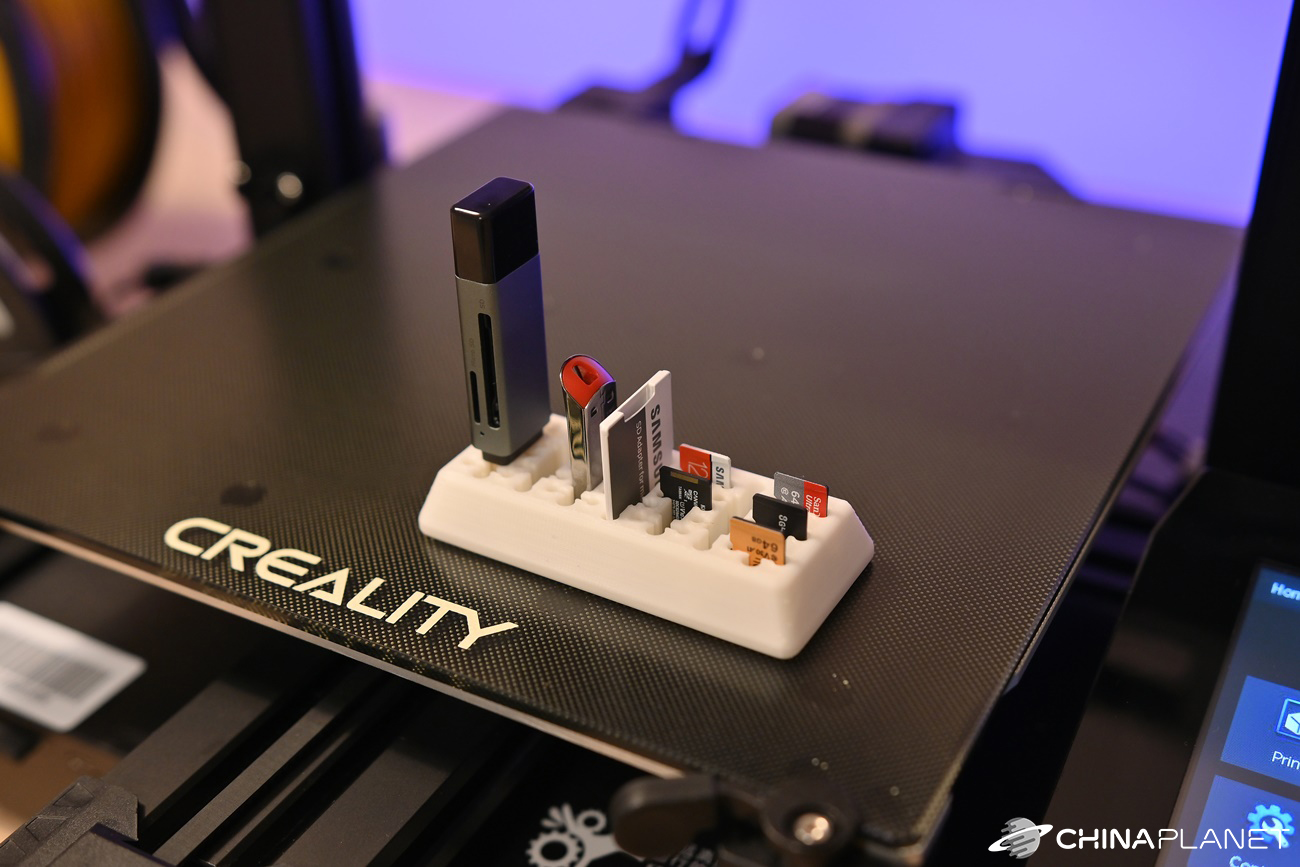
The 3D printer offers a really wide range of uses. For example, we printed a practical holder for memory cards and USB keys, toys for a child or a cutter for honeycombs. It is also possible to print various spare parts, storage boxes, flower pots or interesting gadgets. Thanks to the wide range of models available for free on the Internet, anyone can really use such a 3D printer without any detailed knowledge of how it works.
Protective functions
3D printer Creality The CR-6 SE has several features that allow it to continue printing even after unexpected power outages or filament shortages. We tested them too.
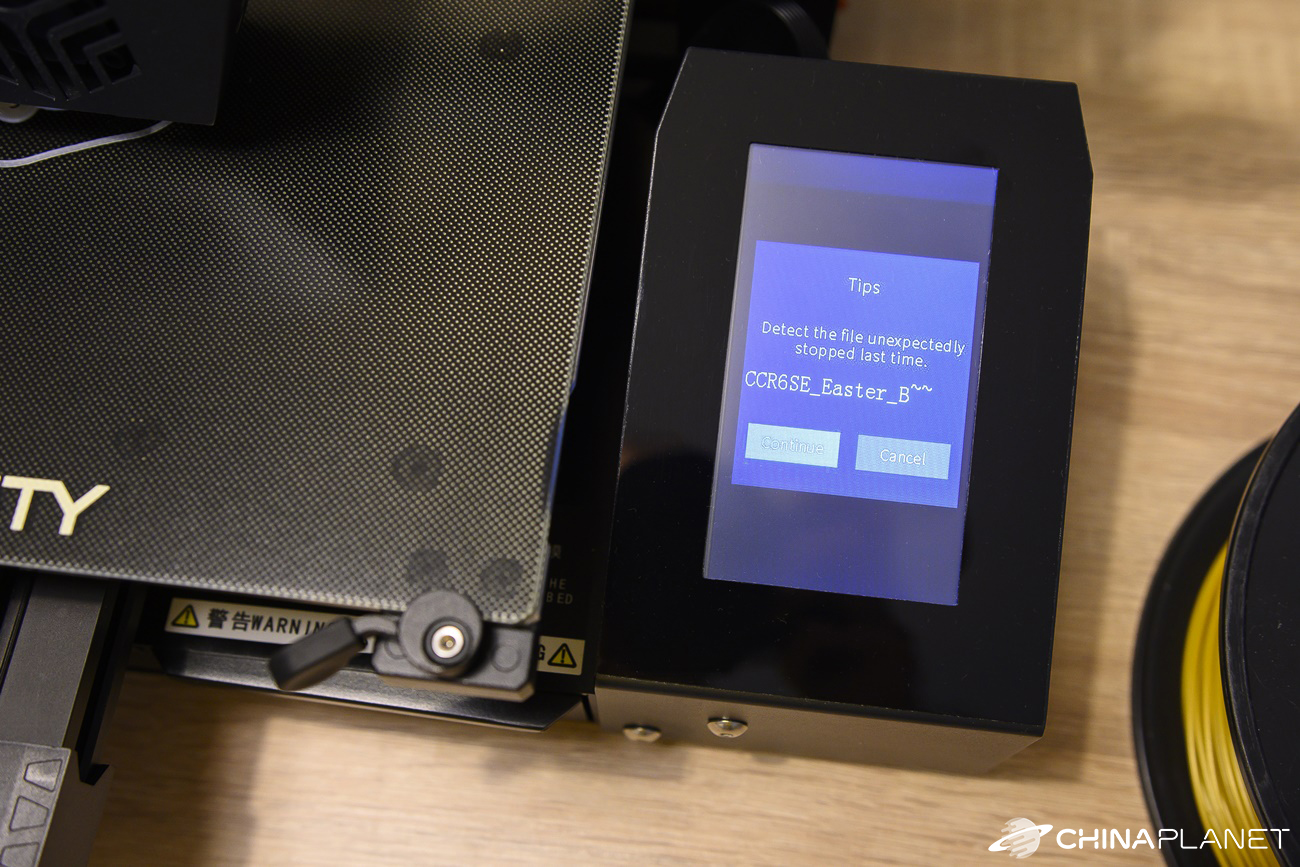
During the printing process, we disconnected the printer from the power supply and then turned it on again after a few minutes. After turning it on again, we were prompted to continue printing on the display. We continued by cutting the filament just in front of the filament sensor. As soon as the interrupted part entered the sensor, printing was suspended and we were asked to check or refill the filament.
Both of these functions work properly, but try to avoid these situations. Although the printer can continue where it left off, the printout may be slightly degraded by this interruption. The nozzle stops and the filament dries in it, just like on the printout, and a small imperfection remains on the printed object. In the event of such a print interruption, it is better to first remove the excess, dried filament on both the nozzle and the printed object, and then continue printing.
Final rating
Since we had no experience with 3D printing before, after testing Creality CR-6 SE we can declare that this 3D printer is a great choice even for complete beginners. Assembly is simple and anyone can do it according to the instructions. Also, no special settings are needed before printing, as we have an automatic pad setting and overall the printer arrived well tuned. We can say that you just need to assemble the printer, insert the filament and print.
A pleasant surprise is also 200 g of filament in the package and a drawer with all the necessary accessories for working with the printer and its settings. We take as a negative a slightly worse display and the absence of automatic shutdown of the printer after printing.
Of course, if you want to take full advantage of the 3D printer, you have to spend some of that time learning and learning to create your own 3D models and know how to adjust the settings so that the printed objects are as perfect as possible. If you have no experience, some prints may look like the image above. Here it would be necessary to change the retraction and speed of movement of the head during off-pressure movements. However, you will find out only after some unsuccessful pieces.