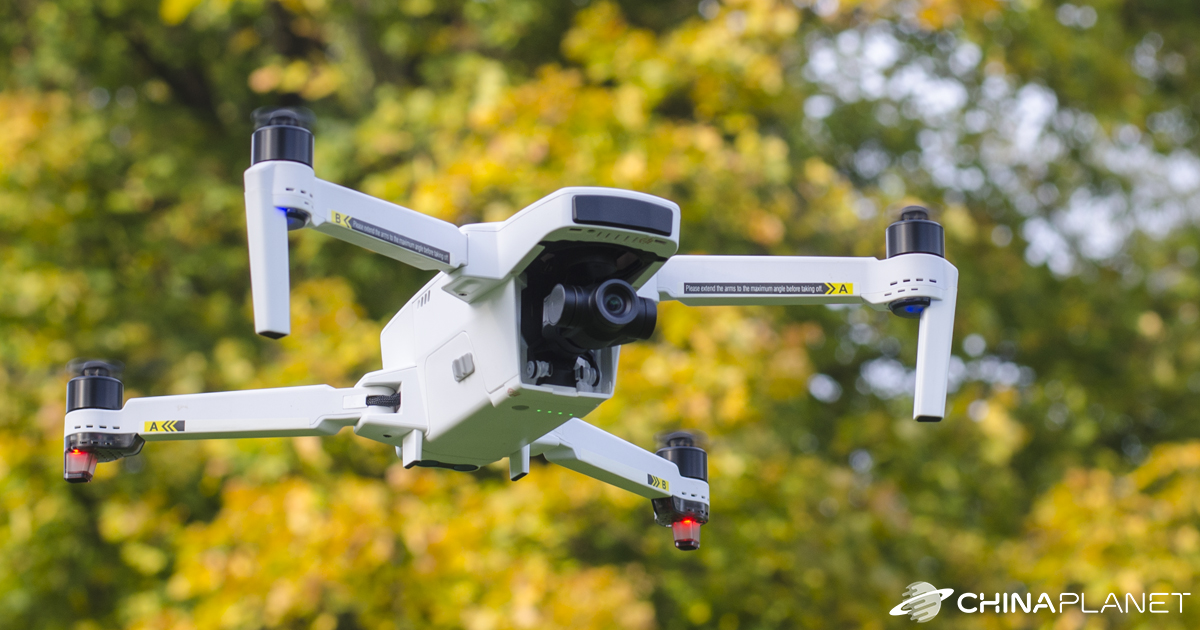
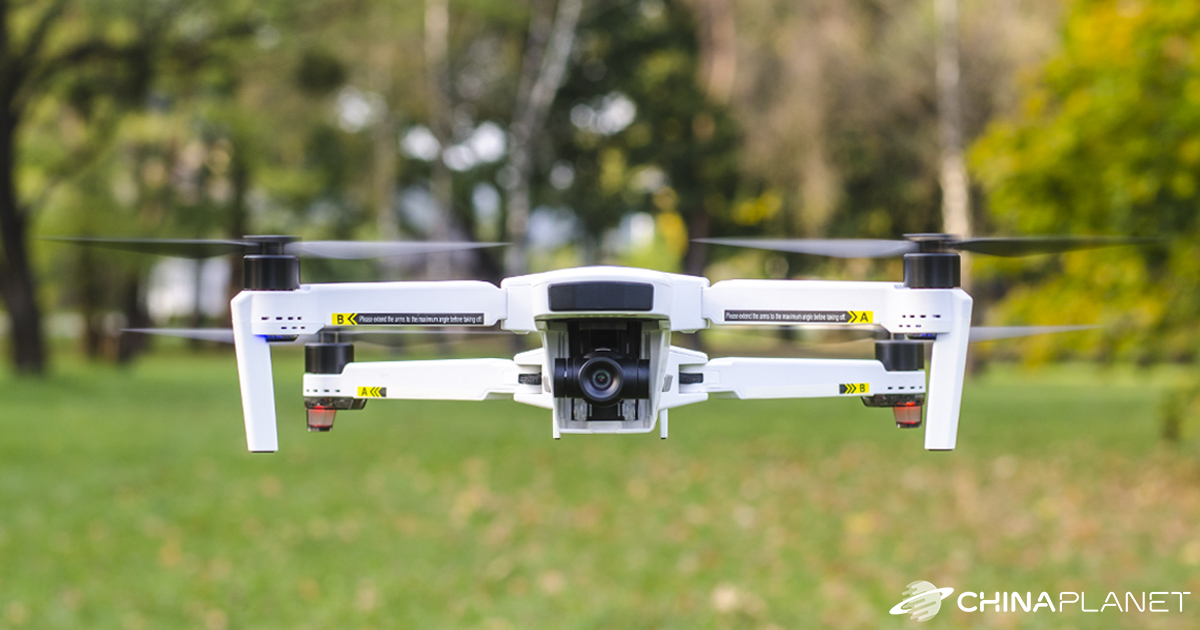
Seeing the world from a bird's eye view and creating a nice video or photo is very tempting for many people. Today, there are already several drones on the market that have a quality camera with a gimbal at a relatively affordable price. One of them is also Hubsan Zino 2which we tested.
Hubsan brand
The Chinese brand Hubsan offers a number of drones, from cheap toys with a 2 MPx camera to high-quality ones with 4K recording. Model line Zino is among the best and most famous drony from this brand.
Recently, the redesigned Zino 2 model was launched, which brought a number of improvements over the previous version. He got a camera with support 4K 60 fps, remote control with information display, battery with higher capacity and range over longer distances. Let's take a closer look at what it has to offer.
Price and availability
We have the Hubsan Zino 2 from a well-known seller Banggood, from which you can buy it for a good price. It is also available from Czech warehouse, from where delivery is very fast. In addition, you avoid any customs duties and the shipment will be delivered to your courier directly at home.
Basic parameters
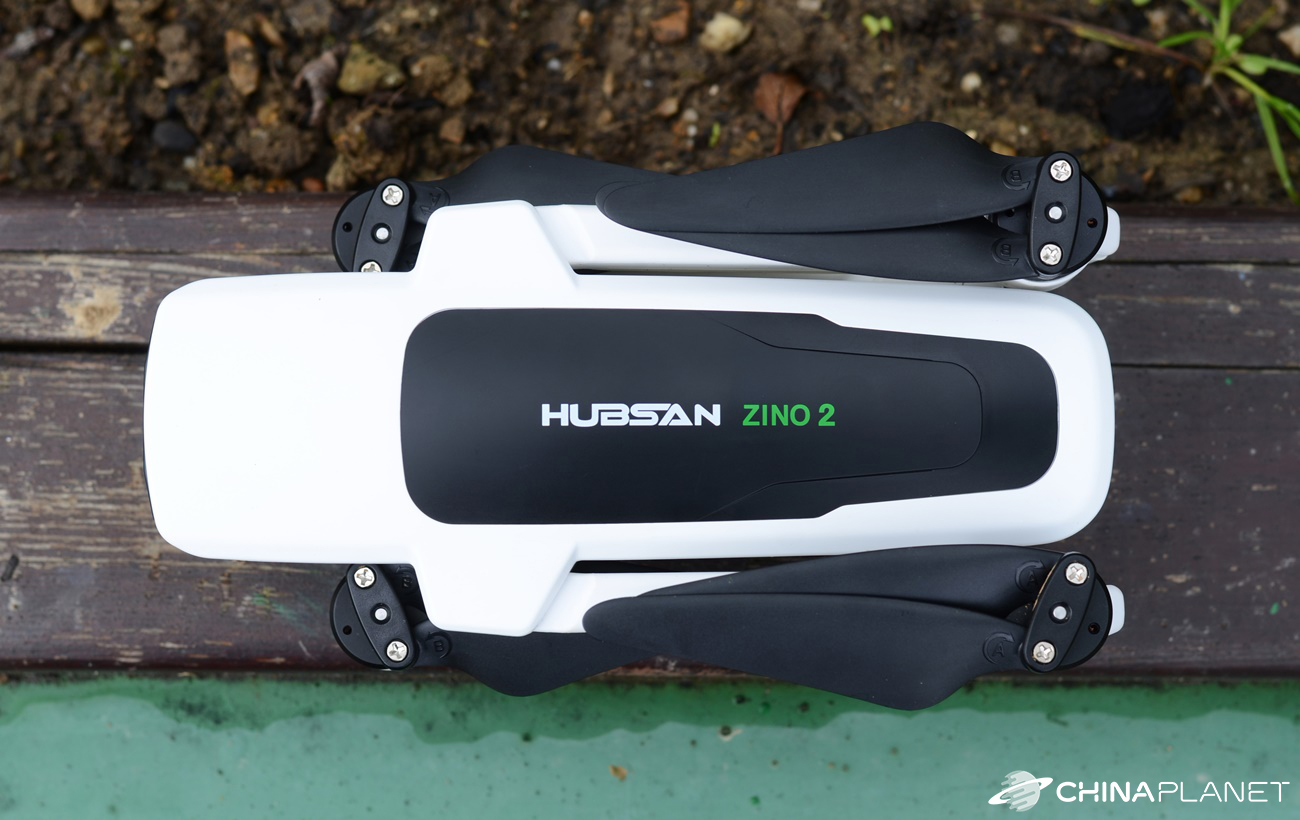
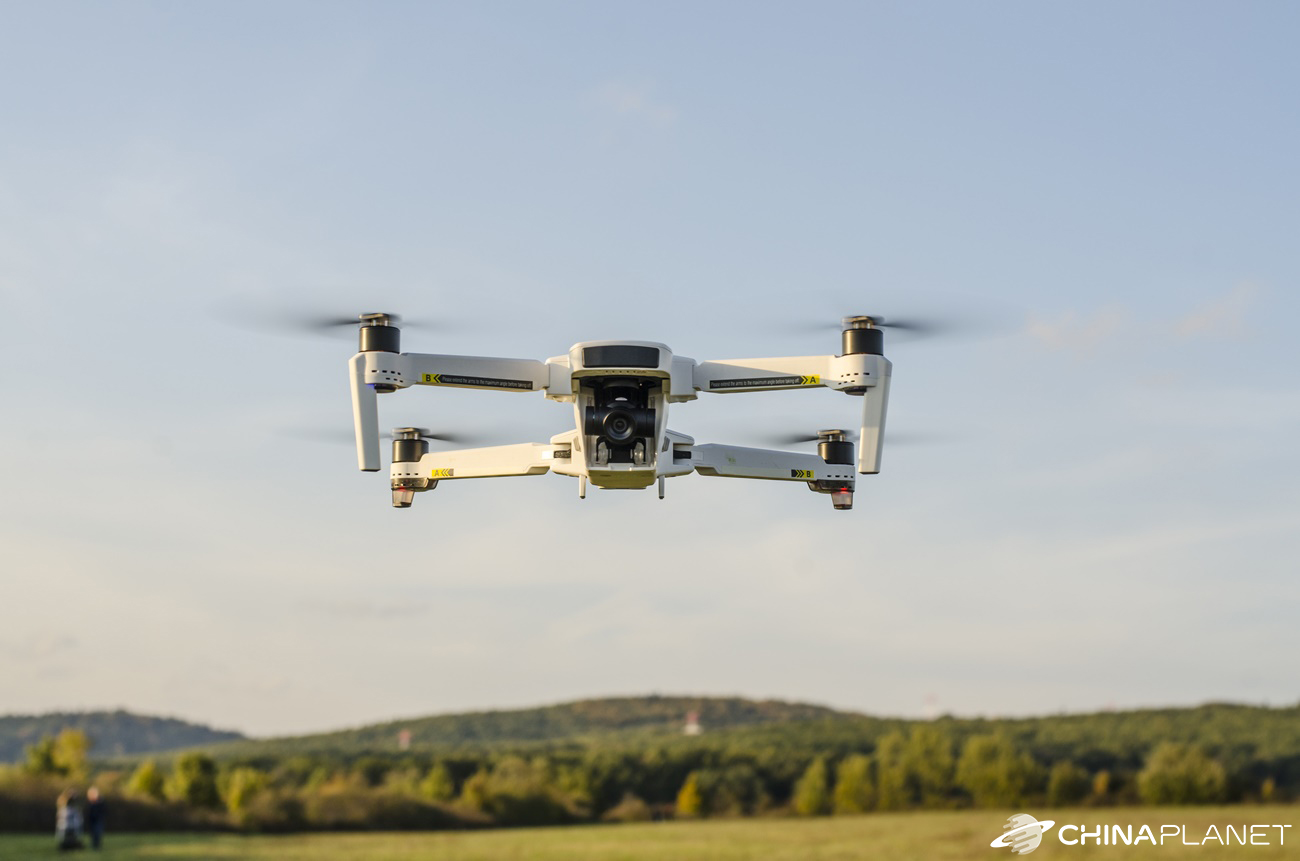
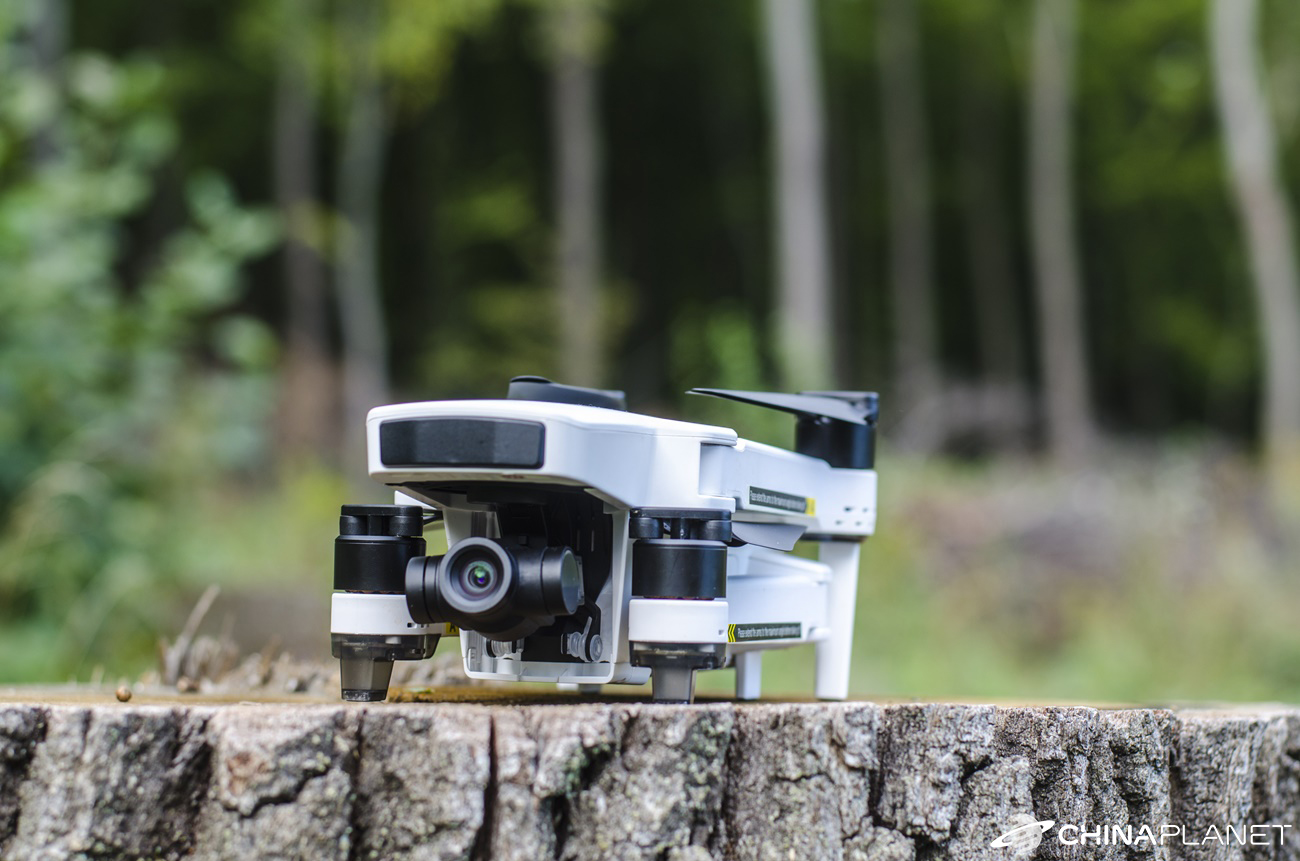
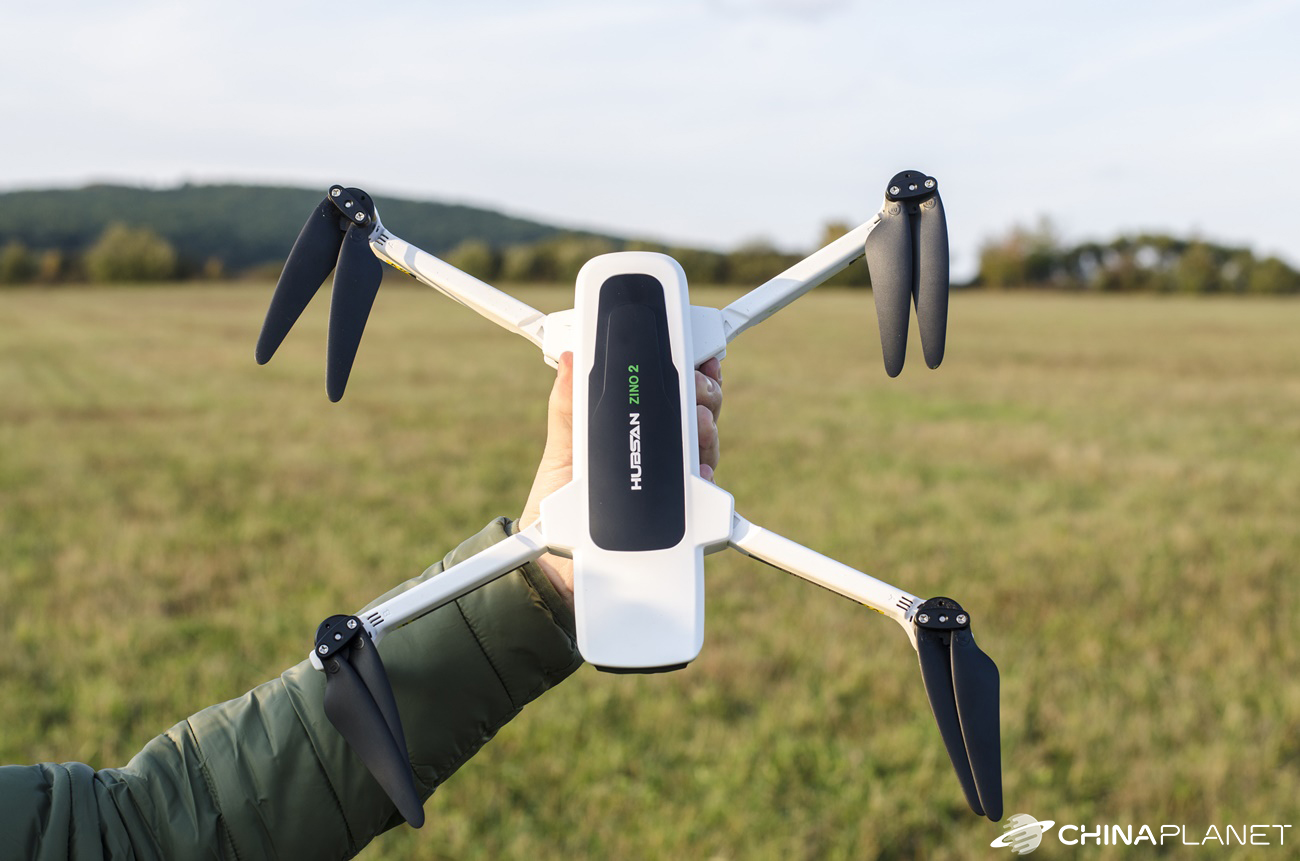
Hubsan Zino 2 is among the compact ones drony thanks to a folding mechanism where the arms fold towards his body. When unfolded, ready to fly, it measures 32.60 x 26.00 x 9.49 cm. After folding, the drone has only 11 x 21.5 x 9.49 cm. It weighs 929 g with a battery.
Shoots the highest quality video in resolution 4K (3840 x 2160 px, at 60 fps) thanks to 1 / 2.3 ″ CMOS sensor with f / 2.2 aperture. The angle of view is at the level of 80 °.
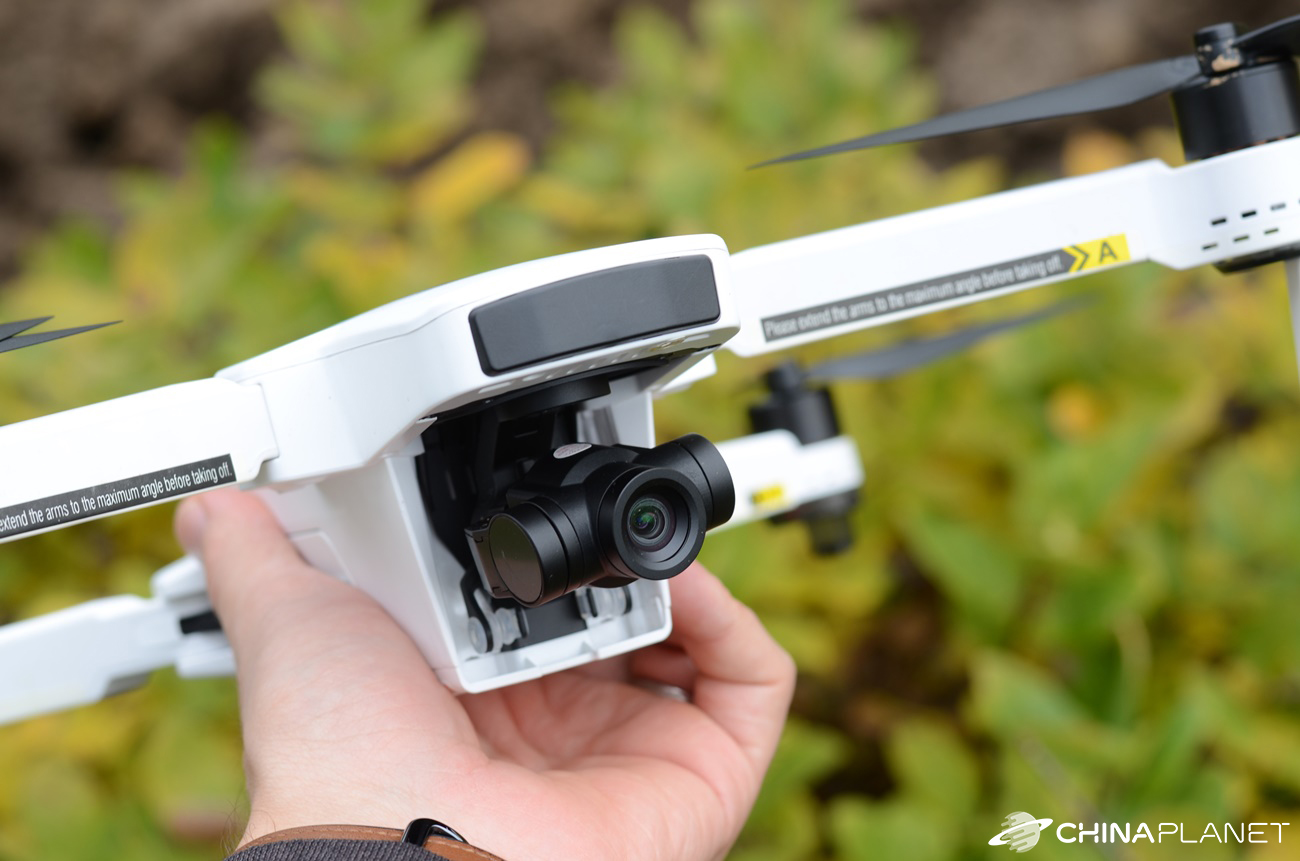
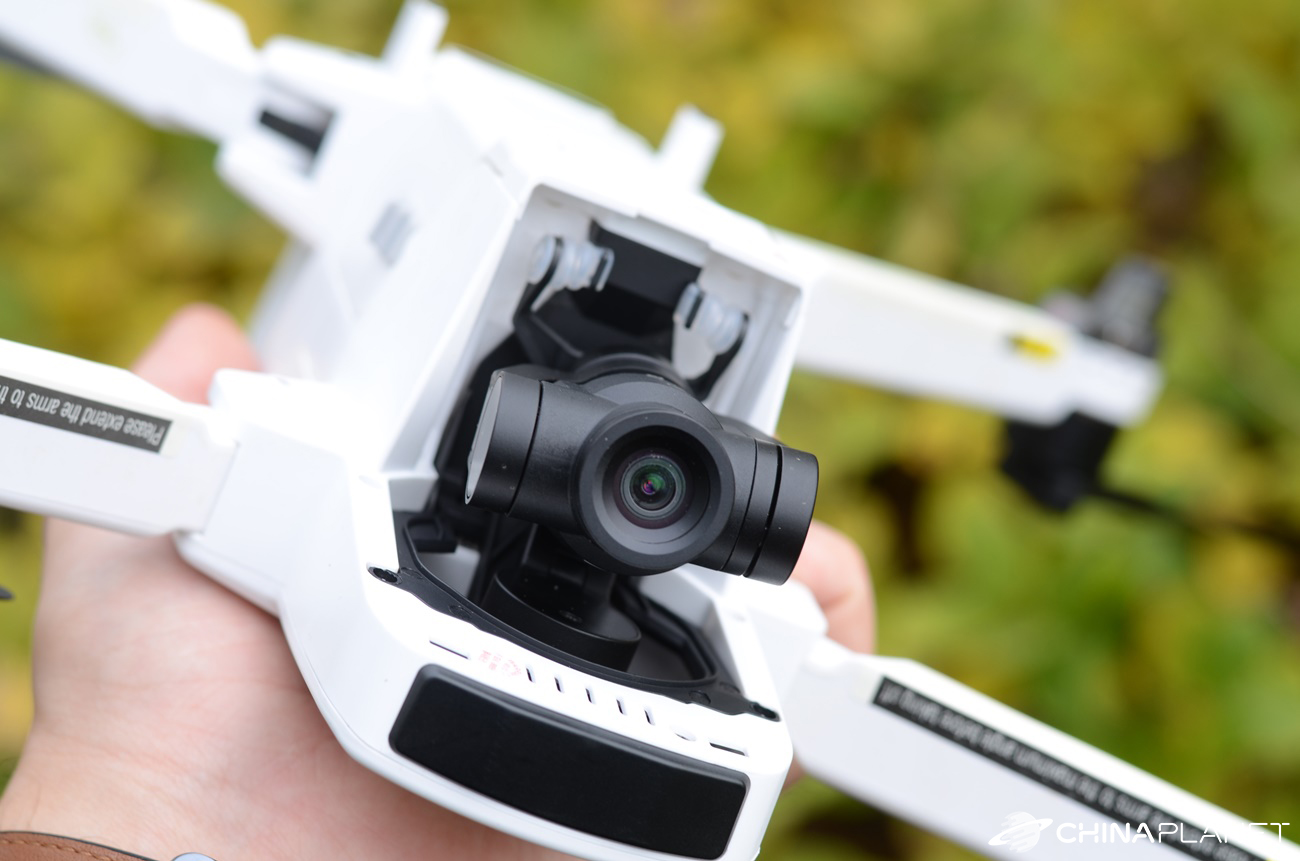
It takes care of video stabilization 3-axis gimbalwhich can be rotated 90 ° in the vertical direction.
The manufacturer states the maximum height to which the drone can fly up to 5000m. The maximum range, ie the distance between the controller and the drone, can be up to 8 km thanks to the frequency 5.725 - 5.850 GHz. There is no lack of support GPS a GLONASS. The technology transmits the image LEAS 2.0.
It should be possible to fly with a drone 33 minutes per charge. The smart battery that the drone uses has capacity 3800 mAh.
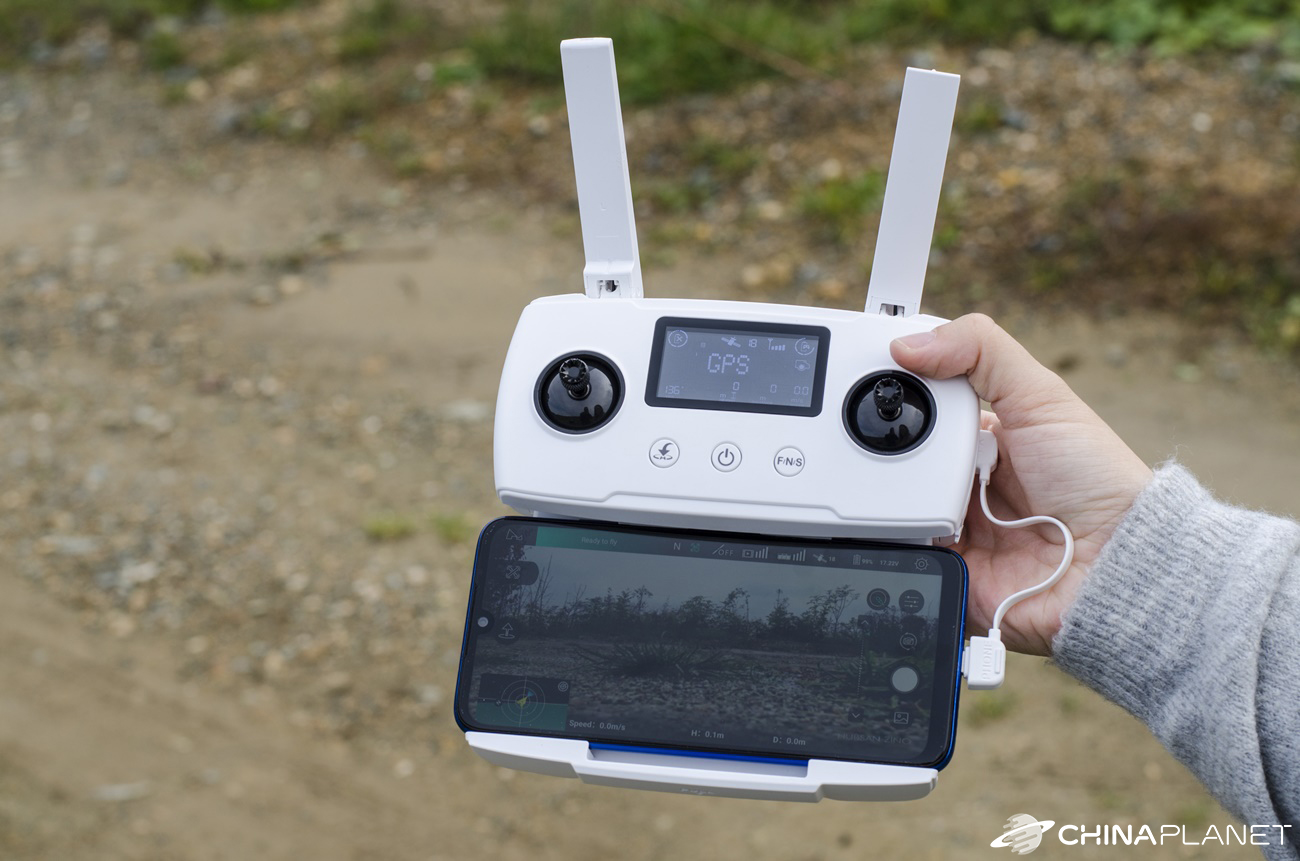
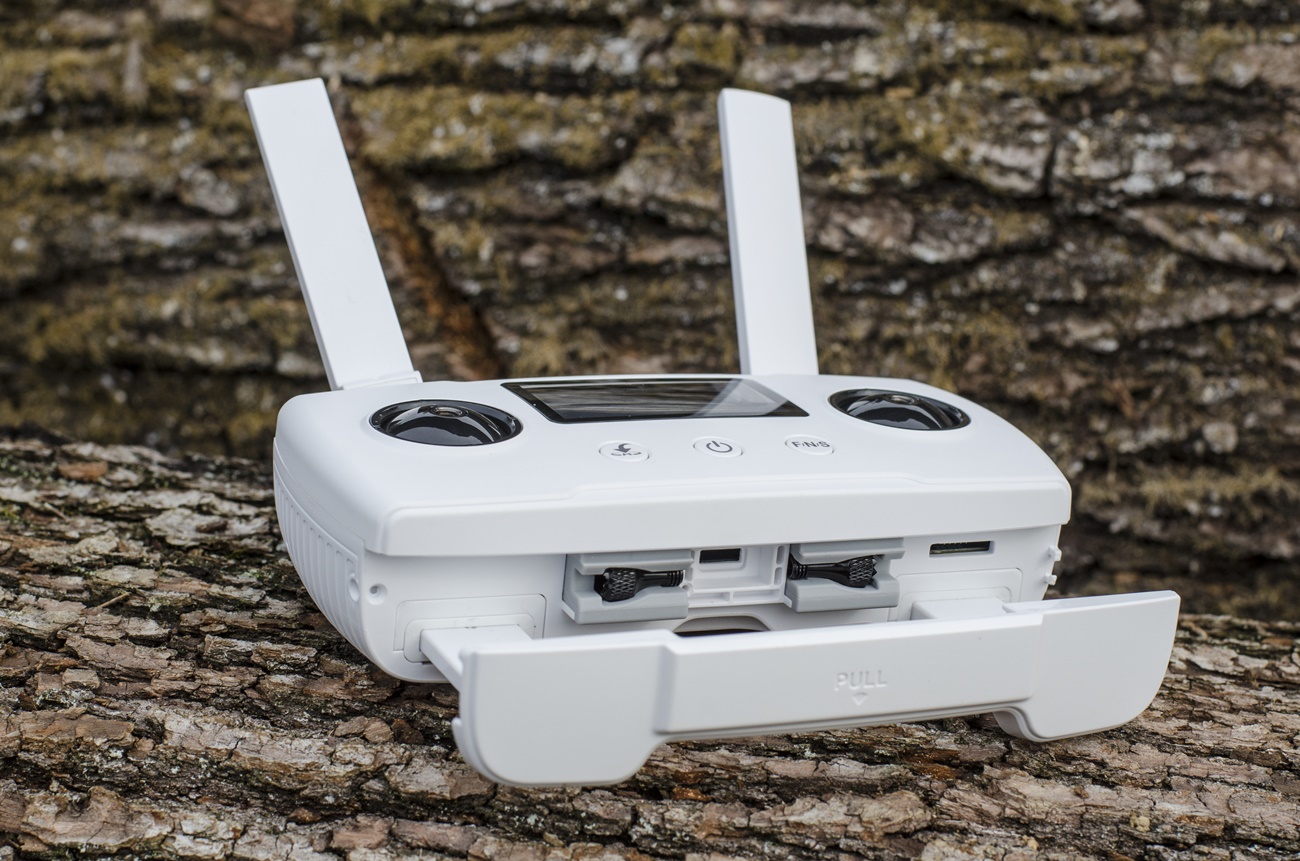
The remote control has an information display, 2 antennas and a system for holding a phone or tablet. There is an integrated battery with capacity 3350 mAh.
Contents of the package
The Hubsan Zino 2 is sold in several versions. You can buy a drone with one or two batteries and with or without a bag. We had the highest version available - with two batteries and a bag.
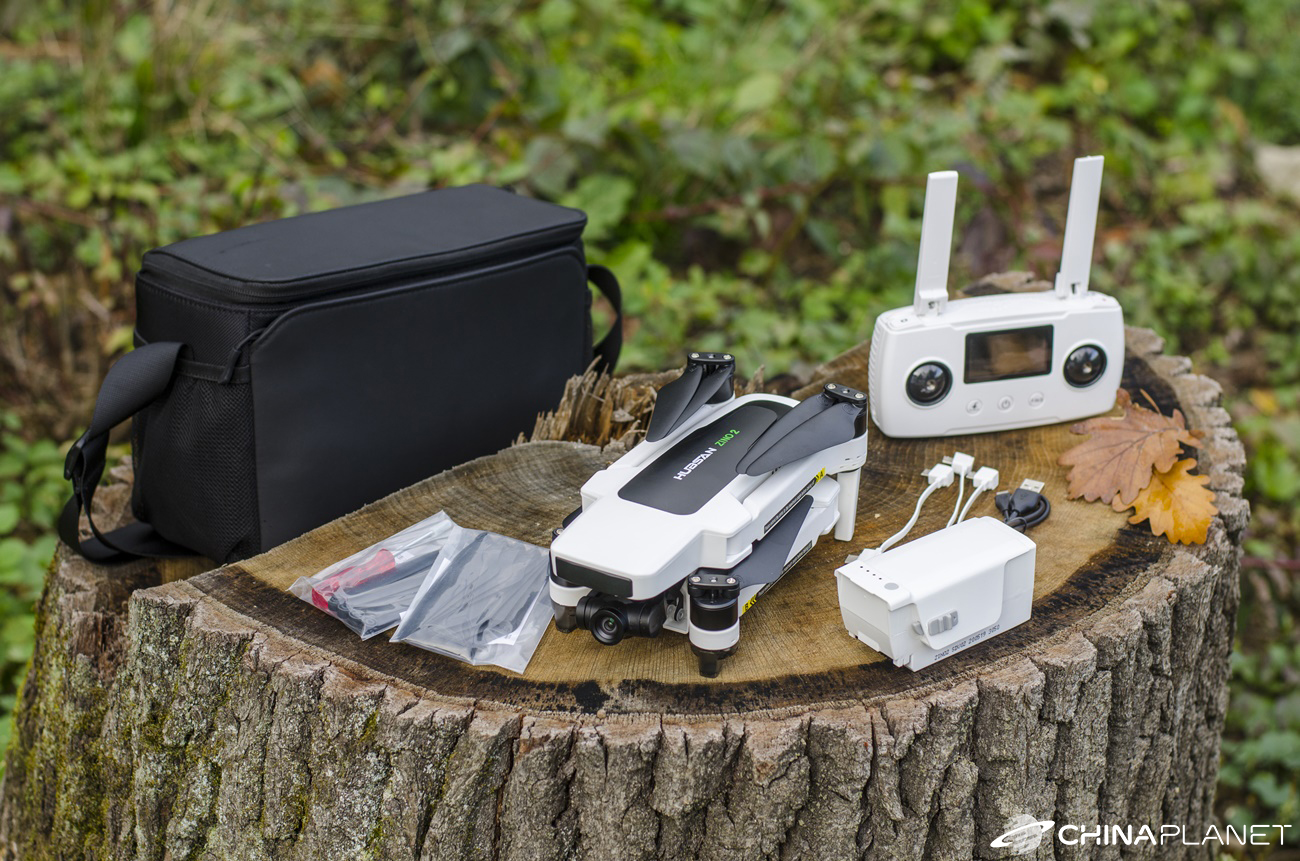
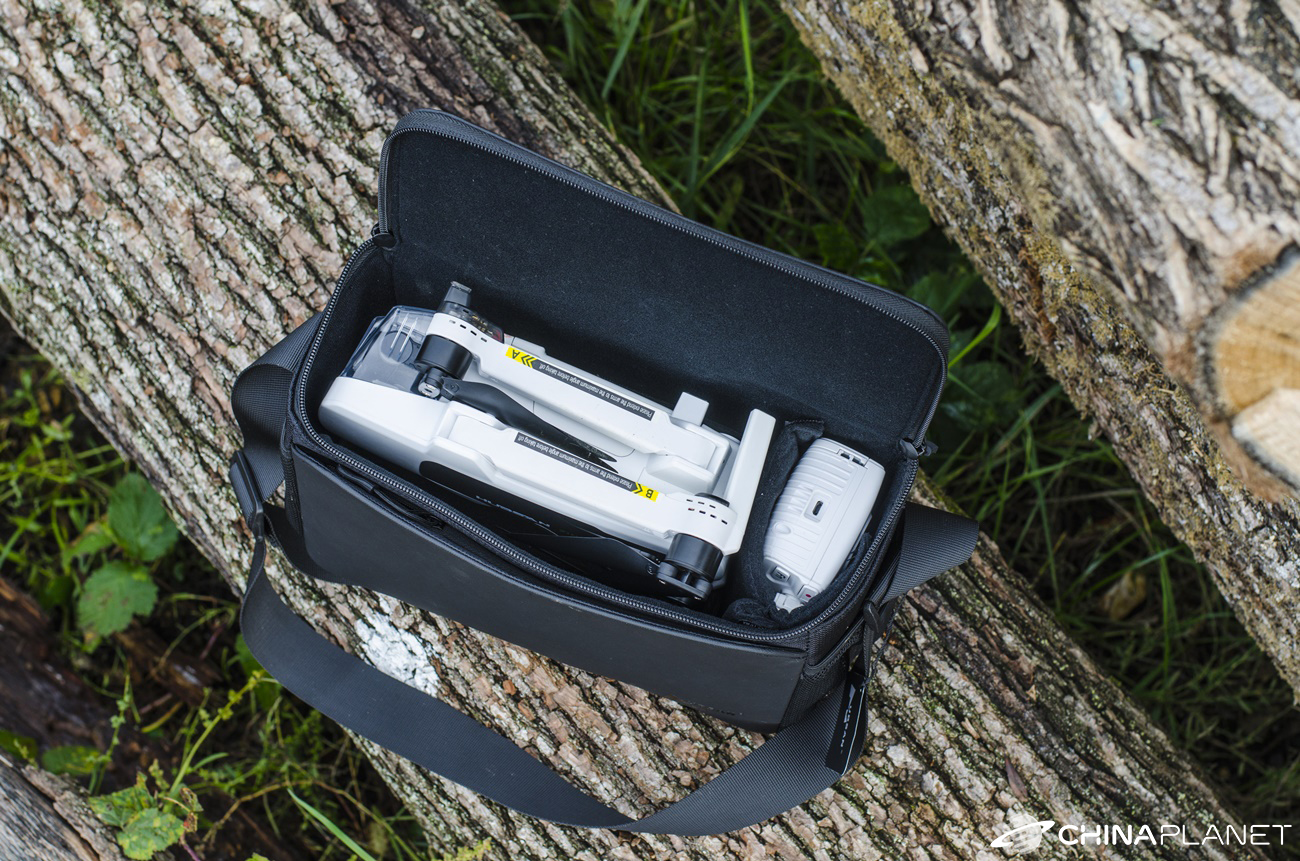
In the package you will find the drone itself stored in the bag as well as 2 smart batteries, a remote control and an adapter with a charging cable.
In addition to this basic equipment, there are also 3 cables for connecting the remote control to the phone (USB-C, microUSB, Lightning), microUSB cable for charging the controller, 2 sets of spare propellers (16 pieces), screws for attaching propellers, a small screwdriver and instructions for use.
This package is so rich, only the protective arches of the propellers for beginners are missing. The bag is of very high quality and all the mentioned items that are the content of the package will fit into it with an overview. There are several compartments and a double bottom inside, so everything has its place in it.
As for the quality of workmanship, everything makes a very good impression. There is no cheap plastic processing. We also appreciate the plastic cover to protect the gimbal.
Since we had 2 batteries in the package, we lacked a charger that could charge both batteries at the same time.
First turn on and pair the drone with the remote control
The enclosed instructions are written clearly, so you can handle pairing according to it. You need to install the application on your phone or tablet X Hubsan 2. We used a Samsung Galaxy S9 + smartphone.
After attaching it to the remote control, it is necessary to use a cable to connect the remote control to a smartphone. We would welcome the possibility of a wireless connection, for example via Bluetooth, as the cable on the side slightly interferes.
The pairing process itself could be simpler, and we would appreciate it if the application automatically guided us through this process the first time it was turned on. However, the process does not run automatically, but the controller must be paired with the drone manually in the application settings.
In addition, to pair the drone, press the small button on the drone for a few seconds. This would not be a problem if we did not need a needle to press this button, but we did not find it in the package.
After the drone switches to pairing mode, it is necessary to go to the controller settings in the application, search for the drone and create a connection between them. The calibration of the compass follows, which the application has already guided us through automatically, even with illustrative examples.
Then all you have to do is hold both control levers in the outer, lower position to start the engines and you can fly.
Application interface with a lot of information
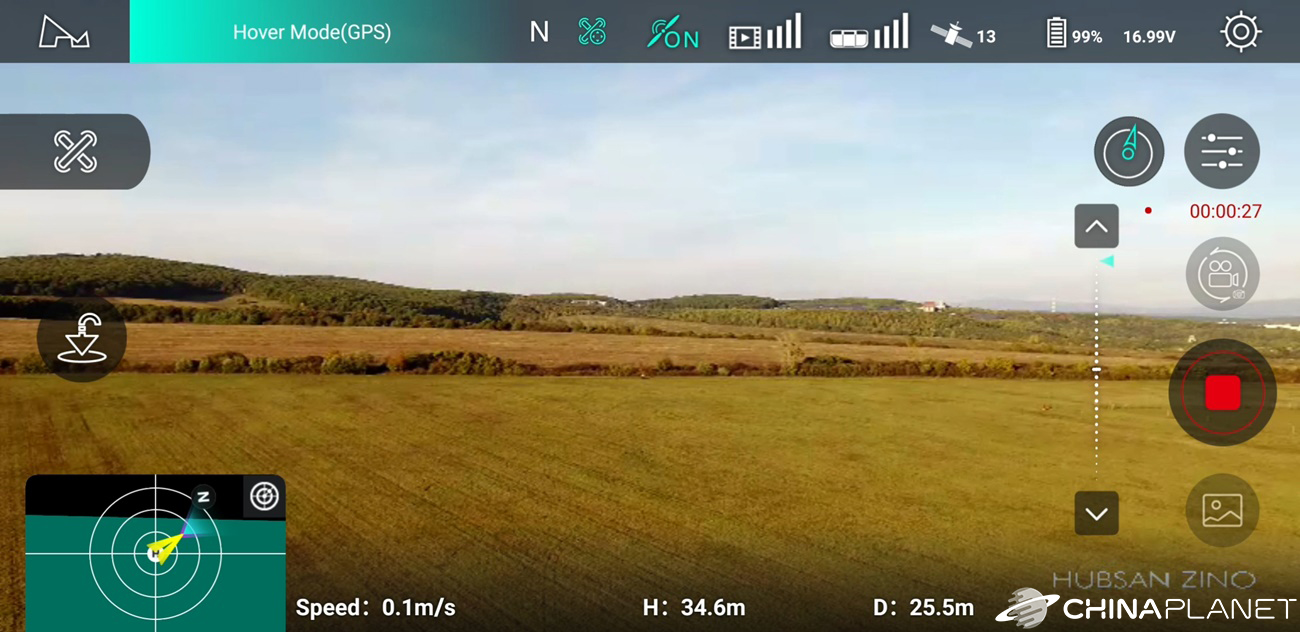
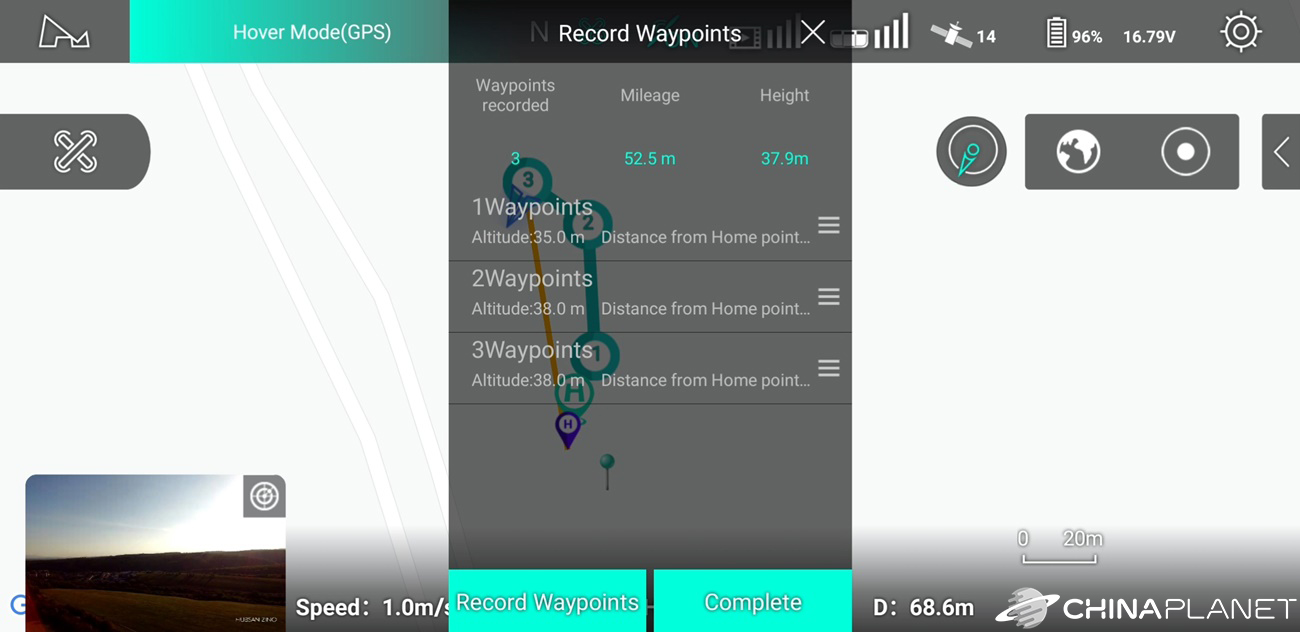
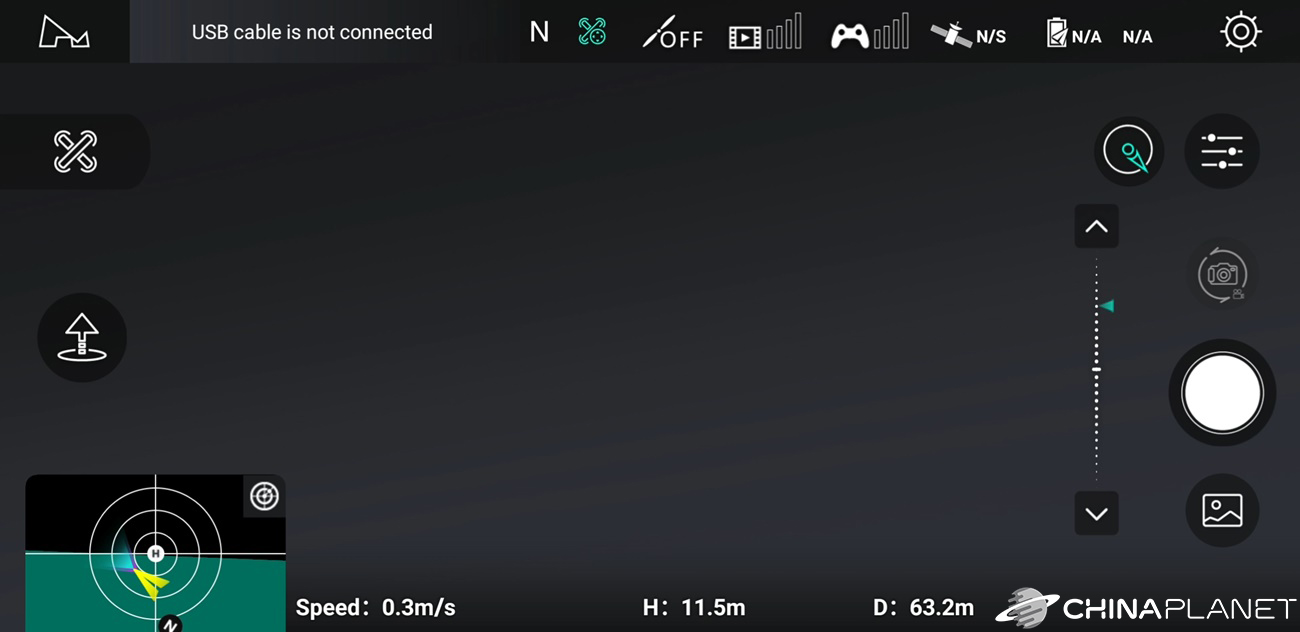
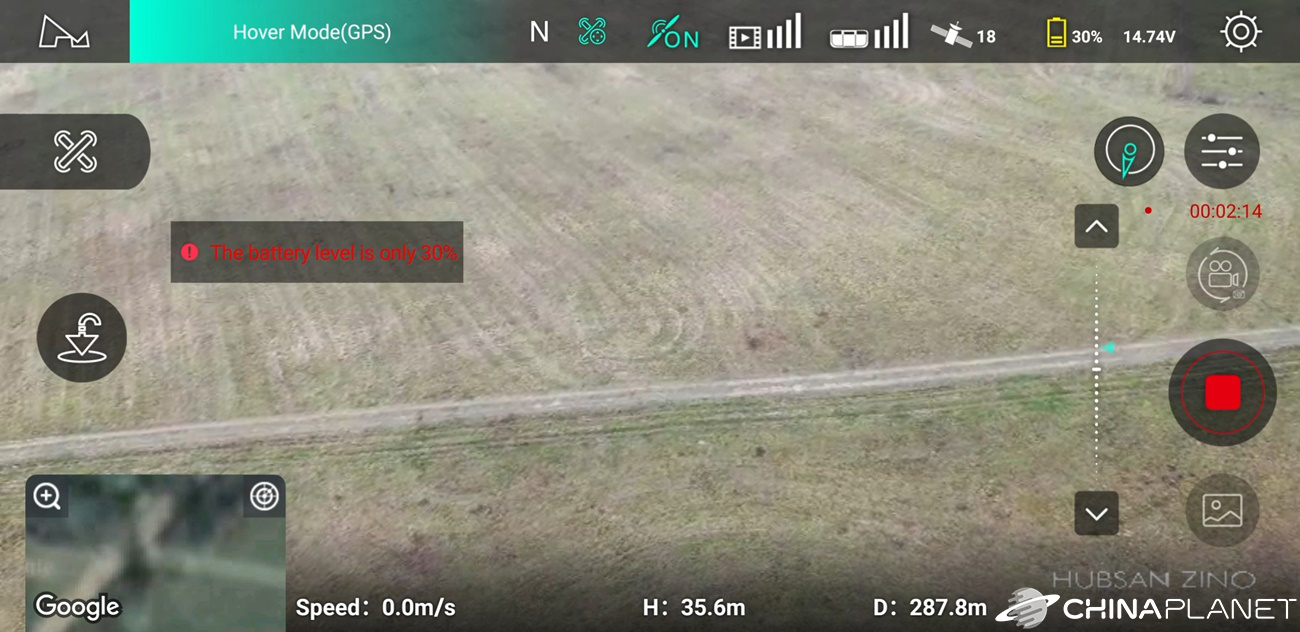
Application X Hubsan 2 displays some useful information. In the top bar you will find the current status, where information is displayed whether the drone is ready for flight. There is also an on mode indicator (movie, normal, sport), an icon showing the current use of one of the intelligent functions (such as object tracking), propeller status (on or off), image signal status and battery status in the remote control also with the signal strength between the drone and the controller.
Here you will find information about the number of connected ones GPS satellites. If there are few of them, the application will warn you of a weak GPS signal and will not allow you to take off. In the upper bar there is also information about the battery voltage and its percentage status. In the corner you will find the settings button.
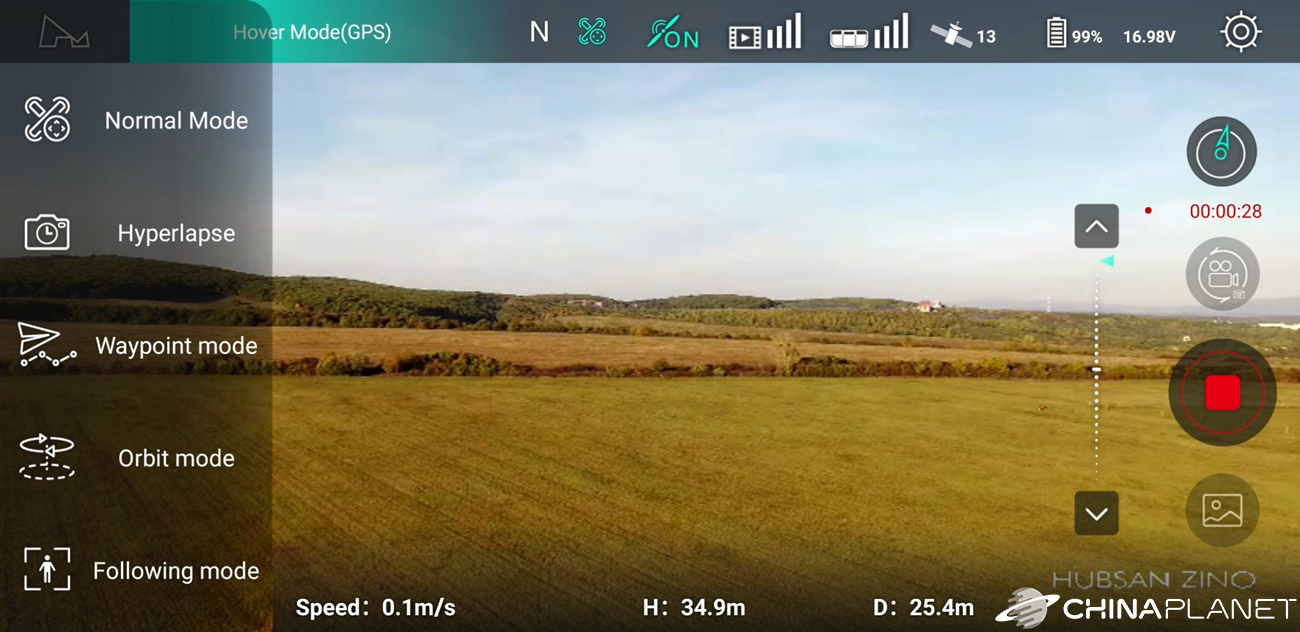
In the left part of the screen you select the intelligent flight mode and there is also a button for automatic take-off and landing.
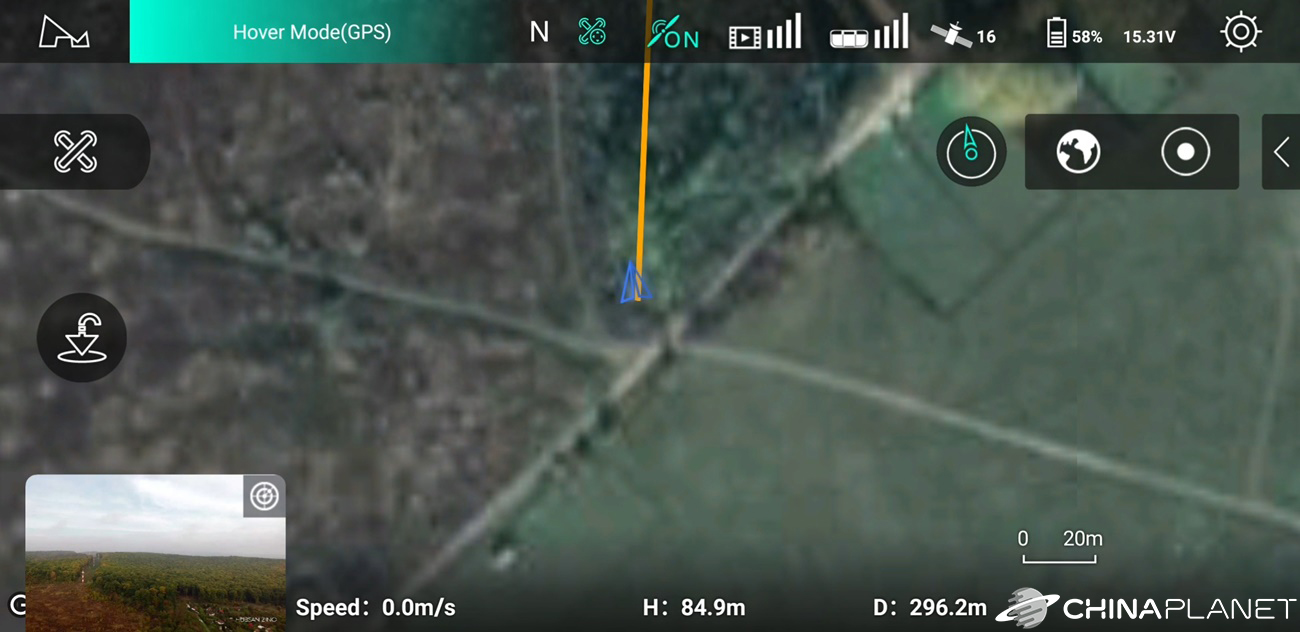
In the corner of the screen you can see the current location of the drone on a Google map or compass. You can enlarge the map to full screen. The lower part informs you about the flight speed, altitude and distance.
The right side belongs to the camera. Here you switch between video and photography or gallery. There's a shutter button, gimbal tilt control, as well as camera settings such as white balance, resolution, photo or video format.
Most of the screen, of course, belongs FPV image transmission from drone camera.
There is a lot of information in the application, so it takes a while to find your way around it.
Hubsan Zino 2: How do you fly with him?
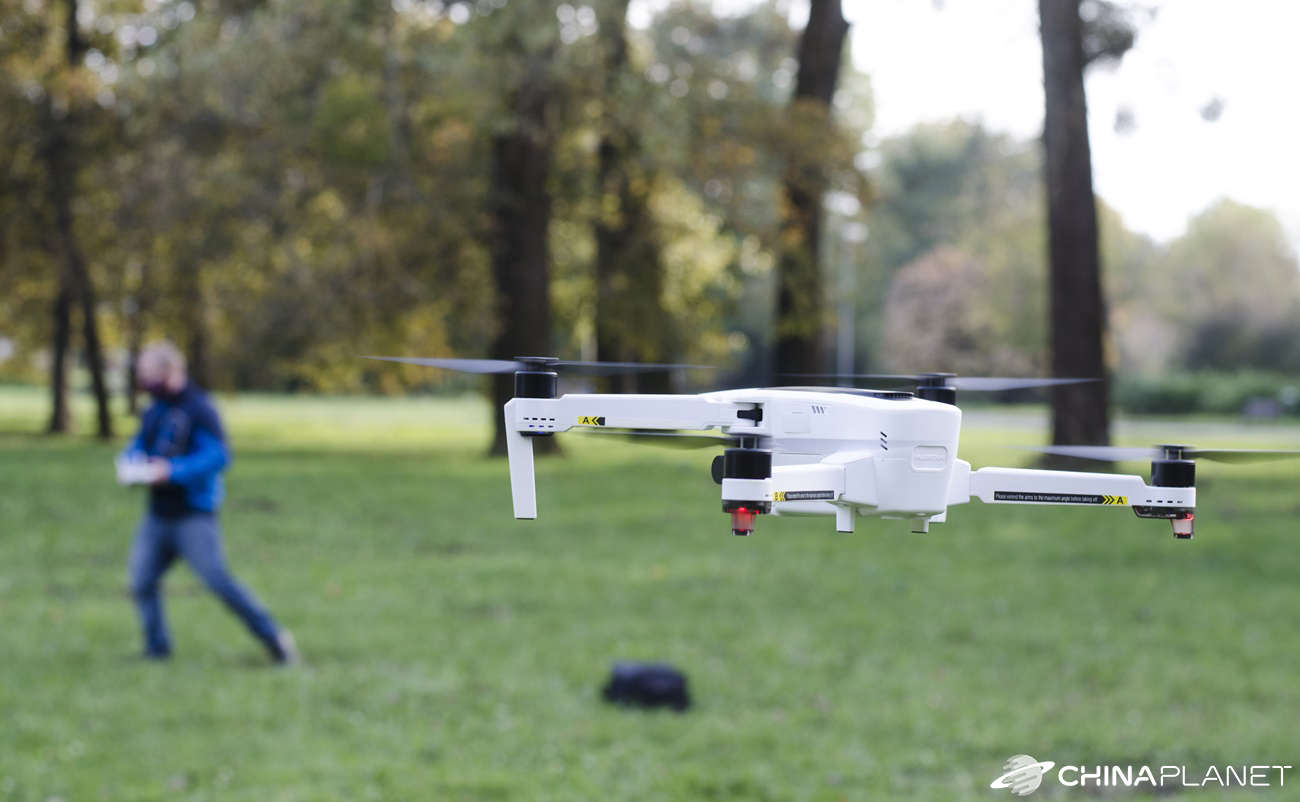
Flying this Hubsan is really easy. Although we already have experience with drones, we have had it tested by several people who have never flown with a drone. After a brief explanation of the controls, these people were able to take off, control the drone and even land.
The drone holds its current position very solidly. You can take off with it and put the remote control down on the ground without any worries. The drone remains in the last position. You don't even have to worry about it falling to the ground. At the bottom there is a small camera with sensors, thanks to which the drone keeps its distance from the ground.
In addition, in film mode, the drone flies at a speed of only 1 m / s, so this mode is great for beginners. It reaches speed in normal mode 12 m / s and sports 20 m / s.
We were very satisfied with the flight characteristics. We flew well with the drone, the control levers provide enough grip and the drone responds to their movement immediately.
We also flew with him in the wind, which he resisted with foresight. With a slightly stronger wind, it was already visible that the drone had something to do to maintain its position, but we did not notice any significant problems. In stronger winds, they deviate slightly from the current position, which is understandable especially in gusts of wind.
The manufacturer states that the windless endurance is 33 minutes. During our testing, endurance moved around 25 minutes. But often at least a very light wind was blowing, so we almost never flew in complete windlessness. It takes about an hour to charge the flashlight from 35 to 100%.
The maximum range should be up to 8 km. For obvious reasons, we did not test this fact, as well as the maximum height. At a distance 500 metrov you can barely see the drone anymore. In addition, under current legislation, you should only fly a drone within visual sight. If you can't see the drone with the naked eye after 500 meters, you shouldn't go any further.
Video and photo quality
Everyone is probably most interested in what the videos and photos taken with this drone are. The Hubsan Zino 2 offers up to 4K resolution at 60 fps, which is not even the case with its competitor from Xiaomi, the Fimi X8 SE. We had such high expectations.
But Hubsan did not disappoint and we were satisfied with the quality of the video. Occasionally, there are areas that are burnt, overexposed, or underexposed. With direct sun, you sometimes bother and see sunlight in the video, but in general we can say that the video output is at a high level. The video is full of detail, sharp and the color rendering is mostly good.
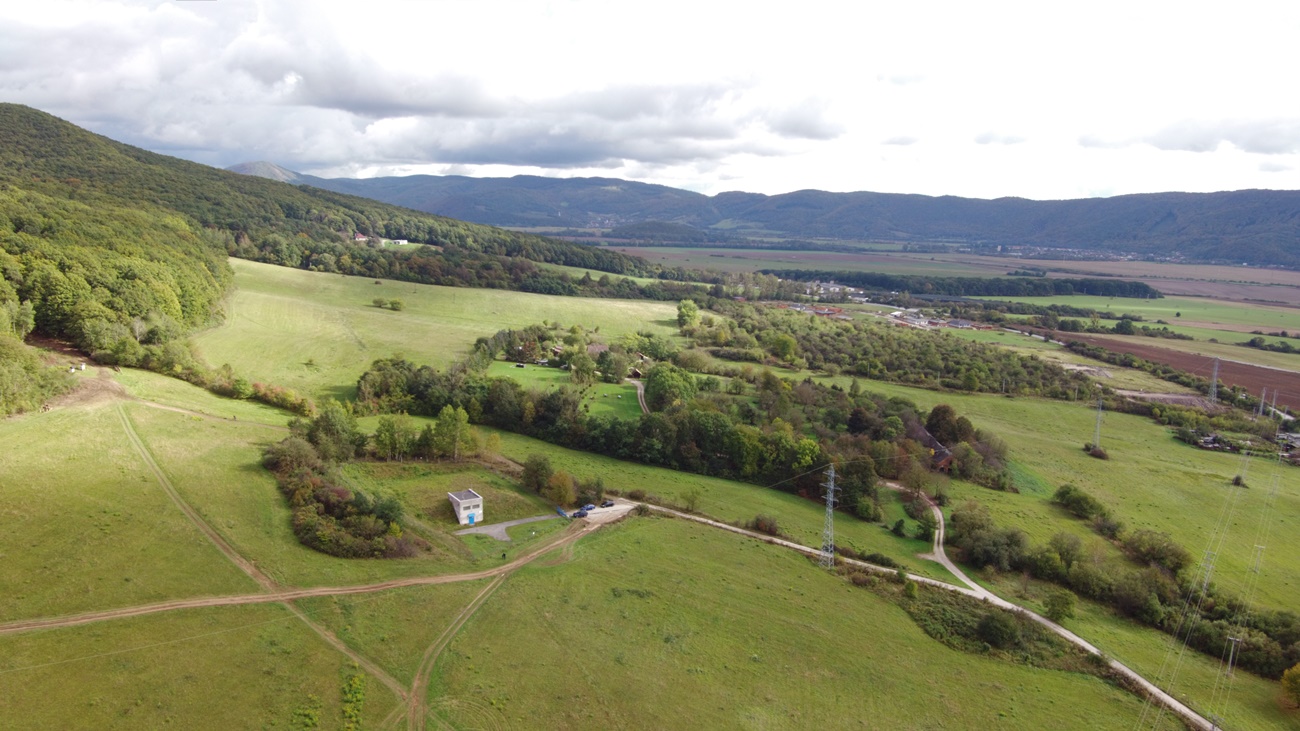
Watch a sample video we shot with this drone. We flew in sunny but also cloudy weather with a slight fog. The video is cut from multiple frames, it has not been edited in any way.
The quality of the photo is quite good. But we were happier with the quality of the videos. He takes good photos in good lighting conditions. In worse light or against the sun, it's a little worse. The drone also allows you to save photos to RAW format.
Look at it nami 3 photos taken also in full resolution by clicking on the links: Photo 1, Photo 2, Photo 3.
Intelligent flight functions
Hubsan Zino 2 offers several intelligent flight modes: creative video, object tracking, waypoint mode, orbit mode, line fly, hyperlapse and panorama.
In fashion creative video you have 2 options: 360 ° shooting a comet. During 360 ° shooting, the drone rotates according to the set parameters around its axis, while recording video. You know how to set the angle - how many degrees the drone should rotate, the speed of rotation (in degrees per second) and the direction of rotation.
In fashion comet you select only the direction of rotation and on the screen you mark the object in which the drone is to rotate. You won't find anything in the comet mode manual. This is probably a novelty that did not exist at the time the manual was issued.
Object tracking is a function that probably everyone knows. With the drone, you take off to a distance of 5 to 15 meters, mark the object to be tracked, and if the object moves, the drone will follow. The Hubsan Zino 2 also offers the option of a drone to follow the remote control (so-called Follow Me mode).
We tested both options and we must say that tracking the marked object did not always work properly. It happened to us several times that we marked ourselves, but after a while the drone lost sight of us and stopped watching us. In the video below, there is a demonstration of where to see from the perspective of the application how object tracking works. We achieved the best results at a low distance from the monitored object.
More smart modes
You will also find here waypoint mode, in which you determine a few points, through which the drone then flies alone. When we chose this mode, the application offered us to plan a route in two ways. In the first mode, you can draw a route on the map with your finger, which the drone will then follow. Several points are automatically marked on the route, which you can edit one by one.
The second possibility is that you go with the drone manually to a certain place, which you then save as a waypoint. Then you move to the next place, which you also save, and so on. Finally, when you save all the points and run this function, the drone will fly through them independently, without your intervention.
In this mode, however, the drone stops at each saved point and continues to the next point. We would also welcome the possibility of a completely smooth transition along the marked route.
Orbit mode is actually a classic circling. You can use the levers on the remote control to set the diameter of the circle, height and direction. The drone can circle around the controller, around your current location, or around a selected point on the map. You can change the speed with the levers even while performing the function. The camera is rotated towards the center of the imaginary circle. This mode worked correctly, as expected.
Line fly, as the name implies, is a straightforward flight. Here you know the angle of flight, distance, altitude and speed. After launch, the drone performs a straight flight according to the set parameters. We also did not notice any problem here.
In the video you can see how the Orbit and Line fly modes are set and what their execution looks like.
Time-lapse videos and panoramas
Hyperlapse is a time - lapse video in motion. The drone will rotate during shooting to create a moving video.
Pri panorama mode you have several options - spherical, 180-degree, vertical or classic wide-angle panorama.
Here we were surprised that the application cannot take the resulting panoramic photo from individual images. To create it, you must use additional software that can do it. You can see a preview of the panorama in full resolution on this link.
Remote control
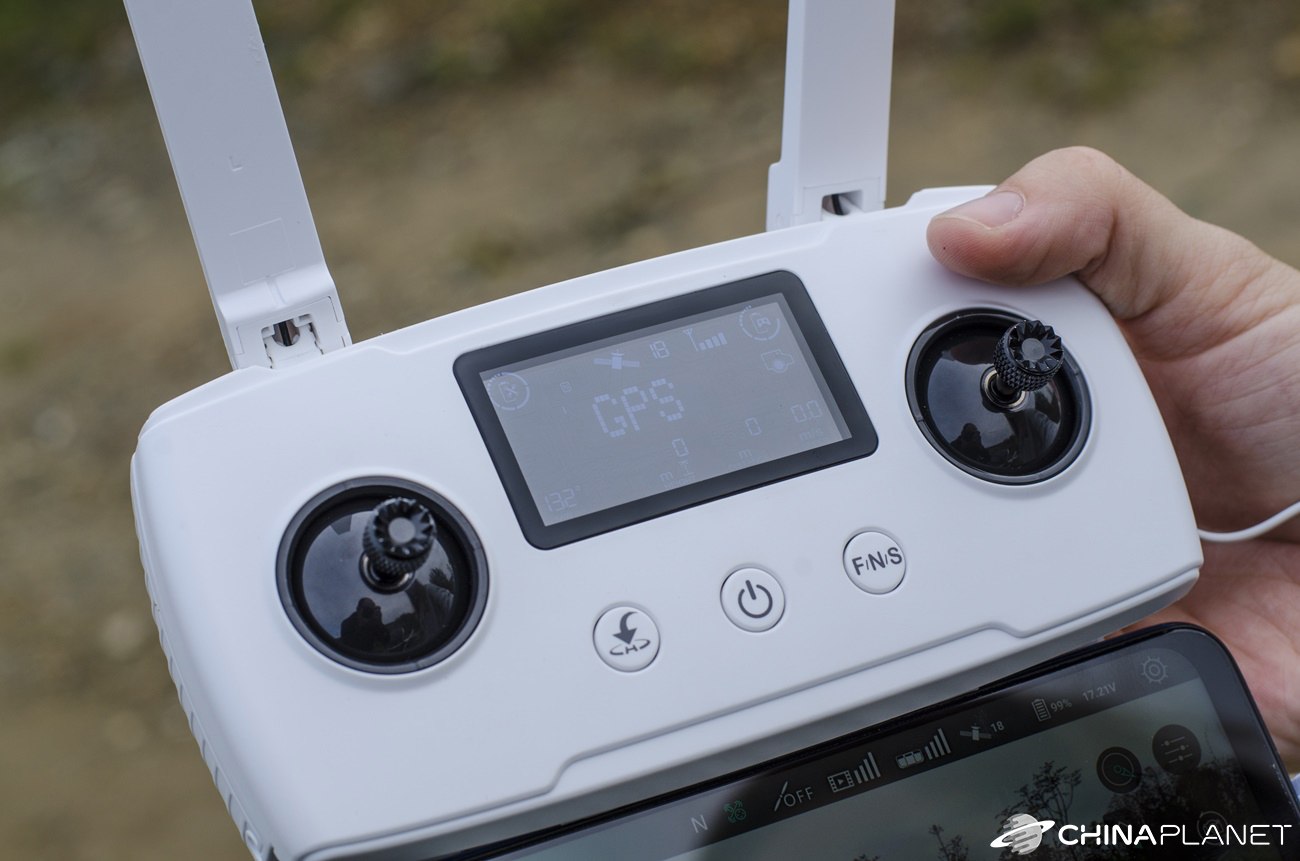
The remote control fits well in the hand and is well made. In its center is the information LCD display, where you will find basic information, which is also displayed by the application on the smartphone. Its readability is good, even during a sunny day the values are visible on the display.
The lower part is retractable. A smartphone is placed here and the control levers are also hidden here, which must be removed if you want to put the controller in its place in the enclosed bag.
The controller has 2 antennas and 3 physical buttons on the front - a button to return home (landing at the take-off location), a button to turn on / off and change the flight mode.
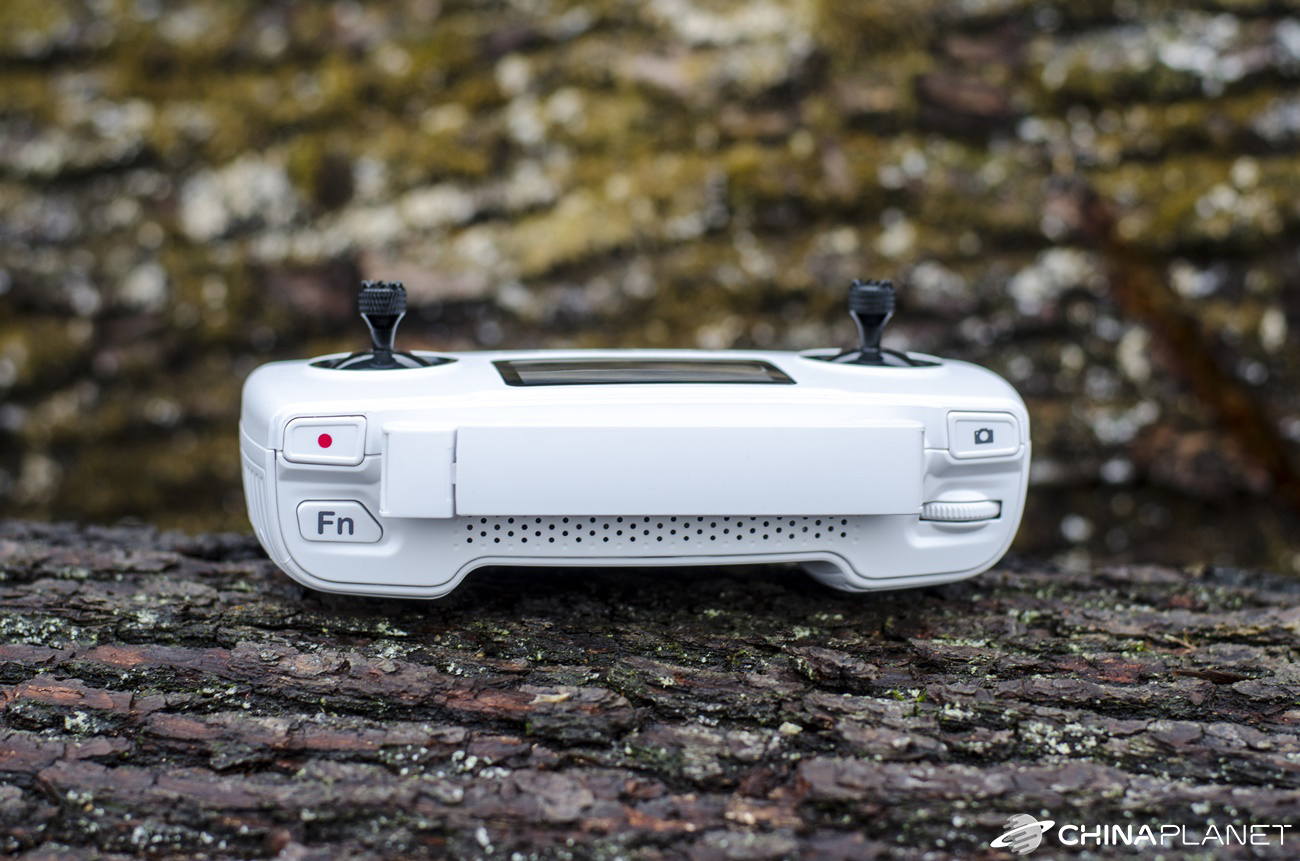
In the upper part there is a wheel with which you can rotate the gimbal smoothly in the vertical direction. There is also a button for taking photos, shooting and so-called Fn button to adjust the brightness of the display. In the application, you can also assign it the function of ending the current intelligent flight mode or resetting the gimbal.
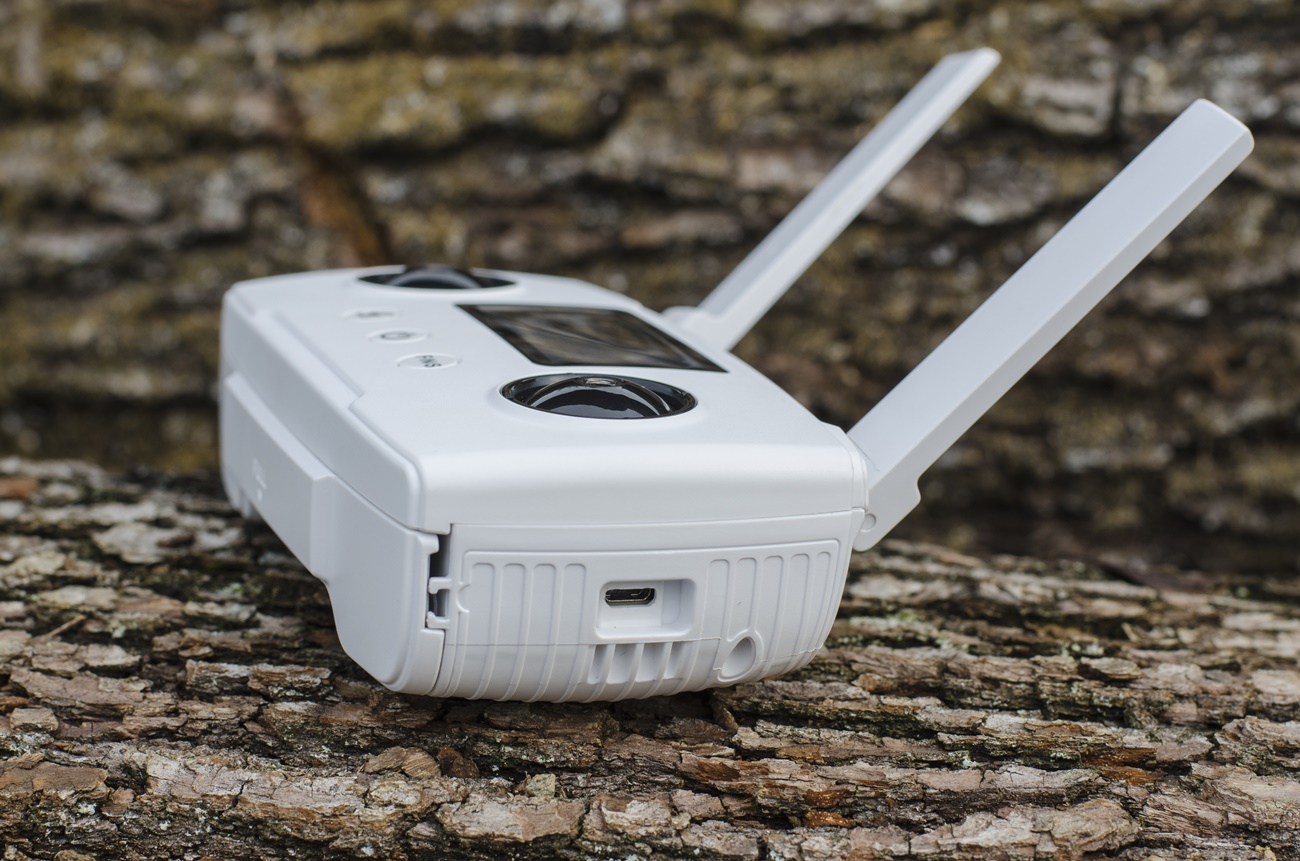
The driver has 3350 mAh battery that lasted us about 3 years. We expected a little better endurance. It is charged using a microUSB cable and charges in about an hour.
You can also use the Hubsan Zino 2 without a phone connected to the remote control. The disadvantage is that you do not see the image from the camera, but you fly with the drone like this.
Problematic application and updates
The biggest problems were caused by the X-Hubsan 2 application. When we downloaded it from Google Play, we noticed a not very positive evaluation of its stability. People also complain about updates that have disabled the drone. They state that when the update was released for the drone, it was necessary to install the update, otherwise it was not possible to fly the drone.
That wouldn't matter so much. However, they describe that after the update, they can no longer use the drone because they cannot connect to the application. We were not offered a firmware update during our test.
But we noticed several problems. Sometimes it happened to us that the application displayed the error message "USB cable disconnected". At that point we lost the image in the app, the signal status data disappeared and the altitude, distance and speed indicators were stuck. After unplugging and plugging the cable back in, everything went back to normal. But after a while it happened again. The drone was within sight and fully controllable at the time.
Other times, the application simply froze immediately after turning on or did not display the video transmission from the drone camera. We had to turn it off and on again.
On the other hand, we have to say that most flights went without any problems with the application.
The application would need to improve the stability. If you are flying at a greater distance and the image falls out, it is not pleasant.
Security features
The Hubsan Zino 2 has several safety mechanisms. As for the battery, if it is charged but not used, it will start to discharge on its own after 10 days of inactivity. As you know, it is not good to store batteries fully charged. This mechanism thus prolongs their service life.
What happens if the signal between the drone and the remote fails? Don't worry, the drone will always remember the GPS coordinates of the take-off point after take-off, to which it will return in case of problems. So if you lose the signal, the drone will return to the starting point.
You will also receive a low capacity alert when the battery is low, whether in the drone or remote control. You receive an audible signal when the battery capacity of the remote control is low.
As for the drone battery, if the capacity drops to 40%, you will receive the first warning. Subsequently, after every additional 5% you receive the same notification in the application. When the capacity dropped to 25%, the drone automatically started returning to the take-off location. You can abort this return and subsequent landing and land manually.
Automatic landing works quite well. The drone always hit the take-off location with an accuracy of 1 - 2 meters. During automatic landing, the drone first returns above the place where it is to land and only then begins to descend.
An automatic take-off feature is also available. The drone will take off on its own and remain at a height of approximately 2 meters above the ground.
Hubsan Zino 2: Final Evaluation
We loved flying with the Hubsan Zino 2 drone. Its control is simple, intuitive and can be mastered by anyone, even a complete beginner. We were surprised by the quality of the video, which is in 4k resolution at 60 fps. It offers true color rendering and sharp images with lots of detail. We also evaluate flight characteristics and control positively. The only big downside is the Android app, which has its flies. It definitely needs to be improved.
Although flying a drone is quite easy, we would welcome the manufacturer to include propeller shields, as some other manufacturers do.
The drone does not have an assistance system, thanks to which it can avoid an obstacle on its own. However, this feature is not available for other models that are in a similar price range - DJI Mavic Mini or Xiaomi Fimi X8 SE. Overall, this drone left a very positive impression and we can recommend it with a clear conscience.
If you have any questions about this drone, do not hesitate to leave us a comment. We will be happy to answer your questions.











They sent me from Banggood Zino 2 and the camera shakes. Photos in raw are green and unusable. You didn't have such a problem?
Hello, we have no problem with camera shake, but we also have green RAW photos. We also wrote to the FB group about Hubsan, but no one else had such a problem, so we thought it was a mistake of our piece, so we didn't even mention this problem in the review.
However, we are currently solving this problem directly with the manufacturer, we will see what they advise us, but it should probably be a bug in the firmware.
Hello. With the support of Hubsan, we solved the problem with green RAW photos for a long time, and we came to the conclusion that it was necessary to use other software for editing. It is said that Photoshop or even Lightroom cannot work with their RAW format. Used UFRaw software. There you can then work better with colors and almost completely eliminate shades of green.
Thanks for the info. That would be great if you could communicate the problem with the manufacturer.
how do i get a gps signal? I turn on the drone driver and I just calibrate the app and I still don't have a signal
Hello, the first time it was turned on, it took a little longer for the controller to catch the GPS signal. Try to go to open space, turn the antenami controller and wait a little longer.